2FA and user logins
When enabled, two-factor authentication also comes into play any time a user logs on to your website or app. When a user visits your site, they’re presented with the standard sign-in screen; they then log in either by entering an email address and password (traditional login) or by clicking a social login provider button and logging on to a social identity provider (social login). If that sounds like the way users log in when 2FA isn’t enabled, well, there’s a good reason for that: users initially log in the same way, regardless of whether or not 2FA is being used.
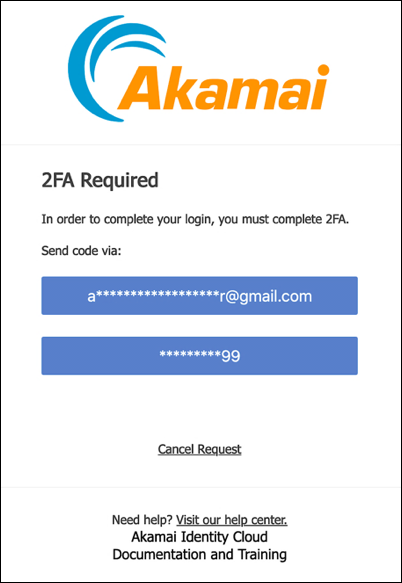
The difference occurs after a user has logged on and after he or she has been authenticated. After a user logs in, but before he or she is issued an access token, Hosted Login checks the user profile to see if that profile includes an email address and a mobile device number. (Why those two items? Because those are the two ways that 2FA is carried out: either by emailing an access code to the user or by texting an access code to the user’s mobile device.) If the user has supplied both an email address and a mobile device number, a 2FA Required screen similar to the following is displayed:

In the interests of privacy and security, the screen masks most of the email address and phone number.
If the user has supplied only an email address, then the verification code is automatically sent to the user’s email address, and no 2FA Required screen is displayed.
What if the user has a mobile device number but no email address? In theory, that should never happen: users must supply an email address to register, and they aren’t allowed to delete their email address. If somehow it does happen, the user won’t be authenticated and, as a result, will never get as far as the 2FA Required screen. See Hosted Login v2 users with a verified mobile number but without a verified email address for details.
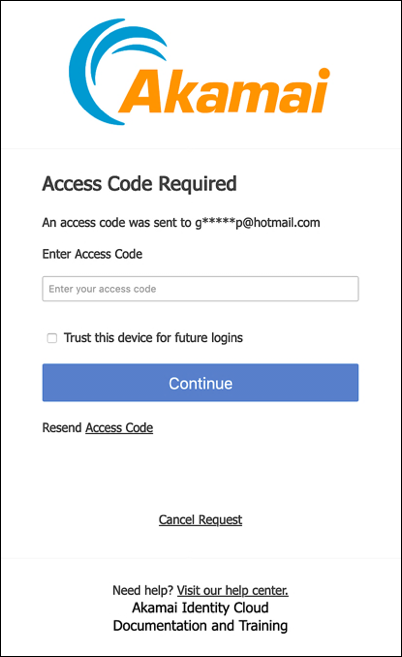
In the 2FA Required screen (assuming the user has both an email address and a mobile device number) he or she clicks the desired 2FA method (email or text message), and a verification code is sent. At the same time, the Access Code Required screen appears

Yes, we see the little checkbox labeled Trust this device for future logins, too. For now, however, we’re going to ignore that checkbox. You can learn everything there is to know about trusted devices by reading Introduction to trusted devices.
The user must enter a valid code and click Continue before they are issued an access token.
Incidentally, the email sent to the user will look something like this:

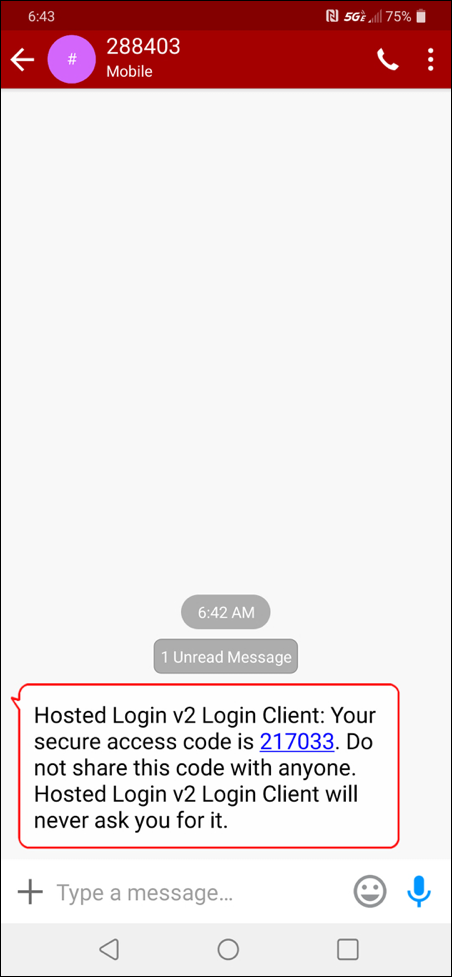
If the user gets a text message, that message will look like this one:

Updated almost 4 years ago
