Create a search query with Guided Search
With the Console, it’s easy to create search queries that let you plumb the depths of your user profiles. Want to find all the users who live in state of Oregon? No problem:
primaryAddress.state = "OR"
Or maybe you want to find all the users who have the last name Smith? Again, no problem:
familyName = "Smith"
Fast, easy, and efficient.
Well, OK: fast and efficient, but, for some people, maybe not that easy. For example, to search for all the users with the last name Smith, you need to know that last name information is stored in the familyName attribute. In addition, you need to type the attribute name like this: familyName. Type it any other way – familyname, FamilyName, FAMILYNAME – and your search will fail. And that’s only for a simple query like familyName = “Smith”.
Now, don’t let us scare you: learning the ins and outs of the Console query language isn’t hard, and it doesn’t take all that long to learn. Nevertheless, learning the query language does take at least some effort and at least some time. And even if you master the basics of the query language, keep in mind that queries have a tendency to get longer and more complicated as new situations arise. Yes, finding all the users who live in Oregon is pretty easy. But what if you need to find all the users with the gender preference male, who live in Washington, Oregon, or California, and who haven’t updated their user profile in the year 2018? This query will do the trick, albeit after a little typing and a few gyrations with parentheses:
(gender = "male" AND (primaryAddress.state = "WA" OR primaryAddress.state = "OR" OR primaryAddress.state = "CA")) AND lastUpdate < "1/1/2018"
As you can see, that’s a lot to type, and to type without making a mistake. It’s not impossible, and people have written far longer and far more complicated search queries. But our primary point remains: for a number of reasons, people aren’t always excited about writing search queries from scratch.
That’s one thing that makes the Console so exciting. After all, the Console includes the following two features:
-
Guided Search. Enables you to create search queries even if you don’t know the query language; even if you can’t remember attribute names (and how those names are spelled); and even if you really, really don’t like to type.
-
User profile search history and search filters. Provides a way for you to save queries, and then reuse those queries over and over again, as many times as you want, and whenever you want.
Use Guided Search
Writing search queries in the Console is easy, but it does require you to be familiar with the Console query language (and, depending on the size and complexity of your queries, requires you to do a lot of typing as well). If you’d prefer not to write your own search queries (or if you’d like a little help along the way), then click Show Filters to display the Console’s Guided Search feature:
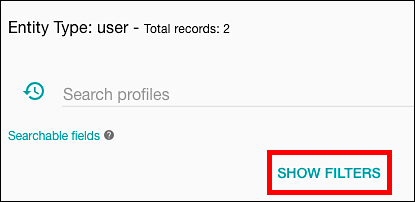
As the name implies, Guided Search walks you through the process of creating a search query; even if you have no idea what a reverse-queryable field is or what a Boolean search does, you can create – and run – queries using Guided Search.
So how does Guided Search work this magic? To explain that, let’s start by taking a look at the Guided Search user interface. When you click Show Filters (the link to click if you want to use Guided Search), you’ll see the Guided Search pane. As shown below, Guided Search breaks the filter-creation process into five parts (Logic, Grouping, Filter, Operator, Value):

And yes, as a matter of fact we can explain what each of these parts are for.
Logic. This is where you specify the Boolean operators AND or OR used to combine multiple clauses in a single filter (for example, primaryAddress.city = “Portland” AND primaryAddress.stateAbbreviation = “OR”). To add additional clauses to a search, click Add New Filter. Note that, when you do this, the new clause always employs the AND operator. If you need to change that, just click the AND operator and then click OR:
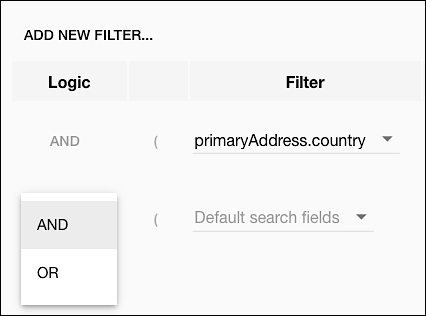
Incidentally, the first clause in the list always shows AND in the Logic column. Don’t worry about that: for the first clause, the operator is disabled, and you can’t click on it or change it, meaning it can safely be ignored.
Grouping (parentheses). Although there is no label for grouping clauses, if you look carefully at the Guided Search section you’ll see that each clause has a preceding and a following parenthesis:

These parentheses are used to group clauses, something that enables you to specify an order of precedence. The Console always starts query processing by acting on items inside parentheses and only then acting on any items outside parentheses. For example, suppose you have the following query:
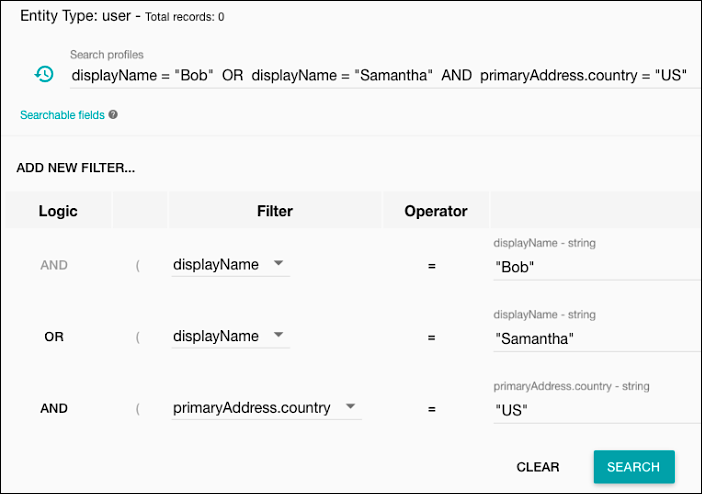
In this example, you want to search for users who have the display name Bob or the display name Samantha, and who live in the US. To ensure that query parsing occurs in that order, you need to put displayName = “Bob” OR displayName = “Samantha” in parentheses:
(displayName = “Bob” OR displayName = “Samantha”) AND primaryAddress.country = “US”
And to do that, you can either type those parentheses in the Search profiles field, or you can click the appropriate parentheses in your filter (parentheses turn red when selected and revert to gray if deselected):
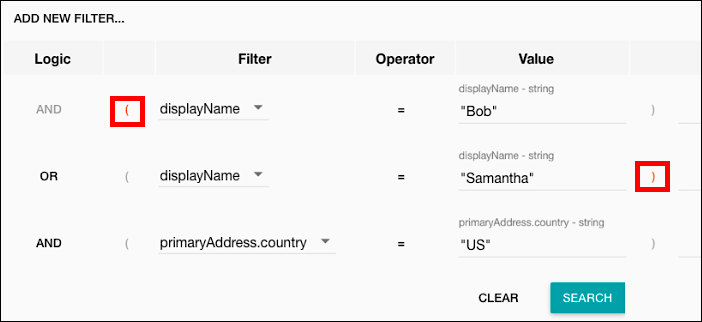
If you change your mind and want to process the clauses in a different order, then simply change the parentheses:

By the way, the Console does not alert you if you have a nonsensical set of parentheses. For example, consider this filter, which has three open parentheses but no close parentheses:
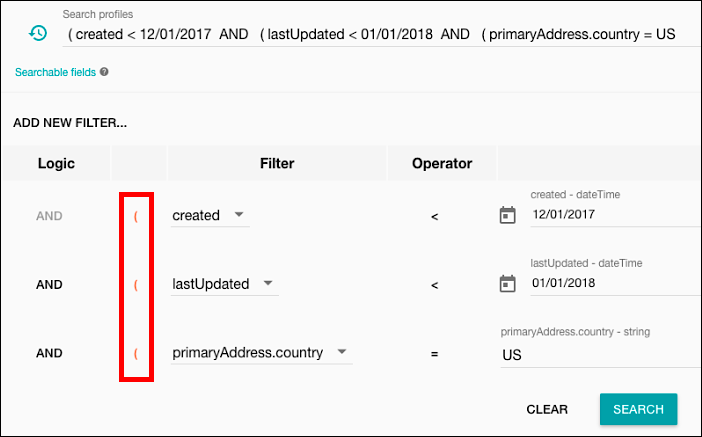
This won’t generate an error message: your query runs, and results are returned. However, because the Console makes a “best guess” at what to do here, it might be difficult to determine why those results were returned.
Filter. Specifies the attribute you want to search on. The Filter lists are particularly useful because: 1) you don’t have to remember whether a field has been indexed or not (if a field doesn’t appear in the list, then it hasn’t been indexed and it can’t be searched on); and, 2) you don’t have to remember the exact spelling/letter casing for each attribute. Attribute names are always displayed in the format required to do a search.
To add an attribute to your filter, just click the appropriate list and select the appropriate attribute:
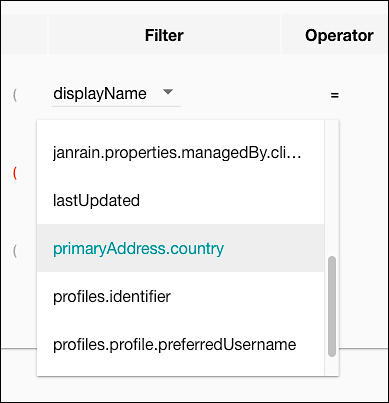
Note that, by default, each new clause is configured to search on the default fields (typically displayName and email). However, that can be changed at any time by selecting a different attribute.
Operator. Specifies the [type of operator]/(#operators used in the search, including:
* = Equal to
* < Less than
* <= Less than or equal to
* \>Greater than
* \>= Greater than or equal to
* != Not equal to
Value. Specifies the target search value. When you select an attribute in Guided Search, the Value field displays both the name of the attribute and the datatype of that attribute. For example, if you select the familyName attribute, the Value field will tell you that familyName uses the string attribute:
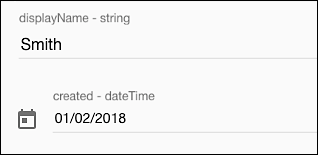
That gives you a clue as to what kind of data can (and cannot) be used as a target search value. For example, if the attribute uses the datetime datatype then you can’t type a string value like February 19, 2107 and expect to get any results. Likewise, wildcard characters can only be used with string attributes. If an attribute uses the uuid datatype then there’s no point in typing in a search value like *903**. It’s not going to work.
Speaking of dates (which we were speaking of a moment ago), if you select a date or datetime attribute the Value field displays a date picker that lets you use a calendar control to select a date:
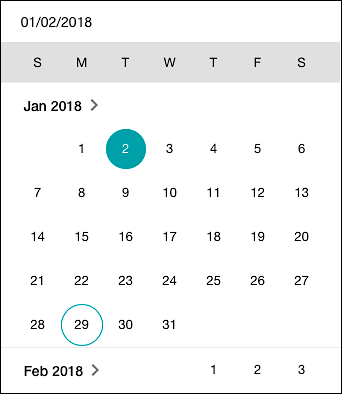
Yes: very handy.
So there you have it: the 5 parts of the Guided Search interface. To actually use those parts, and to actually create a filter in Guided Search, you must (at a minimum) do the following:
- Select an attribute to search on (the Filter section).
- Choose an operator (the Operator section).
- Enter a target search value (the Value section).
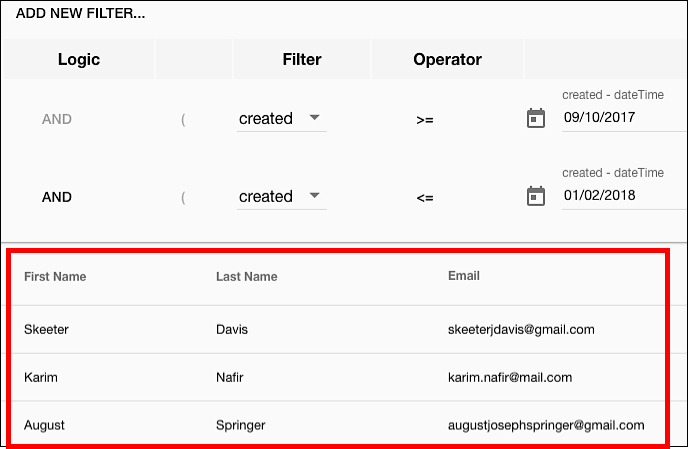
And then, after configuring the filter, you simply need to click Search to put that filter to use. As usual, your search results will show up at the bottom of the screen:
If you feel that the Guided Search section is taking up too much screen space, you can hide the section at any time by clicking Hide Filters:
Clicking Show Filters shows the Guided Search section again.
By default, filters and searches are not permanent. For example, suppose you click the Manage Agents link to exit the Manage Profiles page, then later return to the Manage Profiles page. When you do that, you’ll discover that both your search query and your filter have been deleted:
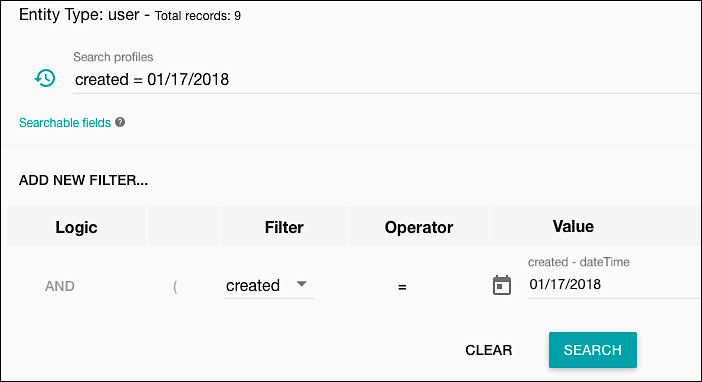
What if you’d like to keep – and then be able to reuse – a search query or a search filter? In that case, you need to know about saved searches and saved filters.
Updated over 2 years ago

