Add a filter to a Dashboard
This article applies to the following Customer Insights roles: Developer
To add a filter to a Dashboard, click Edit to put the Dashboard into edit mode. After you’re in edit mode, click Filters to display the Add/Edit Dashboard Filters dialog box:
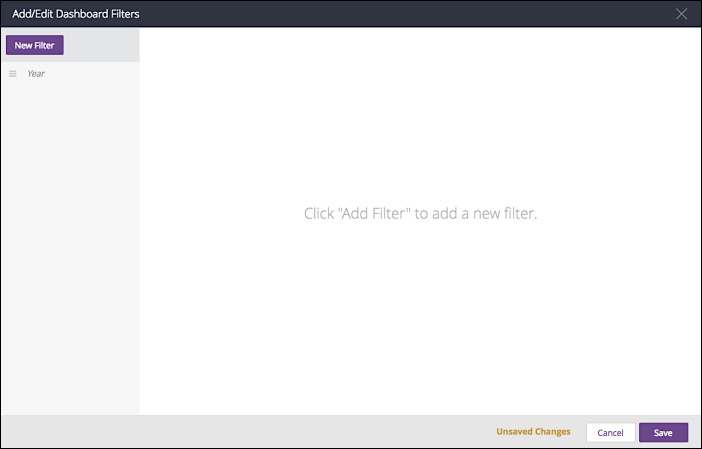
From here, click New Filter. When you do that, the dialog box redraws itself to look like this:
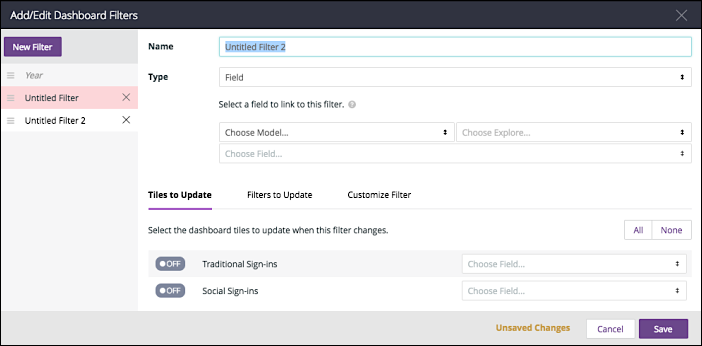
In the dialog box, type a filter name in the Name box. This name is the label that will be attached to the filter. Although you don’t have to give the filter a new name, you probably don’t want to use default name Untitled Filter. If you do, your Dashboard will look like this:

That might be somewhat-less than user friendly.
After entering the name, click Type and then select the type of filter you want to add to the Dashboard. More often than not, you’ll want to select Field, meaning you want to filter on a field found in one of your Explores. To specify the field to be used by the filter, click Choose Model and then click Janrain. After selecting Janrain, click Choose Explore and select:
- Events, if you want to filter on event occurrences.
- Profiles, if you want to filter on profile information.
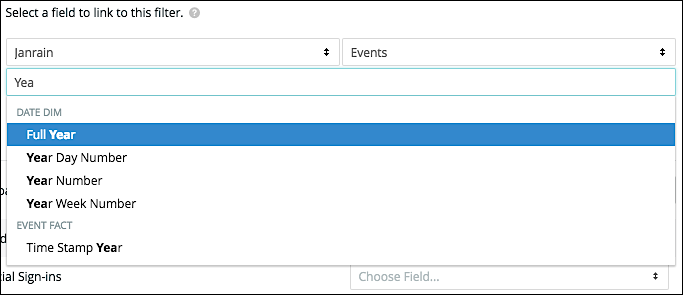
After selecting an Explore, click Choose Field and then select the field you want to filter on:

To quickly locate the desired field, start typing the field name in the Choose Field box. The list will filter itself based on what you type:
After choosing a field, select a default operator and enter a default value for that field:

Actually, entering a default value is optional; if you prefer, you can leave the filter value blank.
That sets up the filter; now you need to specify which Dashboard tiles are affected by that filter. (By default, none of your Dashboard tiles are affected by a filter.) At the bottom of the dialog box you’ll see a list of Dashboard tiles, each tile accompanied by an Off label. To apply a filter to a Dashboard, click Off: the label will change to On, and the field used to filter the tile will be automatically selected:

And what if that’s not the right field? Then click the dropdown list and select whichever field is the right one:
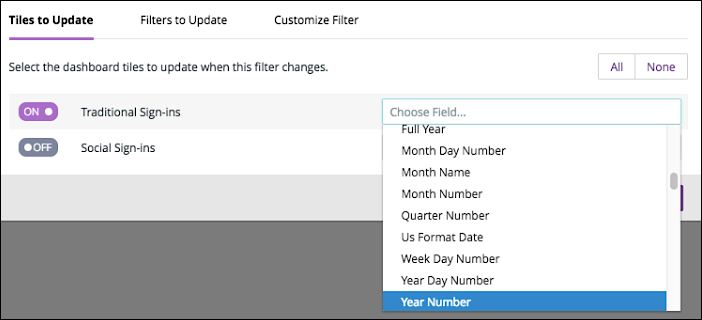
All you have to now is click Save, and the filter is added to the Dashboard:
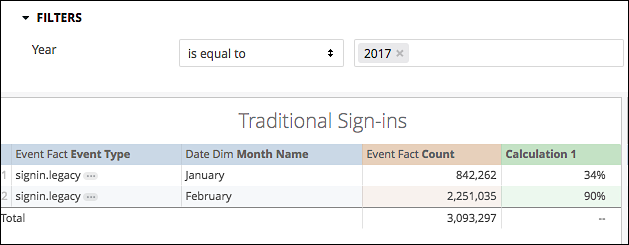
Note that you can change your filter setting at any time simply by clicking Filters and displaying the Add/Edit Dashboard Filters dialog box:
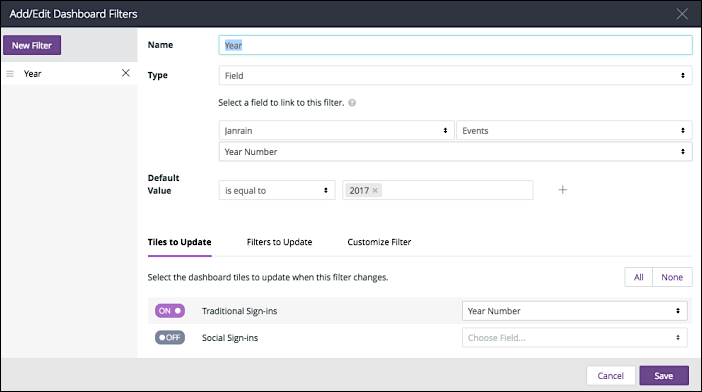
If you want to add additional filters to the Dashboard, click New Filter. And if you want to remove a filter from a Dashboard, just click the X next to the filter name:

Updated almost 4 years ago
