Configure social login by using the Social Login Dashboard
Upcoming changes to the Social Login Dashboard
As part of the Identity Cloud End of Life, the Social Login Dashboard will be decommissioned on March 31, 2026. Please see Social Login Dashboard changes on the End of Life & FAQ page for details.
Identity Cloud's Social Login features supports convenient and secure sign-in, authenticated by a long and growing list of identity providers including:
- Yahoo!
Once a user has signed in, your application can use the Identity Cloud REST APIs to access user profile data.
Social Login authenticates a user and returns social data. It is up to your application to determine a user’s logged-in state, as well as store the returned data.
Social Login Dashboard
The Social Login Dashboard provides a central location from which to administer the features of Social Login. Each Social Login application listed as a property on the Dashboard home page has its own unique configuration page, similar to the one shown here:

This page consists of the following sections, which provide high-level information about the application and access to more detailed information as well as the application configuration UI.
-
Analytics. Shows 30-day averages and trend graphs for the application. Click any of the categories or the arrow at the top right of the Analytics box to display a detailed view of the corresponding data. For more information, see Social Login Analytics.
-
Providers. Lists the identity providers configured for the application and shows the percentage of users who signed in with each provider. When you hover over a provider, click the wrench icon to configure the provider settings. See the Provider Setup Guides for specific setup instructions.
-
Settings. Provides access to the Application Settings page, where you can access your application domain and API credentials, set up your allowed domains, and manage other aspects of your Social Login application.
-
Widgets and SDKs. Provides links to the configuration UI for Social Login and Social Sharing and resources for using the Social Login iOS and Android SDKs. For information on configuring through this UI, see Design the UI with the Dashboard.
-
People. Lists the administrators in your organization who have access to the application. Click the pencil icon at the top right of the card to send invitations (valid for three days) to additional email addresses or remove people who currently have access.
Implementing Social Login
A Social Login application is needed for implementing both social login and social sharing.
If you are using Akamai's Registration solution, Social Login is included as part of the deployment process.
To create your Social Login application:
-
Log in to (https://dashboard.janrain.com).
-
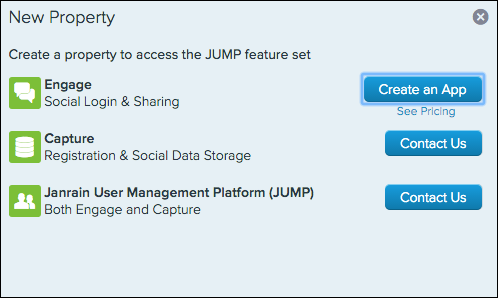
Click New Property. The New Property dialog appears:
-
In the New Property dialog, click Create an App.
-
Choose an Application Name and click Create Application. Your application name (e.g., yourdomain) is appended to the rpxnow domain, appearing as yourdomain.rpxnow.com. You can customize this URL as needed.
-
The Akamai servers generate the application you have created. After you click Get Started, your application is ready to use.
If you are implementing Social Login on multiple sites, you can use the same application across all sites, or you can create different applications for each one. If you would like the provider login and permissions screens to be individually branded for each of your sites, then you will want to create additional Social Login applications (following the previous steps).
Configuring a Social Login Application
After you have created an application, click the app’s Manage Engage App button to configure it:

Your application home page is displayed.

Configure Providers and Permissions
The first step in deploying Social Login is to select which identity providers will be offered to users and configure the permissions requested from users. Click here for a video demo of this process.
-
To access the provider configuration page, click the pencil icon in the Providers section.
-
Configure applications for each of the providers that you want to appear as buttons to the end user.
-
Not all providers require configuration. A gray gear icon indicates when configuration is required, and the dashboard will automatically prompt you to complete configuration if you attempt to enable a provider that requires it. Once a provider has been set up with all required fields, the gear icon will turn green.
-
See the Social login configuration guides for specific provider configuration instructions. Note that providers regularly change or update their developer tools. We try to keep directions as up-to-date as possible, but some steps may differ slightly from the currently-documented process.
-
Note that if you have both a development and a production Social Login application, you need to follow these provider configuration steps individually for each application.
-
-
Set which permissions you want to request from users when they sign in with a particular social provider. Select features to prompt users for permission to that part of their profile when they authenticate. Features that are not selected are returned automatically.
Facebook applications must pass a Facebook login review before features marked in the Dashboard with an asterisk (*) will be returned. For more information about the audit process, see Facebook’s login review page.
Design the UI with the Dashboard
The Social Login Dashboard provides a UI designer with live preview. For those who need more customization, the JavaScript API can augment the UI created in the Dashboard, or the UI can be coded from scratch.
-
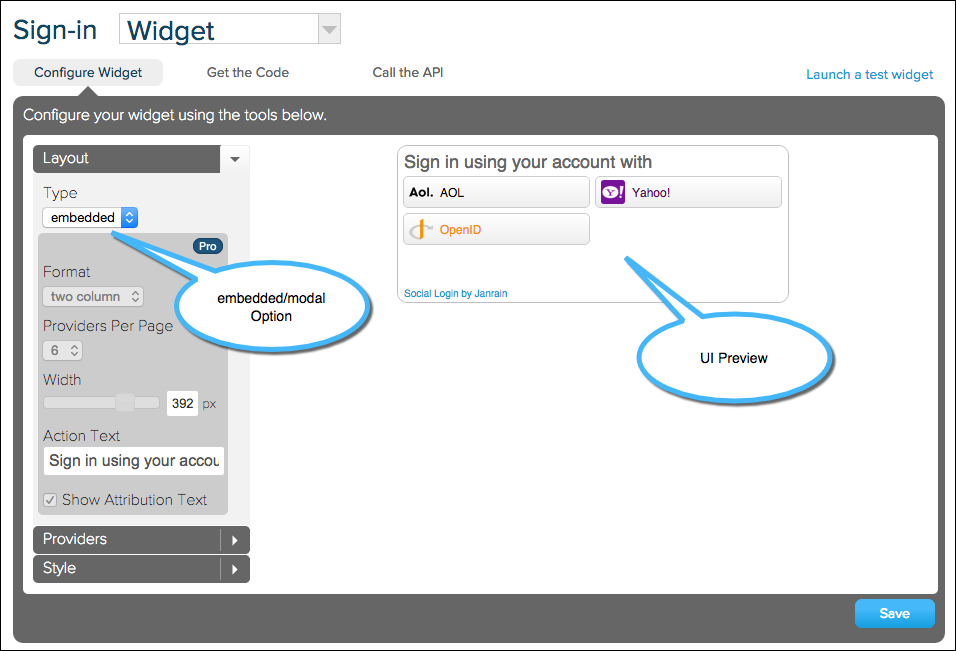
In the Widgets and SDKs section, click Sign-ins to access the Configure Widget page. A preview of how the UI will appear is presented on the right.
-
Configure the layout and style for your UI. Your changes will be reflected live in the preview area. If you are using Akamai's Registration solution, the modal/embedded option will not affect the modality of the Social Login widget in the signin screen, as this is controlled in a Registration configuration file.
-
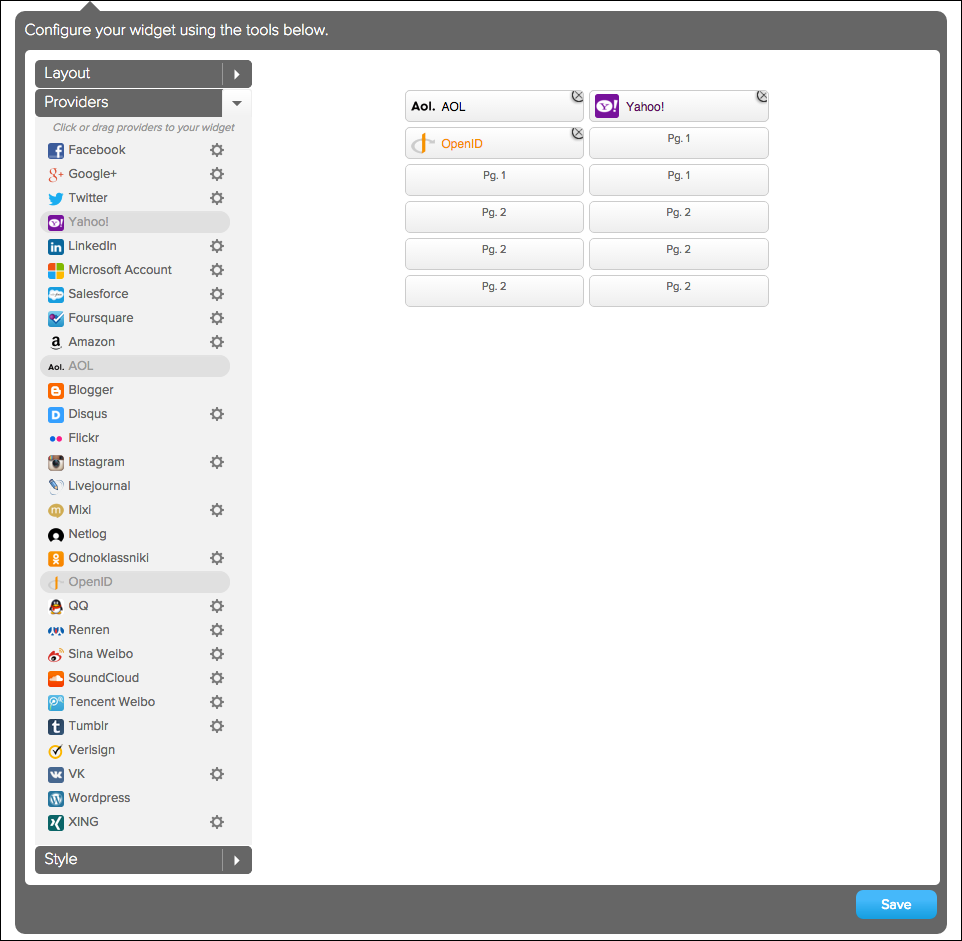
To add configured providers (or providers that do not require configuration) to the UI, click the Providers list and drag providers into the preview area. To delete a provider button in the preview area, click the Close icon in the button’s upper-right corner.
-
After you've completed configuration, click Save to save your configuration to the Akamai servers. This allows for a single, central configuration located on the Akamai servers. Changes made on the Dashboard automatically propagate to deployed integrations on client websites. Changes are usually implemented immediately, but may take up to an hour to propagate.
For Pro and Enterprise Service Levels
Organizations have the choice of selecting either the Save and Publish or Save and Embed options for saving configurations. Configuration settings are included in the JavaScript code that is generated for integration into your site (available on the Get the Code page). The Save and Embed option allows you to modify configurations independently of the Dashboard, which is useful for maintaining multiple UI instances with different configurations.
If you are using Akamai's Registration solution, always select the Save and Publish option.
Get the Code
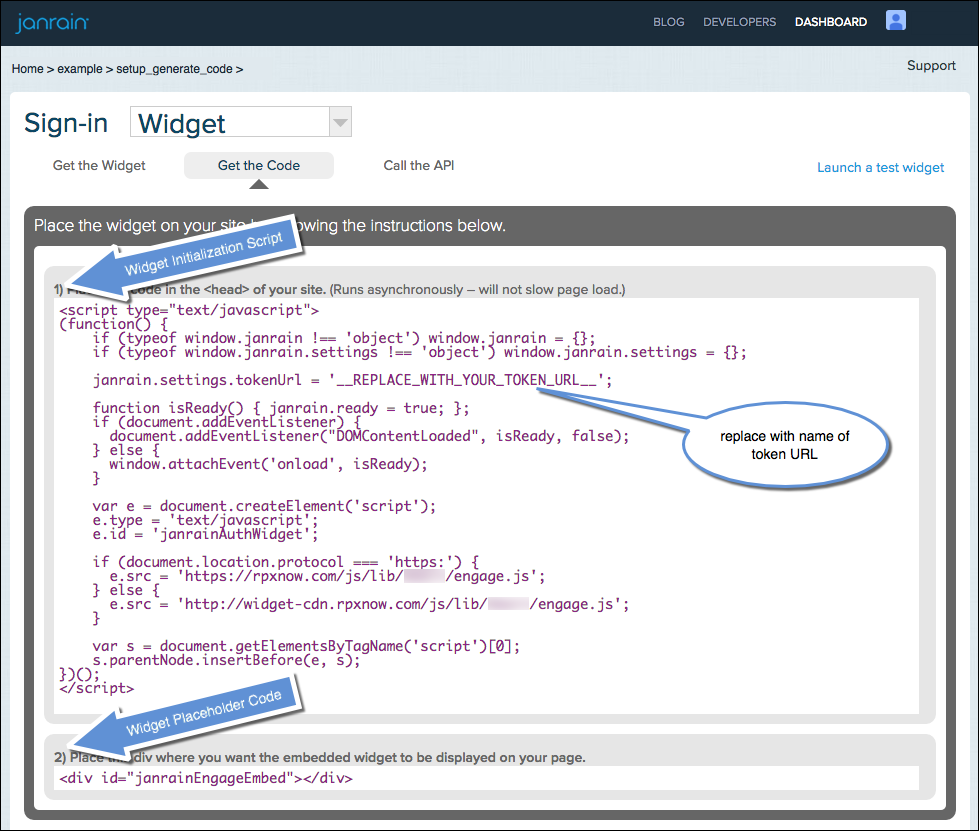
After you've saved your configuration, the JavaScript code is available from the Dashboard’s Get the Code page. This code must be placed on all pages where the UI will appear. If you are using Akamai's Registration solution, do not complete this or the next section.
-
Copy the widget initialization script and paste it in the <head> element of the destination web page.
-
Replace the placeholder in the JavaScript code with your token URL (see step 3 for more information).
-
Copy the widget placeholder or link and paste it in the <body> element of the destination web page.
-
If you designed an embedded UI, this is a <div> element. Copy it to the place you want the UI to appear.
-
If you designed a modal UI, this is the <a> element that the user clicks to make the UI appear. Copy it to the place you want the link to appear.
-
Create a Server-side Token URL
The token URL is a page hosted on your site that receives a token posted by Akamai after a successful social login and retrieves user profile information. You can build the token URL page with any number of web technologies, as long as it can perform these basic steps:
-
Accept the one-time token. Akamai posts a one-time token for the session to the token URL. Store this token for the auth_info call, or other API calls to the Akamai servers.
-
Request profile information. Using your API key (found in the Dashboard), and the one-time token, use the auth_info call to request profile data from Akamai.
By default, a successful social authentication will redirect the user to the token URL page to make the auth_info call and then initiate a page refresh for the site to receive the user information. You can also configure the login process to proceed without a page refresh by listening for the Social Login event for onProviderLoginToken and posting the one-time token to your token URL with an AJAX call.
See the Sample-Code GitHub repo for some example token URLs.
The POST tokens to token_url setting found in this section of the Dashboard is no longer used, and can safely be ignored: nothing will happen (either good or bad) regardless of whether the value is selected or not selected.
Update Application Settings
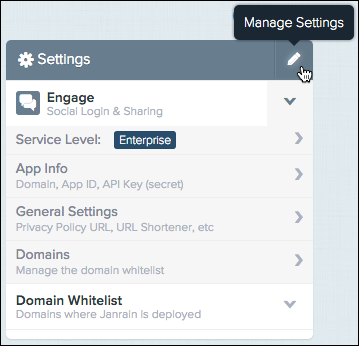
The final step in deploying Social Login is completing the Application Settings page. To access this page, click the pencil (Manage Settings) icon at the top right of the Settings section on your home page. The Application Settings page includes information on your:
- Service plan
- Application domain and ID
- API key
Your API key should always be kept secret. Never email the key or include it in a support ticket!
Domain Whitelist (required)
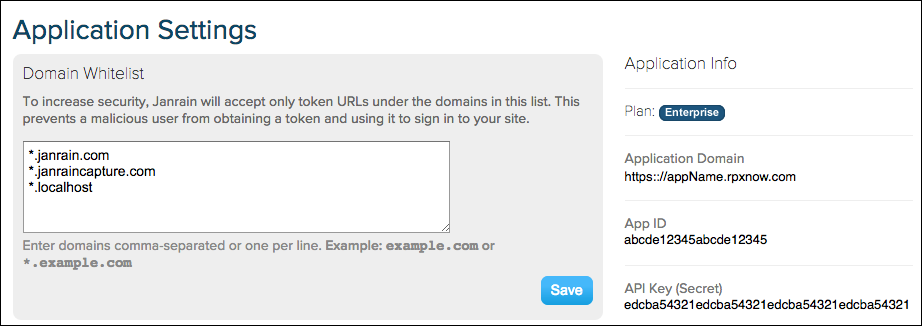
For security reasons, only allowed domains can communicate with your Social Login application.
-
Add the token URL to the Domain Whitelist.
-
Add the domain(s) and subdomain(s) of any sites where you plan to implement Social Login to the Domain Whitelist. Depending on how your domain is routed, you may need to add an additional entry with the URL prefixes example.com and www.example.com.
Custom URL Shortening (optional)
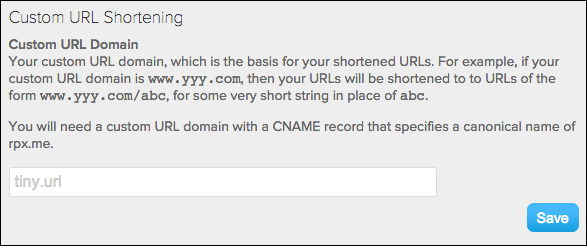
If you are implementing social sharing, you can customize the domain used for shared links if you have a URL shortening service.
Application URLs (optional)
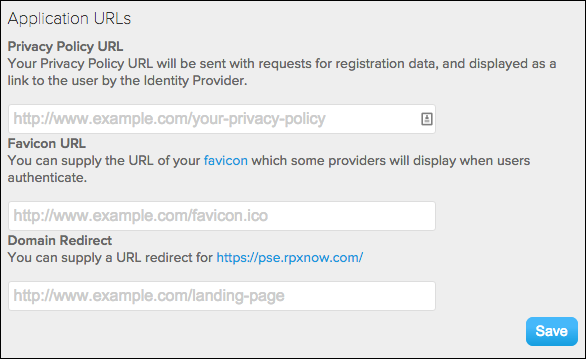
These are links to files on your servers.
- Privacy Policy URL. Link that may be displayed on social provider permissions screens.
- Favicon URL. Image that may be displayed on social provider permissions screens.
- Domain Redirect. A URL that users are sent to if they type your Social Login application domain directly into a browser.
Token URL Redirect Message (optional)

Text will appears in the lower-left side of the Social Login dialog after a user authenticates.
Migrations (optional)
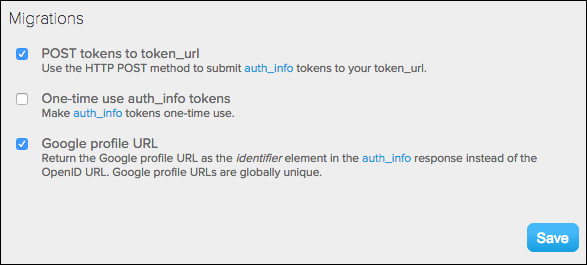
Options for making auth_info calls.
You can now use the Social Login functionality.
Testing Social Login
The Dashboard includes a testing tool, accessible in two ways:
- On the Configure Widget page, click the Launch a test widget link at the top of the screen. (This link appears when you save configuration changes.)
- On the Call the API page, click the Launch a test widget link on the right side of the screen.

The testing tool implements the application as you configured it, allowing you to simulate a login and retrieve the user profile from the selected identity provider. After you retrieve the profile, you can fill in the token URL and test your own code for retrieving the user profile.
Updated 11 months ago
