Facebook social login guide
![]()
Facebook is the world’s largest social media network, with more than 2 billion active users each month.
Before you begin
To use Facebook for social login you must:
-
Obtain a Facebook developer account from https://developers.facebook.com.
-
Do one of the following:
- Open a previously-created Facebook app, and copy the app ID and app secret.
- Create a new app and copy the app ID and app secret.
-
Use the Social Login Dashboard and the Facebook app ID and app secret to configure Facebook as a social login provider.
Create a Facebook app for social login
This section walks you through the process of creating a Facebook app for social login. If you already have an app, see the Using an Existing Facebook App for Social Login section of this documentation.
To configure a Facebook app for social login, complete the following procedure:
-
Log on to Facebook for Developers.
-
From the Facebook for Developers home page, click My Apps in the upper right corner of the browser window:

-
On the Apps page, click Create App:

-
In the Create an App ID dialog, click For Everything Else to create an app that uses Facebook as a social login provider:

-
In the Create an App ID dialog, enter the name of your app in the App Display Name field and your contact email address in the App Contact Email field. If your organization has a Facebook Business Manager account you can select that account from the Do you have a Business Manager account? dropdown list. If you don’t have a Business Manager account you can leave this field blank for now:

When you’re finished, click Create App Id.
-
In the Security Check dialog box, select I’m not a robot and then click Submit. When the security check is complete you'll be presented with the App Dashboard page:

-
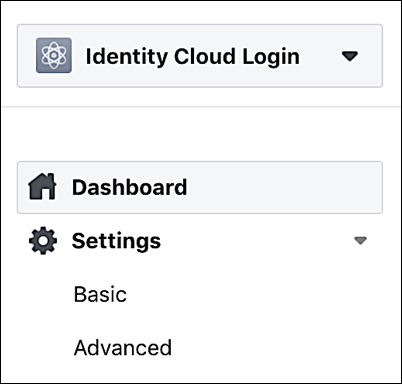
In the left navigation pane, expand Settings and then click Basic:
-
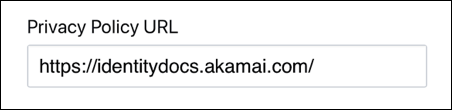
Enter the URL to your privacy policy in the Privacy Policy URL field:
-
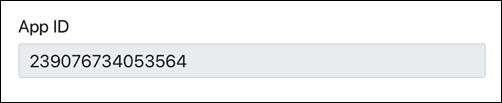
Copy the App ID; this value is required in order to configure Facebook as a social login provider:
-
Click Show in the App Secret session to display your app secret:

Copy the app secret. The secret is also needed when configuring Facebook as a social login provider.
-
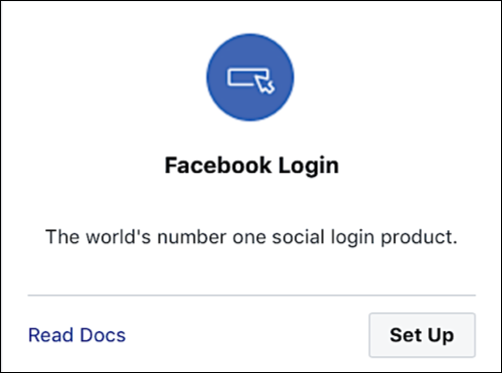
In the Navigation pane, click Dashboard. On the dashboard, scroll to the Add a Product section and then click Set Up on the Facebook Login card:
-
Ignore the Quickstart page that appears and, instead, go to the navigation page and, click Facebook Login, then click Settings:

-
On the Settings page, enter your Facebook redirect URI in the Valid OAuth Redirect URIs field:

-
Retype your redirect URI in the Redirect URI Validator field and then click Check URI:
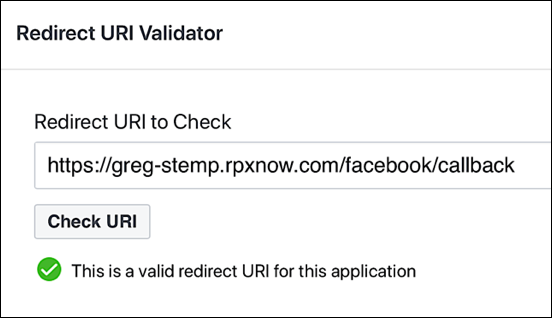
This verifies that you've entered a valid redirect URI.
-
Click Save Changes.
-
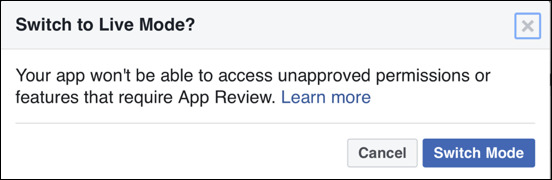
At the top of the window, next to the App ID, select In development.
-
In the Switch to Live Mode? dialog, click Switch Mode:
-
Log off from the Facebook Developers site.
Use an existing Facebook app for social login
If you already have a Facebook app that can be used for social login, complete the following steps to retrieve the application’s app ID and app Secret:
-
Log on to Facebook for Developers.
-
From the Facebook for Developers home page, click My Apps in the upper right corner of the browser window:

-
On the Apps page, click the app you want to use for social logins:

-
In the navigation pane, expand Settings, and then click Basic:

-
On the basic settings page, copy the App ID; this value is required in order to configure Facebook as a social login provider:

-
In the App Secret section, click Show to display your app secret:

Copy the app secret. The secret is also needed when configuring Facebook as a social login provider.
-
Log off from the Facebook Developers center.
Configure Facebook as a social login provider
To configure Facebook as a social login provider, make sure you have your Facebook app ID and app secret, and then complete the following procedure:
-
Log on to your Social Login Dashboard (https://dashboard.janrain.com).
-
From the Dashboard home page, click the Manage Engage Dashboard icon.
-
From the Engage Dashboard home page, in the Widgets and SDKs section, click Sign-Ins.
-
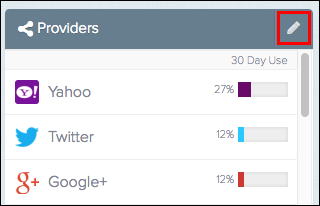
From the Sign-in page, verify that Widget is selected and then expand Providers.
-
From the list of Providers, click Facebook.
-
In the Facebook dialog box, click Next until you reach the screen requesting the App ID and App secret:

-
Paste your Facebook app ID in the App ID field, paste your Facebook app secret in the App Secret field, and then click Save. Facebook appears in your social login widget.
-
When you are finished, select Save and Publish and then click Publish. It might take as long as one hour before Facebook appears as a social login option on your web site.
Test Facebook social login
To test Facebook social login, complete the following procedure:
-
Do one of the following:
-
If you have just published your widget settings, click the Test your widget link that appears after the widget has been saved.
-
If you previously published your widget settings then, from the Engage Dashboard Sign-in page, click Launch a test widget.
-
-
From the Test page, click the Facebook icon:

-
In the Facebook window, logon using a valid Facebook account:

-
If the Facebook logon succeeds, information returned from the Facebook profile is displayed in the API response preview field:

The returned profile information will vary depending on:
- The Facebook account used in the test.
- The profile information you requested for Facebook.
You can verify Facebook profile fields by completing the following procedure:
-
From the Engage Dashboard home page, click the Manage Providers icon:

-
From the Configure Providers page, click Facebook. Profile information returned from Facebook is displayed onscreen. For example:

Fields not marked with an Off or an Ask label are automatically returned when a user logs on using a Facebook account.
For fields that are marked with a label, click Off to request that the information be returned. The Off label will change to Ask, meaning that, at logon time, the user will be asked if they give permission for that data to be returned:
For example, if you ask for a user’s email address during logon, he or she will see the following message before they log on:

The user can either click Continue to forward all the requested information, or can click Review the info you provide and select which fields (if any) will be forwarded during logon.
On the Configure Providers page, click Ask to turn off the information request.
Assign a different Facebook app for social login
If you want to use a different Facebook app or if you need to need to change your existing app, you must update your Facebook provider configuration settings. To do that, complete the following procedure:
-
From the Engage Dashboard home page, click the Manage Providers icon:
-
From the Configure Providers page, click Facebook.
-
Click the green Configured button to display the Facebook is currently enabled dialog box:

-
To change the Facebook configuration, click Modify these settings.
-
In the Facebook dialog box, change the App ID and/or App Secret as needed, and then click Save:

Although you can modify your Facebook settings, you cannot delete those settings. If you delete the settings and then try to save your changes, you’ll see the error message Please enter your Consumer Key and Secret exactly as Facebook shows them.
This means that you cannot “unconfigure” the provider: once configured, the Facebook icon will always be shown as green (i.e., configured) in the Social Login Dashboard.
Remove Facebook as a social login provider
If you no longer want to use Facebook for social login, you can remove Facebook as a social login provider by completing the following procedure:
-
Log on to your Social Login Dashboard (https://dashboard.janrain.com).
-
From the Dashboard home page, click the Manage Engage Dashboard icon.
-
From the Engage Dashboard home page, in the Widgets and SDKs section, click Sign-Ins.
-
From the Sign-in page, verify that Widget is selected and then expand Providers.
-
In the widget, click the X in the upper right corner of the Facebook icon.
-
Scroll to the bottom of the page, select Save and Publish, and then click Publish. Facebook no longer appears in the sign-on widget.
You must always have at least one social login provider in the widget. If you delete all the providers and then click Publish, you’ll see the error message Couldn’t save configuration: No providers.
Updated 3 months ago