Login with a mobile number instead of an email address
No doubt you already know how to log on to an Identity Cloud website: you arrive at the sign-in screen, your enter your email address and password, you click Sign In and, just like that, you’re logged in.
Yes, we know: you can also log in by using, say, your Facebook account or your Twitter account. On a similar note, you might have to undergo two-factor authentication following that initial login. For now, however, we’re going to focus on a “plain vanilla” traditional login that requires an email address and password and that doesn’t use two-factor authentication.
So what’s wrong with logging on by using an email address and password? Nothing really: it’s quick, it’s easy, and it’s something people are used to doing. Having said, however, there are people who prefer to log on by using, say, their mobile device number. In fact, it's not all that unusual to find people who have a smartphone (and, thus, a mobile device number) but who don't have an email address. That’s a problem when it comes to Identity Cloud. You simply can't log in by supplying a mobile device number instead of a password::
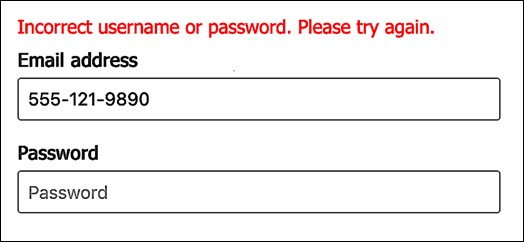
Or at least that's what they say ....
The multiIdentifierAuth field
One of the more interesting (as well as one of the most-often overlooked) Identity Cloud field types is the multiIdentifierAuth field. The multiIdentifierAuth field enables you to associate a single field with more than one user profile attribute. That might not sound all that interesting, but this also provides a way for you to allow users to log on by using something other than their email address. For example, if you associate a multiIdentifierAuth field with the email attribute and with the mobileNumber attribute users can log in by supplying their email address and password or by supplying their mobile device number and password. And in this article, we’ll show you exactly how to do that.
We’ll also focus solely on logging users on. If you want to enable users to register for accounts without having to supply an email address you’ll need to configure the user registration fields, forms, and screens to work similar to the sign-in fields, forms, and screens we’re about to show you. But, again, we won't worry about registration in this article.
Here’s how you go about creating – and using – a multiIdentifierAuth field.
Create a label for your multiIdentifierAuth field
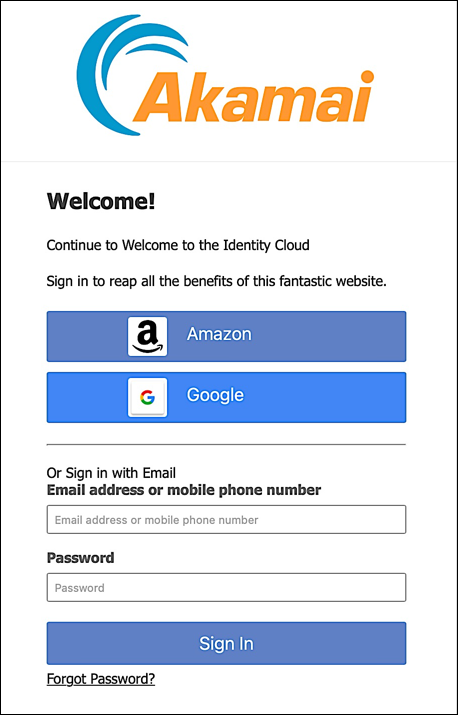
By default, the sign-in screen prompt a user to enter their email address:
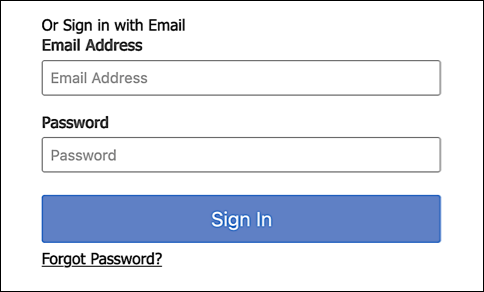
That’s fine, except for one thing: with the multiIdentifierAuth field, we’re going to give users the option of logging in by using their email address or by using their mobile device number. Therefore, we need to change the Email Address label to something more like Email address or mobile phone number.
And yes, we should also change the label that’s says Or Sign in with Email. But, to keep things reasonably simple, we'll skip that for now.
The label we apply to the multiIdentifierAuth needs to be created before we create the field. (Why? Because, when we create the field, we don’t specify the text for that label in our API call. Instead, we reference the ID of a pre-existing bit of text that serves as the label.) To create a new label, we use the /translations operation and a Curl call similar to this:
curl -L -X POST 'https://v1.api.us.janrain.com/config/79y4mqf2rt3bxs378kw5479xdu/flows/standard/translations' \
-H 'Content-Type: application/json' \
-H 'Authorization: Basic eTR4Zmc2ZjQ0bXNhYzN2ZXBqanZ4Z2d6dnQzZTNzazk6OTVjY3hrN2N6YnZ1eng2ZHB0ZTVrOXA2ZGo1Ynpla3U=' \
--data-raw '[
   {
        "values": {
          "en-US": "Email address or mobile phone number"
        }
    }
]
'
The preceding code creates a new translation (in US English) in the flow named standard. That translation reads like this: Email address or mobile phone number. When we make the API call we should get back a response like this one:
{
  "translations": [
    {
      "key": "79383318-a86d-4ce0-b971-138d178f838d",
      "path": "",
      "values": {
        "en-US": "Email address or mobile phone number"
      },
      "_self": "/config/79y4mqf2rt3bxs378kw5479xdu/flows/standard/translations/79383318-a86d-4ce0-b971-138d178f838d"
    }
  ],
  "_self": "/config/79y4mqf2rt3bxs378kw5479xdu/flows/standard/translations"
}
For the moment, all we care about is the key field. The value of that field (79383318-a86d-4ce0-b971-138d178f838d) is the unique identifier of our new translation.
Create the multiIdentifierAuth field
With the label in hand we can then use the /fields operation and a Curl command similar to the following to create a new field:
curl -L -X POST 'https://v1.api.us.janrain.com/config/79y4mqf2rt3bxs378kw5479xdu/flows/standard/fields' \
-H 'Content-Type: application/json' \
-H 'Authorization: Basic eTR4Zmc2ZjQ0bXNhYzN2ZXBqanZ4Z2d6dnQzZTNzazk6OTVjY3hrN2N6YnZ1eng2ZHB0ZTVrOXA2ZGo1Ynpla3U=' \
--data-raw '{
    "type": "multiIdentifierAuth",
    "label": {
        "key": "79383318-a86d-4ce0-b971-138d178f838d"
        },
       "placeholder": {
        "key": "79383318-a86d-4ce0-b971-138d178f838d"
        },
  "schemaAttributes": [
        "email",
        "mobileNumber"
    ],
    "name": "emailAndMobileNumberField"
}'
And yes, you need to use the Configuration APIs to create a multiIdentifierAuth field. This type of field can’t be created in Console.
What do you need to know when it comes to this sample API call? Let’s quickly run through the request body members:
| Member | Description |
|---|---|
| type | Type of field you’re creating. It probably goes without saying that this must be set to multiIdentifierAuth. |
| label | Label that appears above the field. The key property of the label needs to be set to the key value of the translation we created a few minutes ago. |
| placeholder | HTML placeholder, the gray informational text that appears inside a field and then disappears when the user clicks on that field. In this case, we set the key property of the placeholder to the key value of our translation. That means that the label and the placeholder are exactly the same. However, that doesn’t have to be the case: your label and your placeholder don’t have to be exactly the same. |
| schemaAttributes | JSON array containing the user profile attributes you want to associate with the field. In our case, we’re associating the field with the email and the mobileNumber attributes. However, you aren’t limited to those two attributes. For example, suppose you have a custom attribute named memberId which stores a user’s membership ID number. As long as memberId is a unique value, you can associate that custom attribute with your new field. In turn, that means users can log on by supplying their membership ID number. |
| name | Name of the field. In this case, we named our field emailAndMobileNumberField. |
If your API call succeeds you’ll get back a response similar to this:
{
  "type": "multiIdentifierAuth",
  "label": {
    "key": "79383318-a86d-4ce0-b971-138d178f838d",
    "path": "fields.emailAndMobileNumberField.placeholder",
    "values": {
      "en-US": "Email address or mobile phone number"
    },
    "_self": "/config/79y4mqf2rt3bxs378kw5479xdu/flows/standard/fields"
  },
  "placeholder": {
    "key": "79383318-a86d-4ce0-b971-138d178f838d",
    "path": "fields.emailAndMobileNumberField.placeholder",
    "values": {
      "en-US": "Email address or mobile phone number"
    },
    "_self": "/config/79y4mqf2rt3bxs378kw5479xdu/flows/standard/fields"
  },
  "schemaAttributes": [
    "email",
    "mobileNumber"
  ],
  "name": "emailAndMobileNumberField",
  "_self": "/config/79y4mqf2rt3bxs378kw5479xdu/flows/standard/fields/emailAndMobileNumberField"
}
Assign the multiIdentifierAuth field to the sign-in form
We now need to do two things:
- Remove the email address field from our sign-in form.
- Add the new multiIdentifierAuth field to the sign-in form.
We’re going to carry out both of these steps by using Console’s Registration Builder: doing that makes it a little bit easier to illustrate exactly what we’re doing. However, you can also use the Configuration APIs to update the sign-in form. That’s entirely up to you.
In Console, click Registration Builder, click the Actions icon located next to flow you’re working with (in our case, standard), and then click Edit. When the home page for the flow appears, click Forms, find the signInForm form, and then click the Edit Form icon. At that point, your screen should look like this:
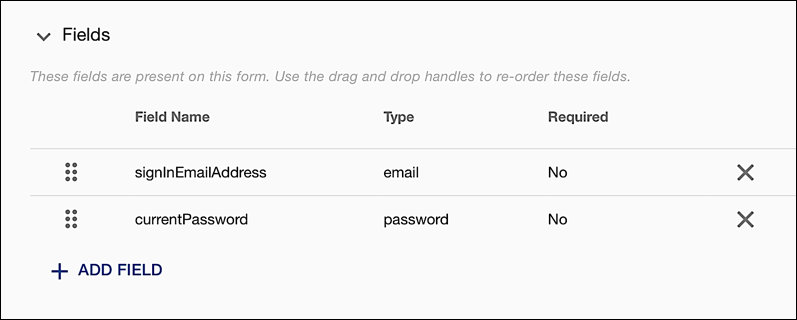
On the sign-in form, in the Fields section, click the X located next to the signInEmailAddress field to remove that field from the form. When that's done, click Add Field and then, in the Add a field to this form dialog, select the emailAndMobileNumberField field:

After making the selection, click Add Field to add the field to the form:

Finally, click the move handle (the six dots located to the left side of the field name), drag the emailAndMobileNumberField to the top of the fields list, and then release the mouse button:
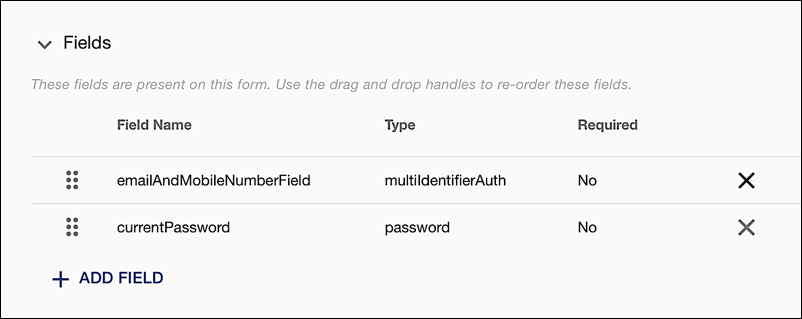
This is important, because fields are displayed in the order in which they appear in the Fields section. Traditionally, you enter your email address (or mobile number) and then enter your password. We want our sign-in form to work just like that.
Click Save to save your changes.
So what have we accomplished by doing all this? Well, the old sign-in form had a field (signInEmailAddress) that was tied to a single user profile attribute: email. Before we made all our changes, you'd go to the sign-in form and enter your email address and password. Identity Cloud would check to see if there was a user who had both that unique email address and that password. If such a user could be found, they'd be logged in.
As you no doubt recall, our new field is tied to two attributes: email and mobileNumber. So what happens now when you access the sign-in form? Well, now you enter:
- An email address or a mobile device number
- A password
In turn, Identity Cloud checks to see if there's a user who has that unique email address and that password or who has that unique mobile device number and password. If either of those conditions are true, then user is logged in.
Let's show you how that works.
Log in by using a mobile device number
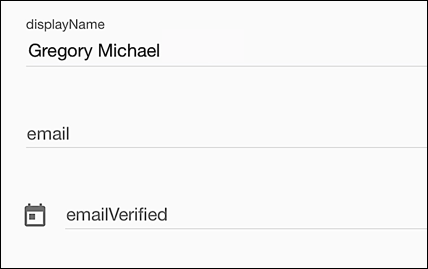
To verify that our new sign-in approach works we’re going to make use of a test account that has a valid (and verified) mobile device number, but does not have an email address at all:
If we make an authorization request to Hosted Login (and if everything has gone according to plan), our sign-in screen should look similar to this:
We’ll now try to sign-in by using a mobile device number rather than an email address:
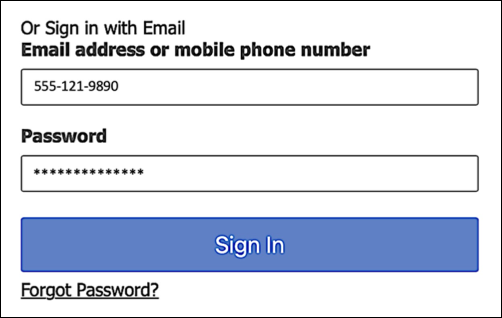
Here’s what happened when we tried that:

Who said you couldn’t log on to Identity Cloud by using a mobile device number?
Before you ask, yes, if we’ve enabled two-factor authentication then you’ll have to go through 2FA in order to be fully logged on. This is a standard Identity Cloud login: you’re just using a mobile number and password rather than an email address and password.
Updated almost 3 years ago
