Create a global setting
You can think of an application as being a collection of properties, with properties being used for making authenticated requests against the Identity Cloud REST APIs. Applications provide a way to centrally manage all of your properties; for example, you can configure a collection of settings at the application level and, by default, have those values applied to each of your properties. In turn, you can then update any of those settings at the application level, and then have those settings automatically applied to all of your properties.
To add a new global setting, complete the following procedure:
-
In the Manage Applications page, click the Add Setting icon:

-
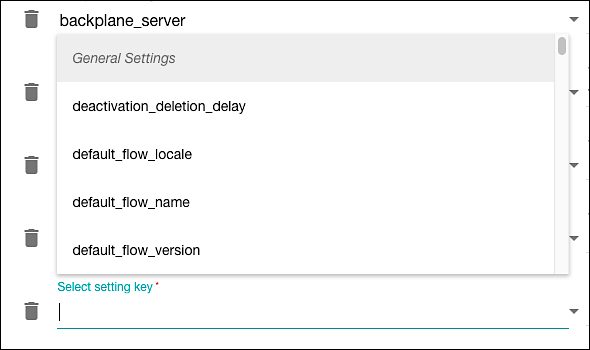
To add a standard Identity Cloud setting, in the Edit Settings pane, click Select setting key and then click the setting you want to add:

-
Any time the Select setting key list is displayed, you can begin typing and the Console will find all the settings that match what you type.
-
In the Value field, enter the value for the new setting:

-
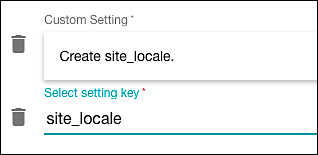
To add a custom setting, type the setting name in the Select setting key field. Note that setting names cannot contain blank spaces; individual words in a name are typically separated by using underscores (my_setting_name):

-
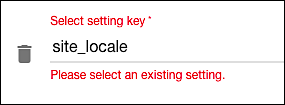
As you type, the setting name appears in the Create setting button located just above the new setting. Click (in this example) Create site_locale. If you click anywhere other than Create site_locale, you’ll see an error message similar to this:

-
To resolve this error, click the setting name (site_locale) and then click Create site_locale. You won’t be able to save your changes until this error has been resolved.
-
After adding the custom setting, type the setting value in the Value field:

-
When you are finished adding new settings, click the Save Changes icon:

Updated almost 4 years ago
