Configure social login in Hosted Login
Configuring Social Login
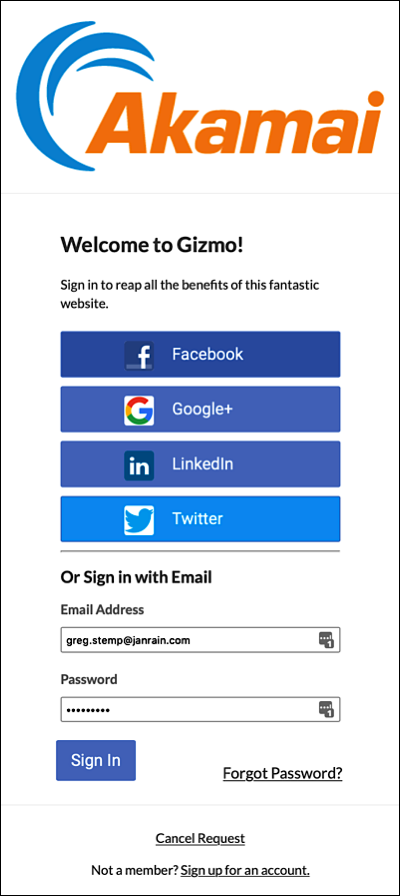
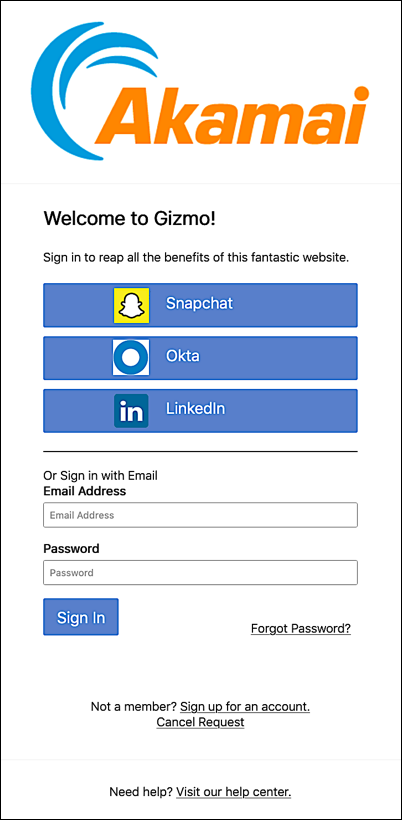
Configuring social login is an integral part of the Hosted Login experience. When a user accesses a Hosted Login site, he or she can log on or register by supplying their email address and a password. Alternatively, users can choose to register (and to logon) by using an existing account previously created with a social identity provider. For example, the Hosted Login login page shown below enables users to log on traditionally (i.e., with an email address and password), or to logon by using an existing account from any one of the following identity providers (IdPs):
- myOpenID
Here's what the sample login page looks like:
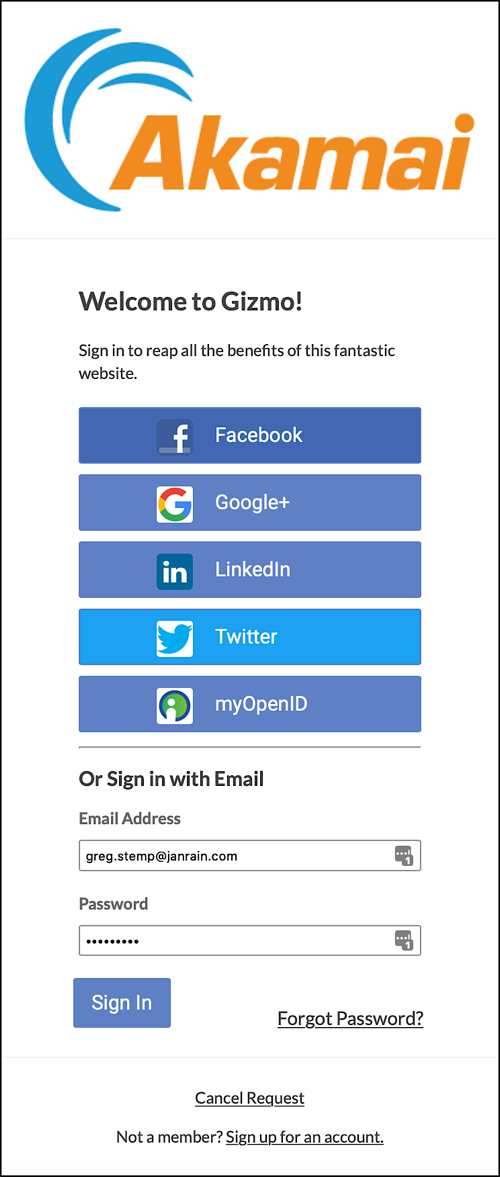
Although the button in the dialog box is labeled Google+, the Akamai Identity Cloud does not support Google+ accounts. Instead, the button actually points to a standard Google account.
Social login makes it quick and easy for users to log on to or register with a site, and ensures that they can do so without having to create (and to remember) yet another username and password.
Which is all well and good. At the same time, however, Hosted Login’s support for social login does raise a few questions. For example, are the five identity providers shown above the only identity providers available for use? What if you want to use a totally different set of IdPs? What if you’d like to give users in one part of the world one set of identity providers, but give users in another part of the world a different set of IdPs? And what if you don’t want to use social login at all?
In other words, how do you manage Hosted Login’s version of social login?
As it turns out, we’re way ahead of you.
Before you begin
To understand how social login works in Hosted Login it’s useful to know how social login works, period. If you’re new to the Akamai Identity Cloud you might want to skip down to the end of this article and start with Appendix A: Configuring Identity Providers in the Social Login App. That will give you some background info that should make the rest of this article easier to follow and easier to understand.
The article will also be easier to follow and easier to understand if you’re familiar with OpenID Connect and application clients. We won’t discuss the nuts and bolts of either client type in this article; follow the preceding links for that information. When reading this article, however, keep in mind that OIDC clients (which handle Hosted Login logins and registrations) must be associated with an API client; in turn, information in the API client is used to help construct the login page presented to the user. And that includes determining which social login identity providers are made available to the user.
Also keep this in mind: different users might use different OIDC clients to log on the Hosted Login; that means that the users are likely using other API clients as well. If User A has a different set of social login options than User B does, that’s invariably because the two users are logging on via different OIDC and API clients.
A quick overview of social login configuration
For starters, let’s provide a brief overview of Hosted Login’s social login configuration process. If you’ve worked with Identity Cloud social login in the past, then you have a huge head-start when it comes to configuring social login for Hosted Login: much of the process is exactly the same. For example, when you subscribe to Hosted Login, one of the things Akamai will provide to you is a social login application, the primary tool used for configuring social login. After you have your Social Login app, you’ll then complete the following steps:
-
Create a provider-specific app for each IdP you want to make available to your users. You can find information on how to create provider-specific apps in the Social login configuration guides ](doc:identity-providers) reference.
-
Configure the required providers in the Social Login app.
-
Add the required providers to the Social Login app “widget.”
-
Reference your Social Login app information (including, at a minimum, your app name, app ID, and API key) in your API client.
That’s all you have to do: Hosted Login takes care of the rest. When a user clicks a Login button in order to log on to your website or app, he or she actually uses an OIDC client to create an authorization request. If that request is approved, Hosted Login locates the API client associated with the specified OIDC client ID, then, among other things, retrieves Social Login app information (app name, app ID, and API key) from the API client. With that information in hand, Hosted Login can access the Social Login app, determine your set of configured identity providers, and then construct a login page for the user. For example, why does your Hosted Login login page include these providers:
That’s right: because those are the same providers that you’ve configured in your Social Login app:
It really is that simple. Just make sure you get your Social Login widget configured correctly (see Appendix A) and you add the required settings to your API client.
Add the required social login settings to your application client
To make sure that your social login IdPs show up on your login page you must add your Social Login app information to your application client. We won’t explain how to configure an application client here; you can find a detailed explanation of the process in the article Application client settings. Just be aware that, a minimum, your application client must include the following three settings:
-
rpx_realm. The "host name" portion of your Social Login app. For example, if the URL for your Social Login app is https://akamai-documentation.rpxnow.com then your rpx_realm is akamai-documentation.
-
rpx_key. The API secret for your Social Login app.
-
rpx_app_id. The unique identifier of your Social Login app.
These settings enable Hosted Login to extract social login information from the Social Login dashboard. End of story.
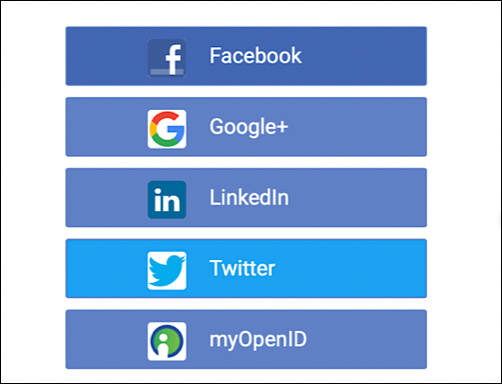
Well, OK: maybe that’s the end of the story. If you only include the rpx_realm, rpx_key, and rpx_app_id settings in your application client then, by default, Hosted Login uses all the social login identity providers configured in the Social Login app. For example, suppose the Social Login widget includes four IdPs (Facebook, Google, LinkedIn, and Twitter):
In turn, those same four IdPs are available to users logging on to or registering with Hosted Login:
That’s what happens if the authentication.providers setting (which we haven’t talked about until now) is not included in your application client settings. If you leave out the authentication.providers settings then anyone logging on to Hosted Login using the associated OIDC client has access to all the social login IdPs configured in the Social Login widget. Do you have 14 different IdPs configured for social login? The user will see 14 different social login buttons on the Hosted Login login page, one for each configured IdP.
However, there are other options.
Option 1: Use only a subset of the configured IDPs
It’s not unusual to want to associate different OIDC clients with a different set of social login providers; for example, you might want to give users in China a different collection of IdPs to choose from than you give users in the US or users in Europe. That’s where the authentication.providers API client setting comes in. If you want to limit an OIDC client to a subset of the social login providers configured in the Social Login widget, then add the authentication.providers setting and set the value to the IDPs that you do want to make available. For example, here’s what our Social Login widget looks like with four different providers available for use:
However, for one of your OIDC clients, you’d like to limit the available IdPs to Facebook and Twitter. To do that, all you have to do is add this line to your application client settings:
"authentication.providers": ["facebook", "twitter"]And what happens when you do that? This happens:
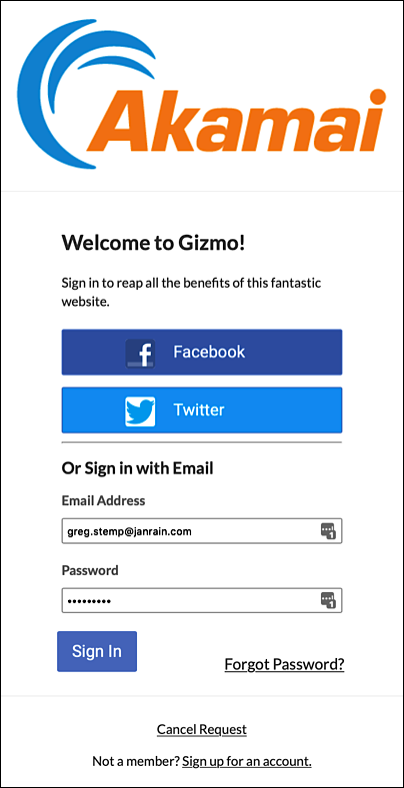
As you can see, for users who log on or register using the associated OIDC client, Google and LinkedIn are no longer available for social login/registration. When you add the authentication.providers setting, then the social login IdPs available to a user are determined by the value of that setting. Google and LinkedIn weren’t included in our sample setting, so you won’t see Google or LinkedIn on your Hosted Login login page.
A few things to keep in mind when using the authentication.providers setting:
-
For IdP names, use the string specifiers for the identity provider. Make sure that you use the exact spelling and the exact letter casing
-
IdP names must be enclosed in double quote marks, and separated by using commas. In addition, the entire set of identity providers must be enclosed in square brackets (which indicates that the data is being passed as an array):
"authentication.providers": ["facebook","twitter"]
If you change your mind and decide to revert back to the default scenario (using all the IdPs found in the Social Login widget), simply remove the authentication.providers setting from your API client.
It’s also important to note that Hosted Login does not validate the identity providers included in the authentication.providers setting. For example, suppose your Social Login widget looks like this:
In your authentication.providers setting, however, you add OpenID, even though that IdP is not configured in the Social Login widget:
"authentication.providers": ["facebook", "googleplus", "linkedin", "twitter", "openid"]If you do that, OpenID will appear on the Hosted Login login page:
<img src="https://techdocs.akamai.com/identity-cloud/img/oidc/user-experience/configuration/login-dialog-2.png" width=350">
However, the myOpenID button will not allow users to log on using an OpenID account; instead, clicking the button will result in an error message. Why? That’s right: because OpenID is not configured as one of your social login IdPs. The authentication.providers setting displays any social login buttons you tell it to. However, those buttons will only work if they represent IdPs that are available in the widget.
Option 2: Completely remove social login
If you’d prefer not to use social login at all, you can remove all the social login IdPs by setting authentication.providers to an empty array:
"authentication.providers": []When you do that, all the social login IdPs are removed from the Hosted Login login page:
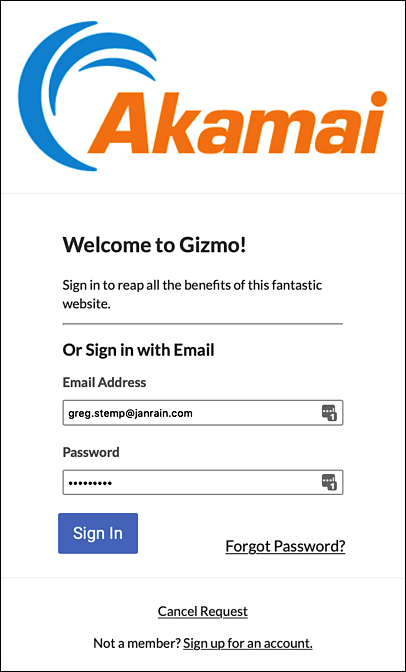
If you remove all the social login IdPs you might also want to change the Or Sign in with Email heading (for example, just Sign in with****Emailwould make more sense seeing as how that’s the only option). Heading text can be found in your Hosted Login flow: search the flow for the text you want to change, then use the Configuration APIs to change that text.
Use configurable social login IdPs in Hosted Login
The Identity Cloud also supports “configurable” IdPs, identity providers that require additional setup and configuration by Akamai Professional Services. If you browse through the list of supported Identity Cloud identity providers, you’ll occasionally see notes similar to this:
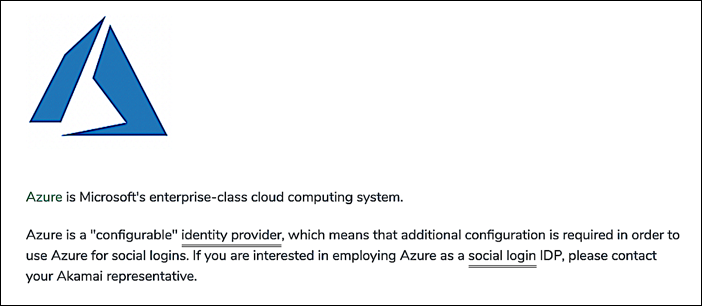
To integrate a configurable IdP with Hosted Login, you must first contact your Identity Cloud representative and work with them on the initial setup and configuration of the identity provider. When that process is complete, Akamai will give you a custom ID and an icon location for the new provider. At that point, you’ll need to do two things:
-
Configure a new setting in your Hosted Login application client.
-
Add the configurable IdP to your list of enabled identity providers.
This documentation explains how to complete both those steps.
Step 1: Add the authentication.providers.custom setting to your application client
After you’ve been given the custom ID and an icon location you can configure the identity provider in your application client’s client settings. To do that, create a new setting named authentication.providers.custom, then assign the value of the new setting to a JSON (JavaScript Object Notation) string similar to the following:
{
  "snap121989":
    {
      "name": "Snapchat",
      "icon": "https://quilt-cdn.janrain.com/HEAD/icons/janrain-providers/snapchat.png",
      "provider": "akamai"
    }
}
Here’s what each piece of the preceding JSON snippet refers to:
| Key | Description |
|---|---|
| snap121989 | Unique identifier for the social login identity provider. This custom ID will be provided to you by your Identity Cloud representative. |
| name | Name of the social login IdP as displayed on the sign-in screen. You can use any name you want, although, needless to say, it makes sense to use the name Snapchat for the Snapchat identity provider, and so on. |
| icon | URL pointing to the icon to be displayed on the sign-in screen. |
| provider | Hostname of your Hosted Login login page. For example, if your login page is https://accounts.akamai.com/login, then the hostname (the value assigned to the provider key) is akamai. |
You can create and configure the new setting by using either Console or the Configuration APIs. If you’re using Console, be sure to remove all the line breaks from the JSON string, leaving a value similar to this:
{"snap121989": {"name": "Snapchat", "icon": https://quilt-cdn.janrain.com/HEAD/icons/janrain-providers/snapchat.png, "provider": "akamai"}}Alternatively, you can use the /config/{appId}/clients/{client_id}/settings operation and the GET method to return all the existing settings and setting values for the application client. Copy those values and paste them into the request body of your API PUT call, then add the new setting to the existing settings before calling the operation.
Step 2: Add the configurable IdP to your list of enabled identity providers
After you have added the authentication.providers.custom setting you can then use your new IdP as a social login identity provider. To do that, add the provider ID (not the name but the ID) to the authentication.providers setting. For example:

Make sure that you enter the correct provider ID. If you don’t, your configurable IdP will still show up on the Hosted Login sign-in screen, but without an icon and without the correct name:
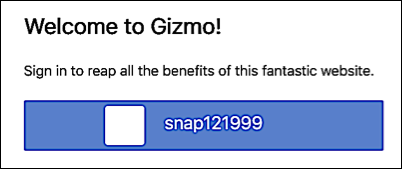
As you might expect, clicking the icon won’t take you to the identity provider’s login page.
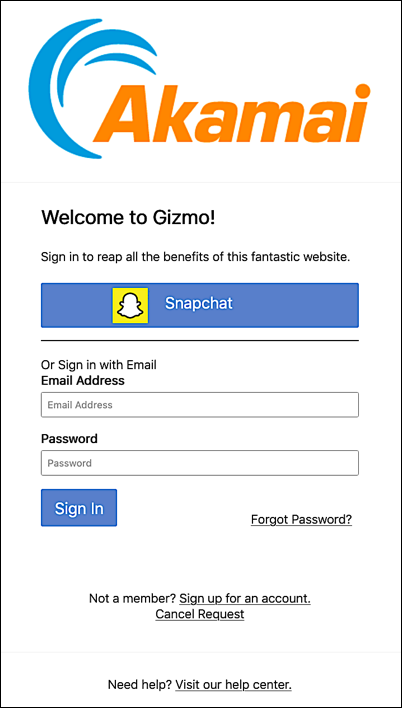
So what happens after you configure the authentication.providers setting? Well, the next time someone logs on to your website, Snapchat will be available as a social login provider:
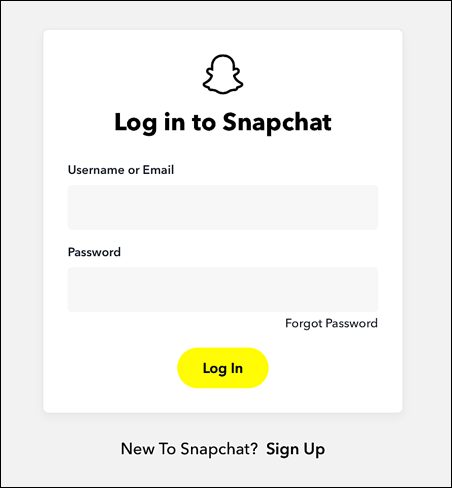
And if the user clicks the Snapchat icon they’ll be redirected to the snapchat.com login page:
Add additional configurable IdPs
In case you were wondering, yes, you can add more than one configurable IdP to your Hosted Login sign-in screen: all you have to do is specify those “extra” identity providers in your JSON string. For example, the following syntax adds Snapchat and Okta to your set of available IdPs:
{
  "snap121989": {
     "name": "Snapchat",
     "icon": "https://quilt-cdn.janrain.com/HEAD/icons/janrain-providers/snapchat.png",
     "provider": "akamai"
     },
    "okta071267": {
     "name": "Okta",
     "icon": "https://quilt-cdn.janrain.com/HEAD/icons/janrain-providers/okta.png",
     "provider": "akamai"
      }
}
After configuring the authentication.providers.custom setting, be sure to specify the IDs for all the configurable IdPs you want to make available for social login:

Note that you don’t have to use all the IdPs defined in the authentication.providers.custom setting; in fact, you don’t have to use any of them if you don’t want to. The authentication.providers.custom setting lists the configurable IdPs that you can use; the authentication.providers setting specifies the configurable IdPs you actually will use. For our sample website we can:
- Use both Snapchat and Okta.
- Use only Snapshot.
- Use only Okta.
- Use neither Snapchat nor Okta.
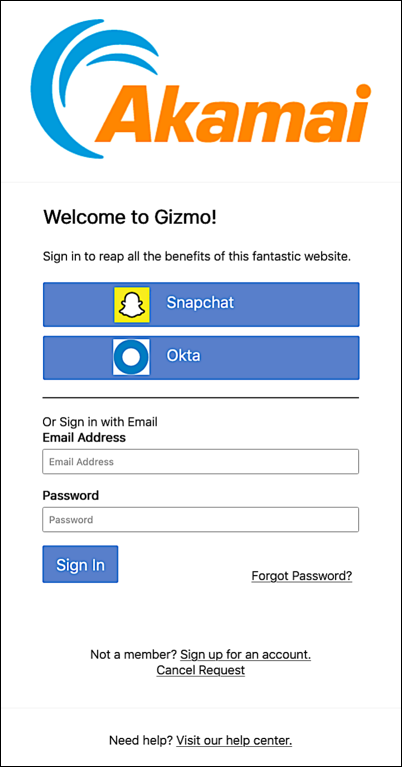
If we choose to use both IdPs then, when a user logs on to your website, they’ll see a sign-in screen similar to the following:
And, of course, you can add both configurable IdPs and standard identity providers to your sign-in screen. (The only real difference between the two? Standard identity providers don’t have to be defined in the authentication.providers.custom setting.) For example, here we’re configuring Snapchat, Okta, and LinkedIn as social login identity providers:

Which means that our Hosted Login sign-in screen will look like this:
If you’re familiar with Snapchat and Okta then you know that Snapchat is typically used for managing consumer accounts and Okta is typically used for managing internal accounts. And that’s fine: Hosted Login can simultaneously support both traditional social login providers and employee directory-based logins. For our sample website, customers can log on by using their Snapchat account, and employees can log on by using their Okta account.
Configure identity providers in the Social Login Dashboard
If you’re new to the Akamai Identity Cloud then you’re probably not familiar with the process for configuring identity providers in the Social Login Dashboard. And that’s a problem: you need to understand that process before you can add social login to Hosted Login. Or at least it would be a problem if we hadn’t included this appendix.
To add social login to Hosted Login, you start by creating an app for each IdP you want to make available for social login. That’s something you have to do first: without these apps social login isn’t going to work.
Well, OK; that’s not entirely true: after all, there area handful of identity providers that can be used as-is without creating an app. However, the most-commonly used IdPs – Facebook, Twitter, Google, LinkedIn, etc. – all require a custom app. To add an IdP to the Social Login widget that IdP needs to be configured. And to configure an IdP, you almost-always need to supply the client ID and client secret for the custom app that you created.
After you create your apps, be sure and note the client IDs and client secrets. (Note, too that different IdPs might use different terminology: for example, Amazon refers to the client ID and client secret, while Facebook refers to these same items as the app ID and the app secret. (See the individual Social login configuration guides for more information.) With the client ID and client secret safely in hand, log on to your Social Login app and then click the Manage Providers icon (the icon in the Providers pane that looks like a pencil):
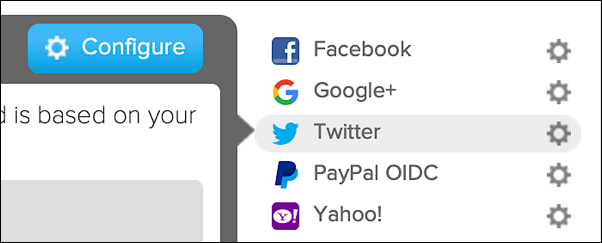
On the Configure Providers page, you’ll see a list of the identity providers that can be used with Hosted Login:
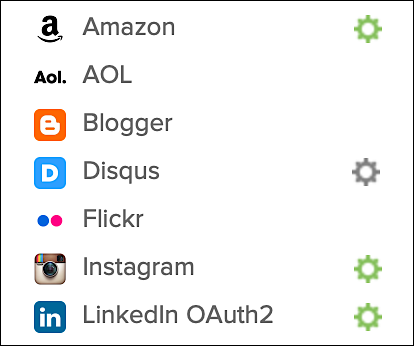
If you look closely at the preceding graphic, you’ll see that each provider may (or may not) be followed by a green or gray gear icon. What does that mean? It means this:
-
A green gear icon means that the identity provider has already been configured, and is ready to be used for social login. For example, in the preceding graphic, Amazon, Instagram, and LinkedIn OAuth2 are ready for use. As you might expect, the first time you log on to the Social Login dashboard you won’t see any green icons. That’s because you haven’t configured any of the identity providers.
-
A gray gear icon means that the IdP has not been configured for use. In our example above, you can’t use Disqus, at least not at the moment; like we said, the gray icon indicates that Disqus has not been configured yet.
-
No icon means that the IdP can be used as-is, without creating an app and without doing any additional configuration? Want to use Flickr for social login? Then you’re already in business.
Like we said, the first time you log on to the Social Login dashboard you won’t have any IdPs configured. Consequently, your list of identity providers will look more like this:
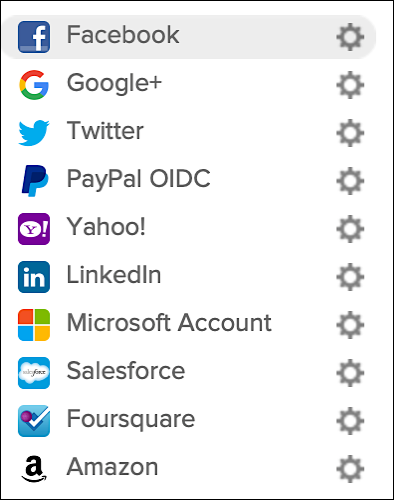
To use any of those IdPs, you’ll have to start by configuring that IdP for use with Social Login (and, by extension, for use with Hosted Login).
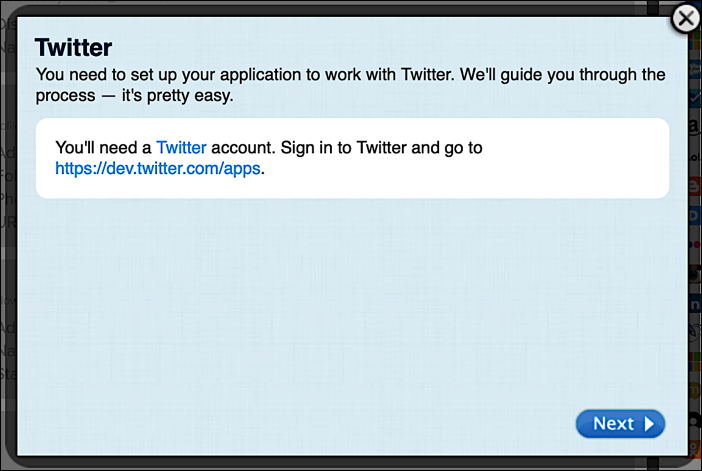
And just exactly how do you do all that? To configure an IdP, click the appropriate identity provider and then click the blue Configure button:
Clicking Configure brings up a dialog box that walks you through the configuration process:
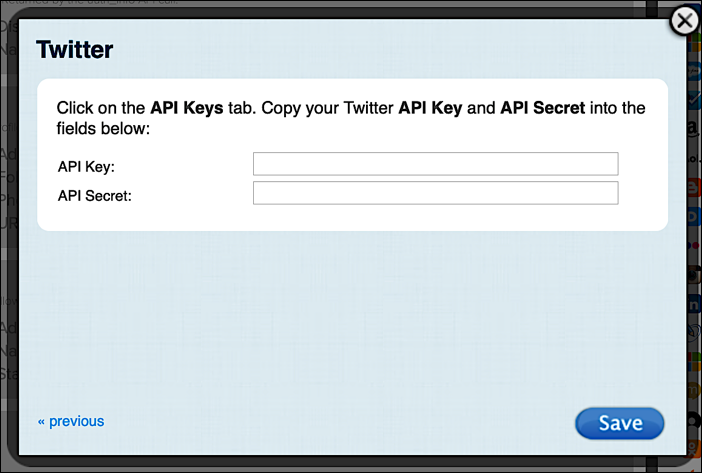
Click the Next button, and enter any of the requested information. Continue clicking Next, and you’ll eventually be asked to enter your client ID and client secret (in the case of Twitter, your API Key and API Secret):
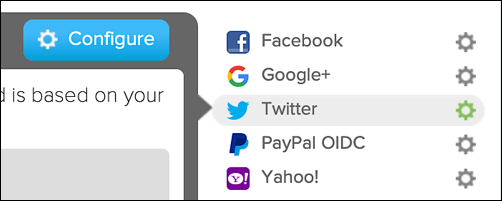
Enter the requested information and then click Save. When you’re done, Twitter will be ready for use, as evidenced by the green gear icon:
Once you’ve configured your identity providers, go back to the Social Login dashboard home page and then click Sign-Ins in the Widgets and SDKs section:
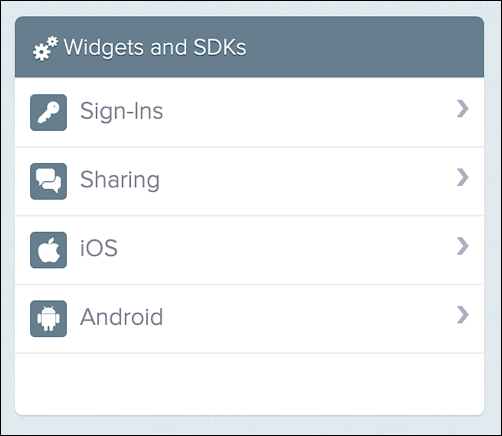
That takes you to the Sign-In page:
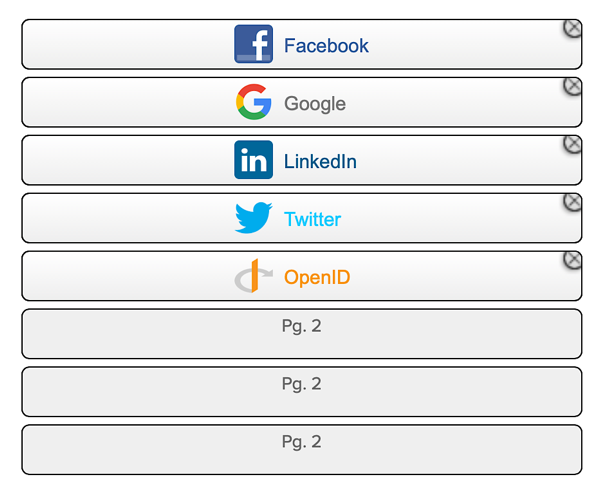
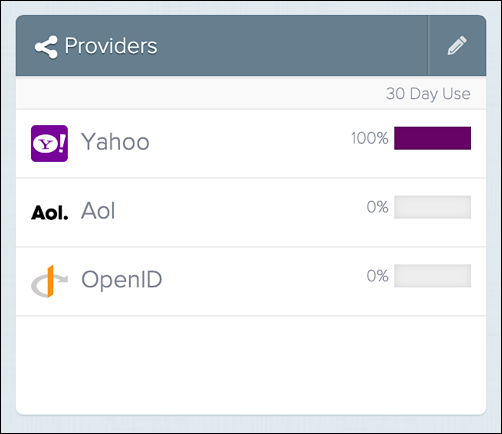
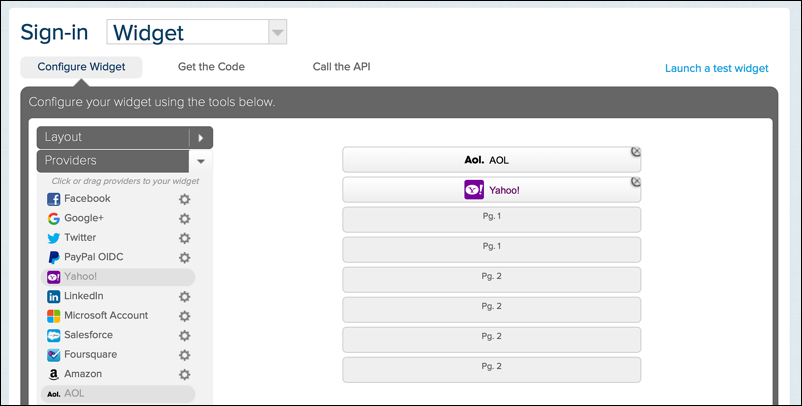
On this page, use the Provider Per Page control to set the number of identity providers that you want to use for social login (e.g., 6), and then click Providers. The Providers pane will look similar to this:

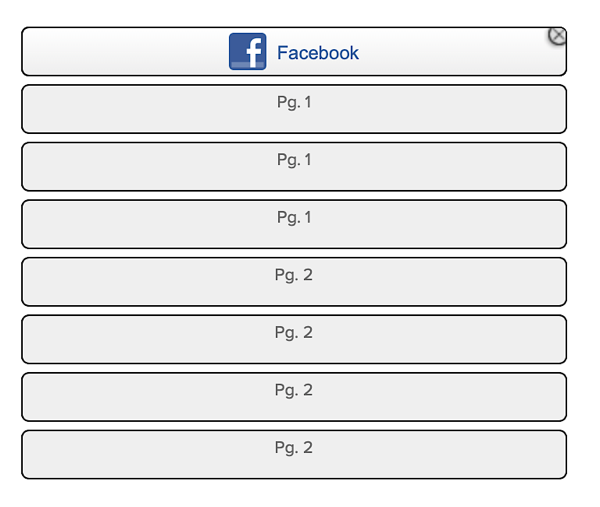
By default, three IdPs – AOL, Yahoo!, and OpenID – are configured for you. What if you don’t want to use these three providers? That’s fine. If you look in the upper right-hand corner of each provider, you’ll see a little X:

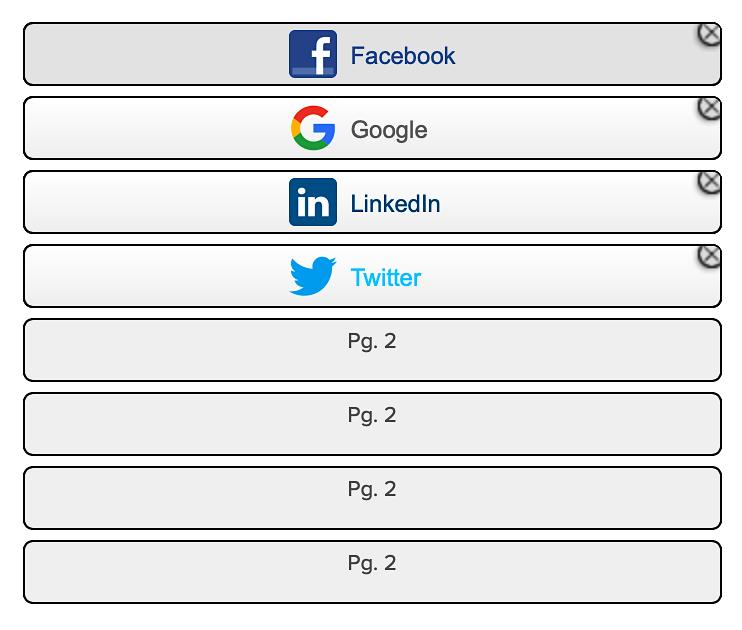
Click that X, and the provider will be removed from the set of configured IdPs:
Keep clicking, and you’ll soon have a blank slate to work with:
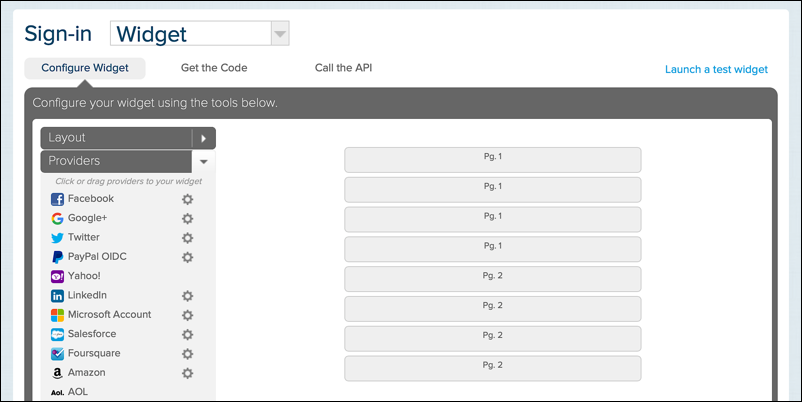
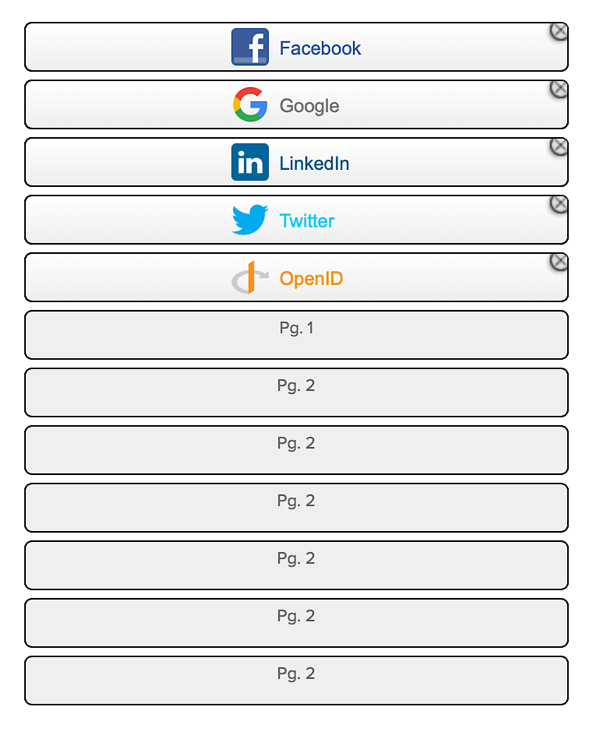
To add a provider to this blank slate, click the appropriate IdP in the list of providers, then drag and drop the provider onto the set of available identity providers:
Keep dragging and dropping until you've added all the providers that you want to add:
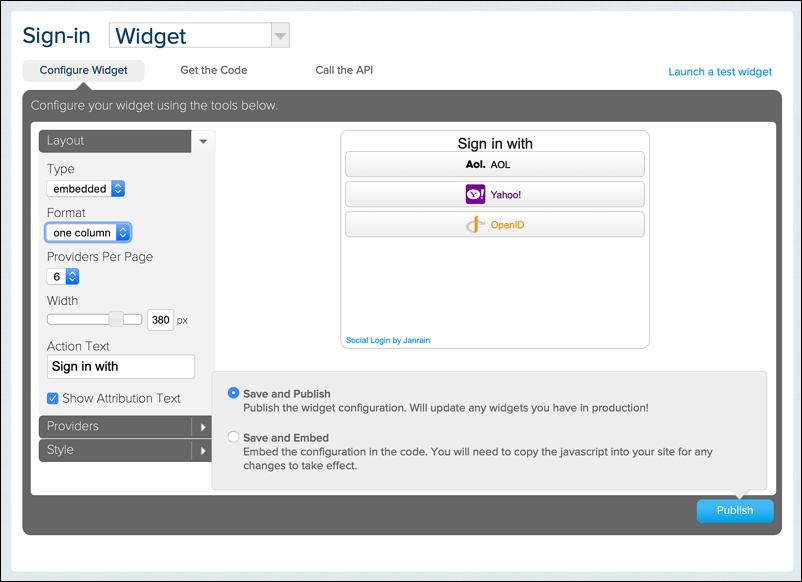
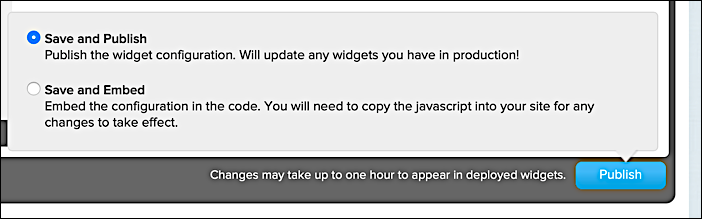
At that point, scroll to the bottom of the page, make sure that Save and Publish is selected, then click Publish:
After saving your set of providers, it’s recommended that you test each one to make sure that users can actually use those providers (and the apps you created) for social login. To test your IdPs, click the Launch a Test Widget link in the upper right-hand corner of the Sign-In page. That brings up a test widget similar to this:

To test an identity provider (e.g., LinkedIn) click the appropriate icon. The login page for that IdP should appear in a pop-up window(if it doesn’t, that usually indicates a problem with the way you configured your app for that IdP):
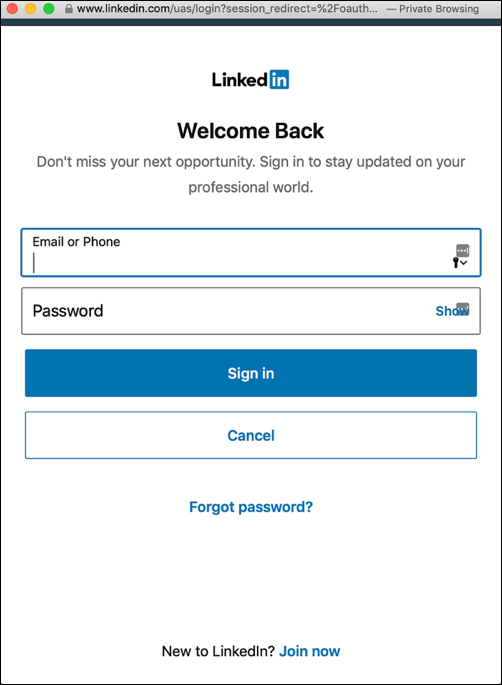
Log onto the IdP (in this case, using any valid LinkedIn account) and, as needed, agree to any consent screens that might appear:
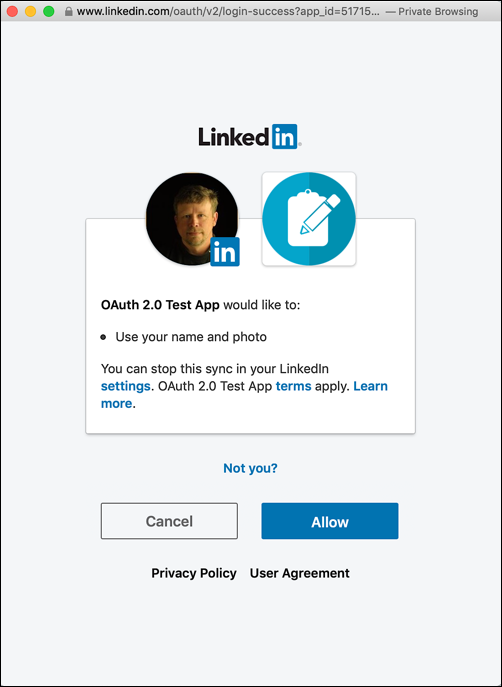
If all goes according to plan, you’ll get back an API response similar to this:
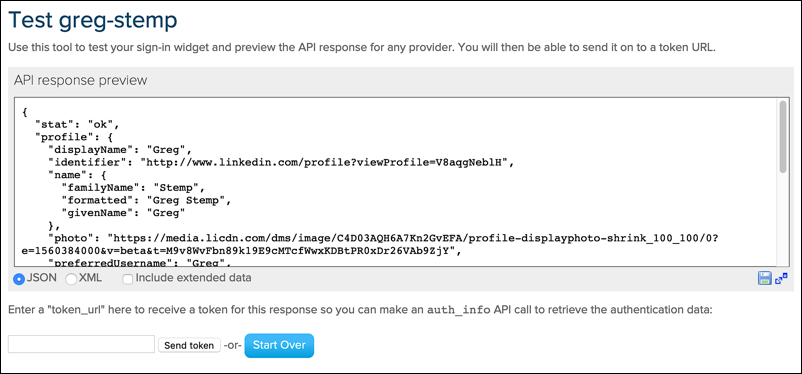
If you do see something like that, then, congratulations: you now know that social login is working, at least for the selected IdP.
Updated 3 months ago