Sina Weibo social login guide

Sina Weibo is a Chinese microblogging site (“weibo” is Chinese for “microblogging”) which has approximately 220 million subscribers and 100 million daily users.
Before you begin
To use Sina Weibo for social login you must:
-
Obtain a Sina Weibo developer’s account from https://open.weibo.com/developers.
-
Do one of the following:
- Open a previously-created Sina Weibo app, and copy the app key and app secret.
- Create a new app and copy the app key and app secret.
-
Use the Social Login Dashboard to configure Sian Weibo as a social login provider.
Web pages on the Sina Weibo Developers site are written in Chinese. If you do not speak Chinese, you might want to use a web browser than can translate the Sina Weibo web pages. For this configuration guide, we used Google Chrome and its Translate to English option.
Create a Sina Weibo application
This section walks you through the process of creating a Sina Weibo application for social login. If you already have an application, see the Using an Existing Sina Weibo Application for Social Login section of this documentation.
To configure a Sina Weibo application, complete the following procedure:
-
Log on to the Sina Weibo Developers site (https://open.weibo.com/developers).
-
From the Developers site home page, click Web:

-
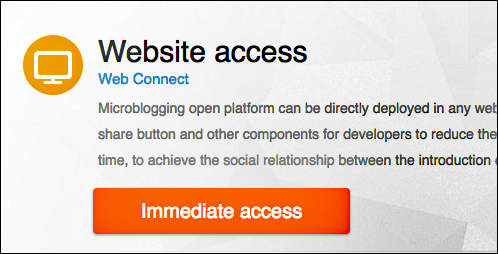
From the Website access page, click Immediate access:
-
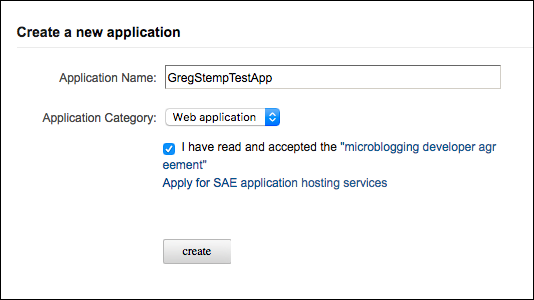
On the Create a new application page, enter a name for your application in the Application Name field. Note that your application name cannot include blank spaces:
-
Click Application Category and then click Web application.
-
Select I have read and accepted the “microblogging developer agreement” and then click Create.
-
On the Application status page, enter:
- Your website URL in the Application Address field.
- A brief description of your application in the first Application Description field.
- A longer description of your application in the second Application Description field.

-
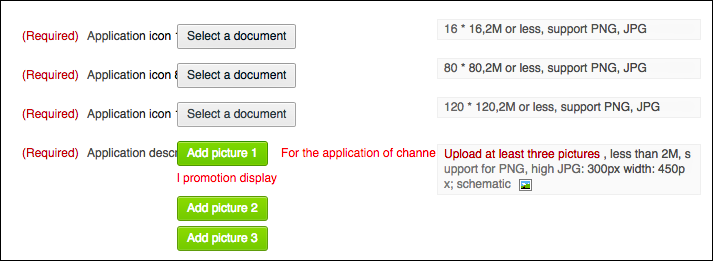
Scroll down the page and locate the three green buttons used for uploading icons for your application:
-
Click the first button (Add picture 1) and then use your operating system’s File Open dialog box to select a 16 pixel by 16 pixel icon (saved either as a .PNG or a .JPG file).
-
Repeat the process with the Add picture 2 button to add an 80 pixel by 80 pixel icon, then click the Add picture 3 button to add a 120 pixel by 120 pixel icon.
-
Click Save the above information to:

-
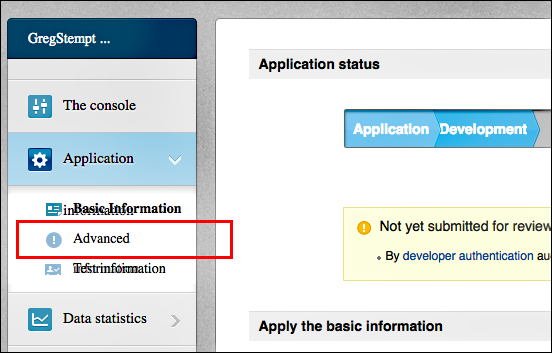
Scroll back to the top of the page and, in the left navigation bar, click Advanced:
-
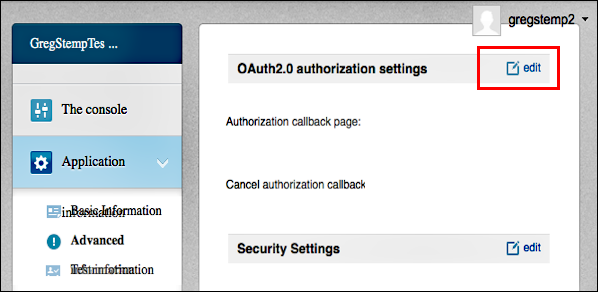
On the Advanced Settings page, click Edit next to the label OAuth2.0 authorization settings:
-
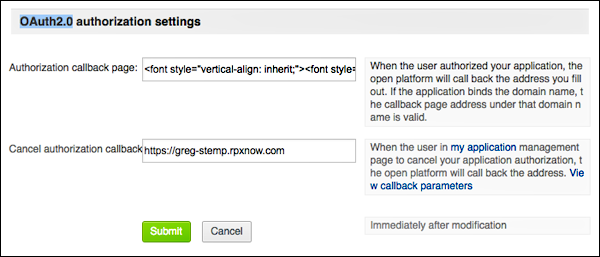
Enter your redirect URL in the Authorization callback page field. If you are using a standard Identity Cloud domain, your redirect URL will look similar to this: https://greg-stemp.rpxnow.com/sinaweibo/callback.
-
Enter your authorization cancellation page in the Cancel authorization callback field. This can simply be your website URL:

-
Click Submit:
-
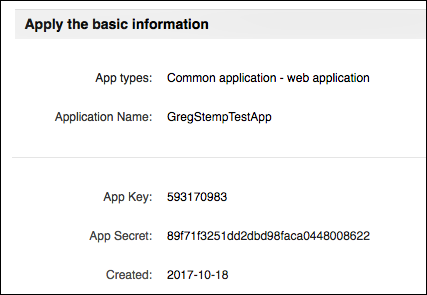
On the Application Status page, copy and save the App Key and the App Secret. You can copy this information to a text editor, then close the text editor after you have configured social login:

-
Log off from the Sina Weibo Developers site.
Use an existing Sina Weibo application for social login
If you already have a Sina Weibo application that can be used for social login, complete the following steps to retrieve the application’s app key and app secret:
-
Log on to the Sina Weibo Developers site (https://open.weibo.com/developers).
-
From the Sina Weibo Developers home page, click My Applications:

-
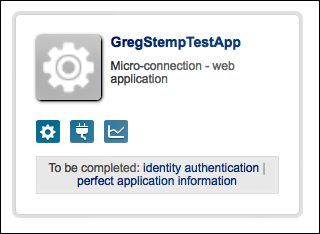
From the home page for your applications, click the Settings icon for the application you want to use for social login:
-
On the Application Status page, copy and save the App Key and the App Secret. You can copy this information to a text editor, then close the text editor after you have configured social login:
-
Log off from the Sina Weibo Developers site.
Configure Sina Weibo as a social login provider
To configure Sina Weibo as a social login provider, make sure you have your Sina Weibo app key and app secret, and then complete the following procedure:
-
Log on to your Social Login Dashboard (https://dashboard.janrain.com).
-
From the Dashboard home page, click the Manage Engage Dashboard icon.
-
From the Engage Dashboard home page, in the Widgets and SDKs section, click Sign-Ins.
-
From the Sign-in page, verify that Widget is selected and then expand Providers.
-
From the list of Providers, click Sina Weibo.
-
In the Sina Weibo dialog box, click Next until you reach the screen requesting the app key and app secret:

-
Paste your Sina Weibo app key in the App Key field, paste your Sina Weibo app secret in the App Secret field, and then click Save. Sina Weibo appears in your social login widget.
-
When you are finished, select Save and Publish and then click Publish. It might take as long as one hour before Sina Weibo appears as a social login option on your web site.
Test Sina Weibo social login
To test Sina Weibo social login, complete the following procedure:
-
Do one of the following:
- If you have just published your widget settings, click the Test your widget link that appears after the widget has been saved.
- If you previously published your widget settings then, from the Engage Dashboard Sign-in page, click Launch a test widget.
-
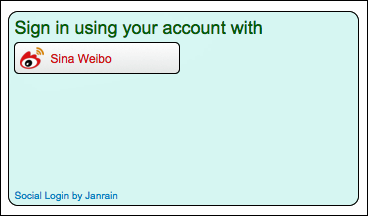
From the Test page, click the Sina Weibo icon:
-
In the Application authorization window, click the red Allow button and then logon using a valid Sina Weibo account:

-
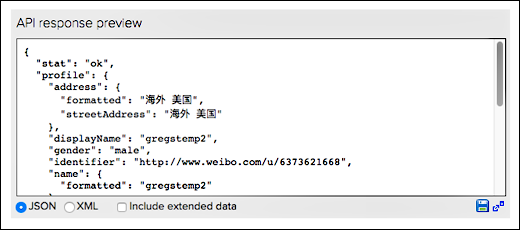
If login succeeds, information returned from the Sina Weibo profile is displayed in the API response preview field:

The returned profile information will vary depending on the Sina Weibo account used in the test, You can verify Sina Weibo profile fields by completing the following procedure:
-
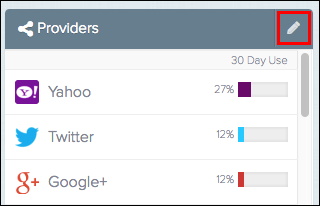
From the Engage Dashboard home page, click the Manage Providers icon:
-
From the Configure Providers page, click Sina Weibo.
-
Profile information returned from Sina Weibo is displayed onscreen. For example:
Assign a different Sina Weibo app for social login
If you want to use a different Sina Weibo app or if you need to change your existing app, you must update the Sina Weibo provider configuration settings. To do that, complete the following procedure:
-
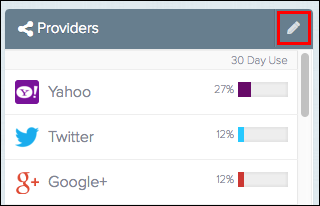
From the Engage Dashboard home page, click the Manage Providers icon:
-
From the Configure Providers page, click Sina Weibo.
-
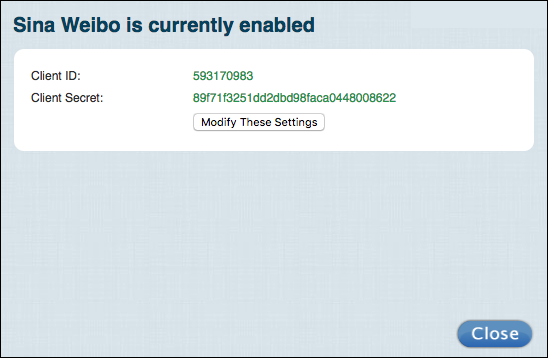
Click the green Configured button to display the Sina Weibo is currently enabled dialog box:
-
To change the Sina Weibo configuration, click Modify these settings.
-
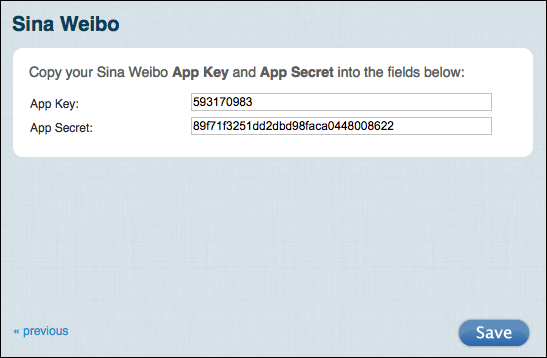
In the Sina Weibo dialog box, change the App Key and/or App Secret as needed, and then click Save:
Although you can modify your Sina Weibo settings, you cannot delete those settings. If you delete the settings and then save your changes, you’ll see the error message Please enter your Consumer Key and Secret exactly as Sina Weibo shows them.
This means that you cannot “unconfigure” the provider: once configured, the Sina Weibo icon will always be shown as green (i.e., configured) in the Social Login Dashboard.
Remove Sina Weibo as a social login provider
You can remove Sina Weibo as a social login provider by completing the following procedure:
-
Log on to your Social Login Dashboard (https://dashboard.janrain.com).
-
From the Dashboard home page, click the Manage Engage Dashboard icon.
-
From the Engage Dashboard home page, in the Widgets and SDKs section, click Sign-Ins.
-
From the Sign-in page, verify that Widget is selected and then expand Providers.
-
In the widget, click the X in the upper right corner of the Sina Weibo icon.
-
Scroll to the bottom of the page, select Save and Publish, and then click Publish. Sina Weibo no longer appears in the sign-on widget.
You must always have at least one social login provider in the widget. If you delete all the providers and then click Publish, you’ll see the error message Couldn’t save configuration: No providers.
Updated almost 4 years ago
