Add attributes to reports
This article applies to the following Customer Insights roles: Developer
Customer Insights gives you the ability to access any attribute from any of your entity type schemas: the application can directly query the user profile store and return any attribute it finds there.
So does this mean that all your user profile attributes are available to you the moment you log on to Customer Insights? No. But that's OK, because there's an easy way to make any attribute available, and, as a result, customize CI in a manner that bests suits your needs.
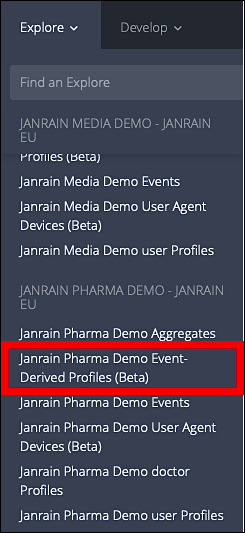
There is one catch, however. Adding attributes applies only to the new directory-derived method of querying your user profile databases, which means that this does not apply to legacy Explores. The original Customer Insights Explores, and their original attribute sets, are still available and can still be used; however, they’ve been marked as “beta” to indicate that, while useful, they are no longer the state-of-the-art method for retrieving data:
As it turns out, any attributes you add to Customer Insights will be assigned to the new entityTypeProfile Explores (for example, user Profiles). By default, these Explores ship with no default dimensions, and with only a single measure (User Count):
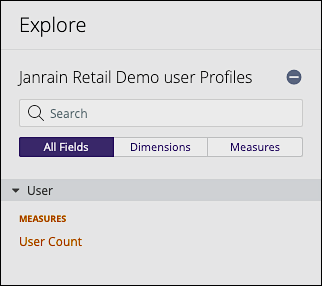
That also means that, by default, the only thing you can do with this new and improved way of querying data is to return your total number of users:

And that’s it. If you want to do anything else you’ll need to add some additional attributes to the appropriate Profiles Explore.
As noted, all attributes you add to Customer Insights are assigned to a Profile Explore: if you add 30 attributes to Customer Insights, your Profile Explore will then have 30 dimensions. At the moment, there’s no way to take those 30 attributes and divvy them up between two or three different Explores.
This is also a good time to clarify that you’ll have one Profile Explore for each of your user profile entity types. You say you’ve got 7 different entity types? Then you’ll have 7 different Explores. And, if you want, you can add a different set of attribute to each of those Explores.
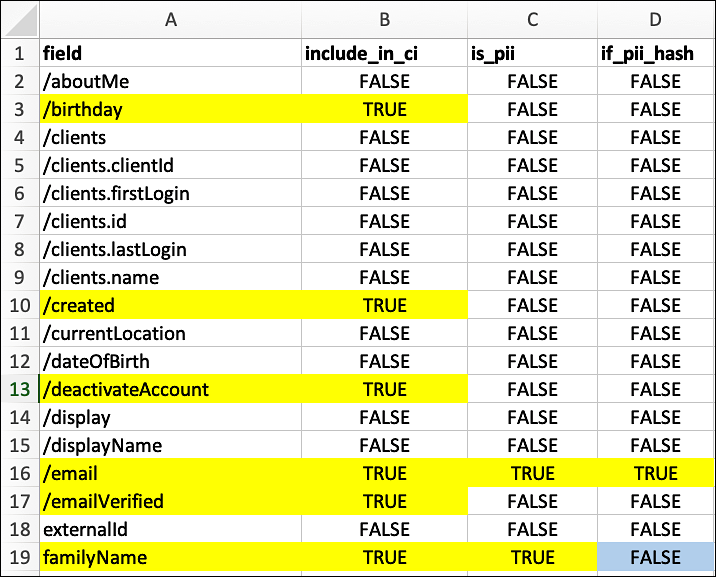
To add attributes to Customer Insights, start by contacting your Akamai representative and telling him or her what you’d like to do. In return, Akamai will export the schemas for all your entity types (or at least for those entity types containing attributes you want to add to Customer Insights). Akamai will then send you a spreadsheet (one for each entity type) that will look similar to this:

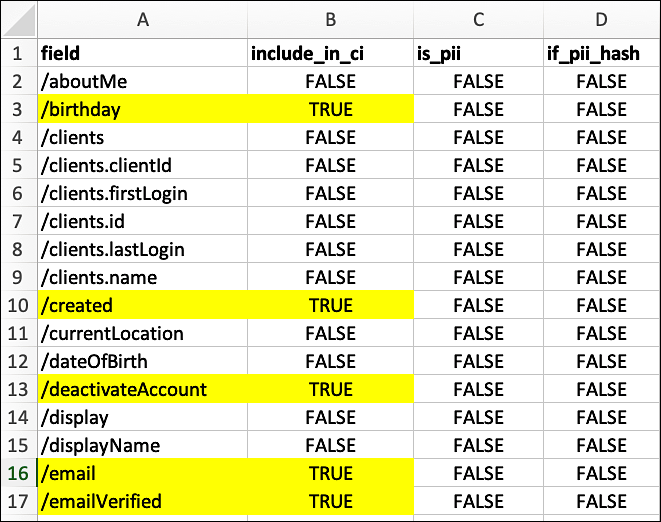
As you can see, there are four columns in this spreadsheet:
field
Each item listed here represents an attribute in the entity type. By default, all the attributes from the entity type are listed in this first column, and in alphabetical order.
include_in_ci
A Boolean value that indicates whether or not you want the attribute to be available in Customer Insights; by default, this value is set to FALSE for each attribute, meaning that the attribute should not be available in Customer Insights. To make an attribute available, simply set include_in_ci to TRUE. For example, the following screenshot shows 5 attributes that have been marked for inclusion in Customer Insights (color coding added for emphasis):
In theory, you can include as many attributes as you want in Customer Insights. Before doing that, however, you should stop and ask yourself whether there is a valid business reason for adding a given attribute. For example, middleName is a valid Identity Cloud user profile attribute and, as such, can be added to Customer Insights. The question you need to ask, however, is this: do you really need to create reports based on user middle names? If the answer is no, then there’s no reason to add middleName to Customer Insights. After all, having too many attributes can needlessly complicate report creation and report viewing.
Along similar lines, you should also consider whether or not users have been supplying the data in question: maybe you do have a good reason to create reports based on middle name, except that only a handful of users have bothered to tell you their middle name. Likewise, you should consider how “clean” your data is before adding it. For example, perhaps you’ve given users the option of specifying their country of residence but you haven’t been validating those entries. As a result, you have entries like these:
- US
- United St.
- America
- Not telling you!
- United States of America
- I’m a man without a country
- The best country in the world!
- USA
- The States
Again, you might have a business need for creating reports based on country of residence, but if most of your data resembles the examples shown above, well ….
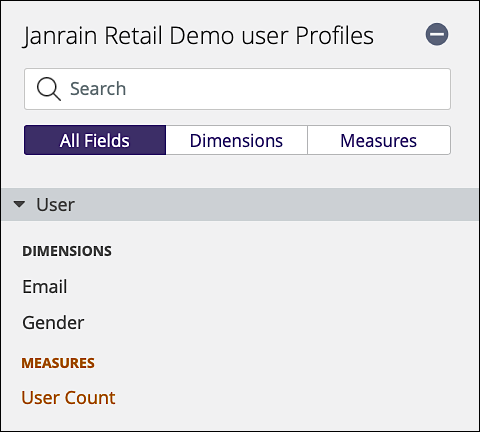
We should also mention that, when adding attributes to CI, the dimension name in the Explore will be the attribute name. For example, if you add the email and gender attributes to the user Explore, your Explore will end up looking like this:
is_pii
Indicates whether the attribute contains personally-identifiable information (PII). This is important, because Customer Insights can be used to limit exposure to PII: you can specify which users can actually view personally-identifiable information and which ones can’t. However, that sort of obfuscation can only take place if you specify which fields contain personally-identifiable and which ones don’t. For example, the screenshot below shows two fields – email and familyName–tagged as containing PII:

And what happens if an attribute is tagged as containing personally identifiable information? For the answer to that question, see if_pii_hash below.
Oh, and for attributes that don’t contain PII, simply leave the default value (FALSE) as-is.
if_pii_hash
Indicates how personally identifiable information should be displayed. If set to FALSE, PII will not be displayed at all: if a Look or a Dashboard returns a PII field, that field will not be displayed (in other words, it will come up blank). If set to TRUE, that field will be displayed as a hash value; for example, a user’s email address might look like this:
a2FyaW0vcmFmaXJAZW32aWwuLp9t
It’s important to note that the preceding value is not just a random string of characters; instead, it’s an encoded value based on the user’s email address. That’s important to know because it means that any time you see the email address a2FyaW0ubmFmaXJAZW1haWwuY29tyou know you’re dealing with the same user. You won’t know who that user is, but this does allow you to do such things as follow the user’s journey through your system.
In the following example, email has been set to display a hash value while familyName has been configured to not be displayed at all:
That’s all you need to know. Save the finished spreadsheet and return it to your Akamai representative; he or she will then take care of configuring Customer Insights for you.
Updated about 1 month ago