
Manage NodeBalancers
View NodeBalancers
Log in to Cloud Manager and select NodeBalancers from the left menu. If any NodeBalancers exist on your account, they are listed on this page.

Each NodeBalancer in the matrix is displayed alongside the following details:
- Label: User-defined name for the NodeBalancer. Premium NodeBalancers display a badge alongside their label to distinguish them from basic instances.
- Backend Status: The number of backend nodes that are available and accepting connections (up) or have been removed from the rotation and are not accepting connections (down).
- Transferred: The amount of network transfer consumed by the inbound traffic to the NodeBalancer.
- Ports: A list of the ports that have been configured on the NodeBalancer.
- Frontend IP: The public-facing IPv4 address assigned to the NodeBalancer (either automatically allocated or a user-selected Reserved IP). Click the copy icon next to the address to quickly copy it to your clipboard.
- Backend: Backend connectivity types (VPC, IPv6, or IPv4).
- Region: The data center where the NodeBalancer is located.
- VPC: The name of the VPC configured for this NodeBalancer or None. The NodeBalancer can serve traffic to the backend Linodes within the VPC.
Create a NodeBalancer
To create a NodeBalancer, follow the instructions within the Create a NodeBalancer guide.
Review, monitor and edit a NodeBalancer
Navigate to the NodeBalancer page in Cloud Manager and select the NodeBalancer you wish to edit. See View NodeBalancers.
This displays the details and settings for the selected NodeBalancer.
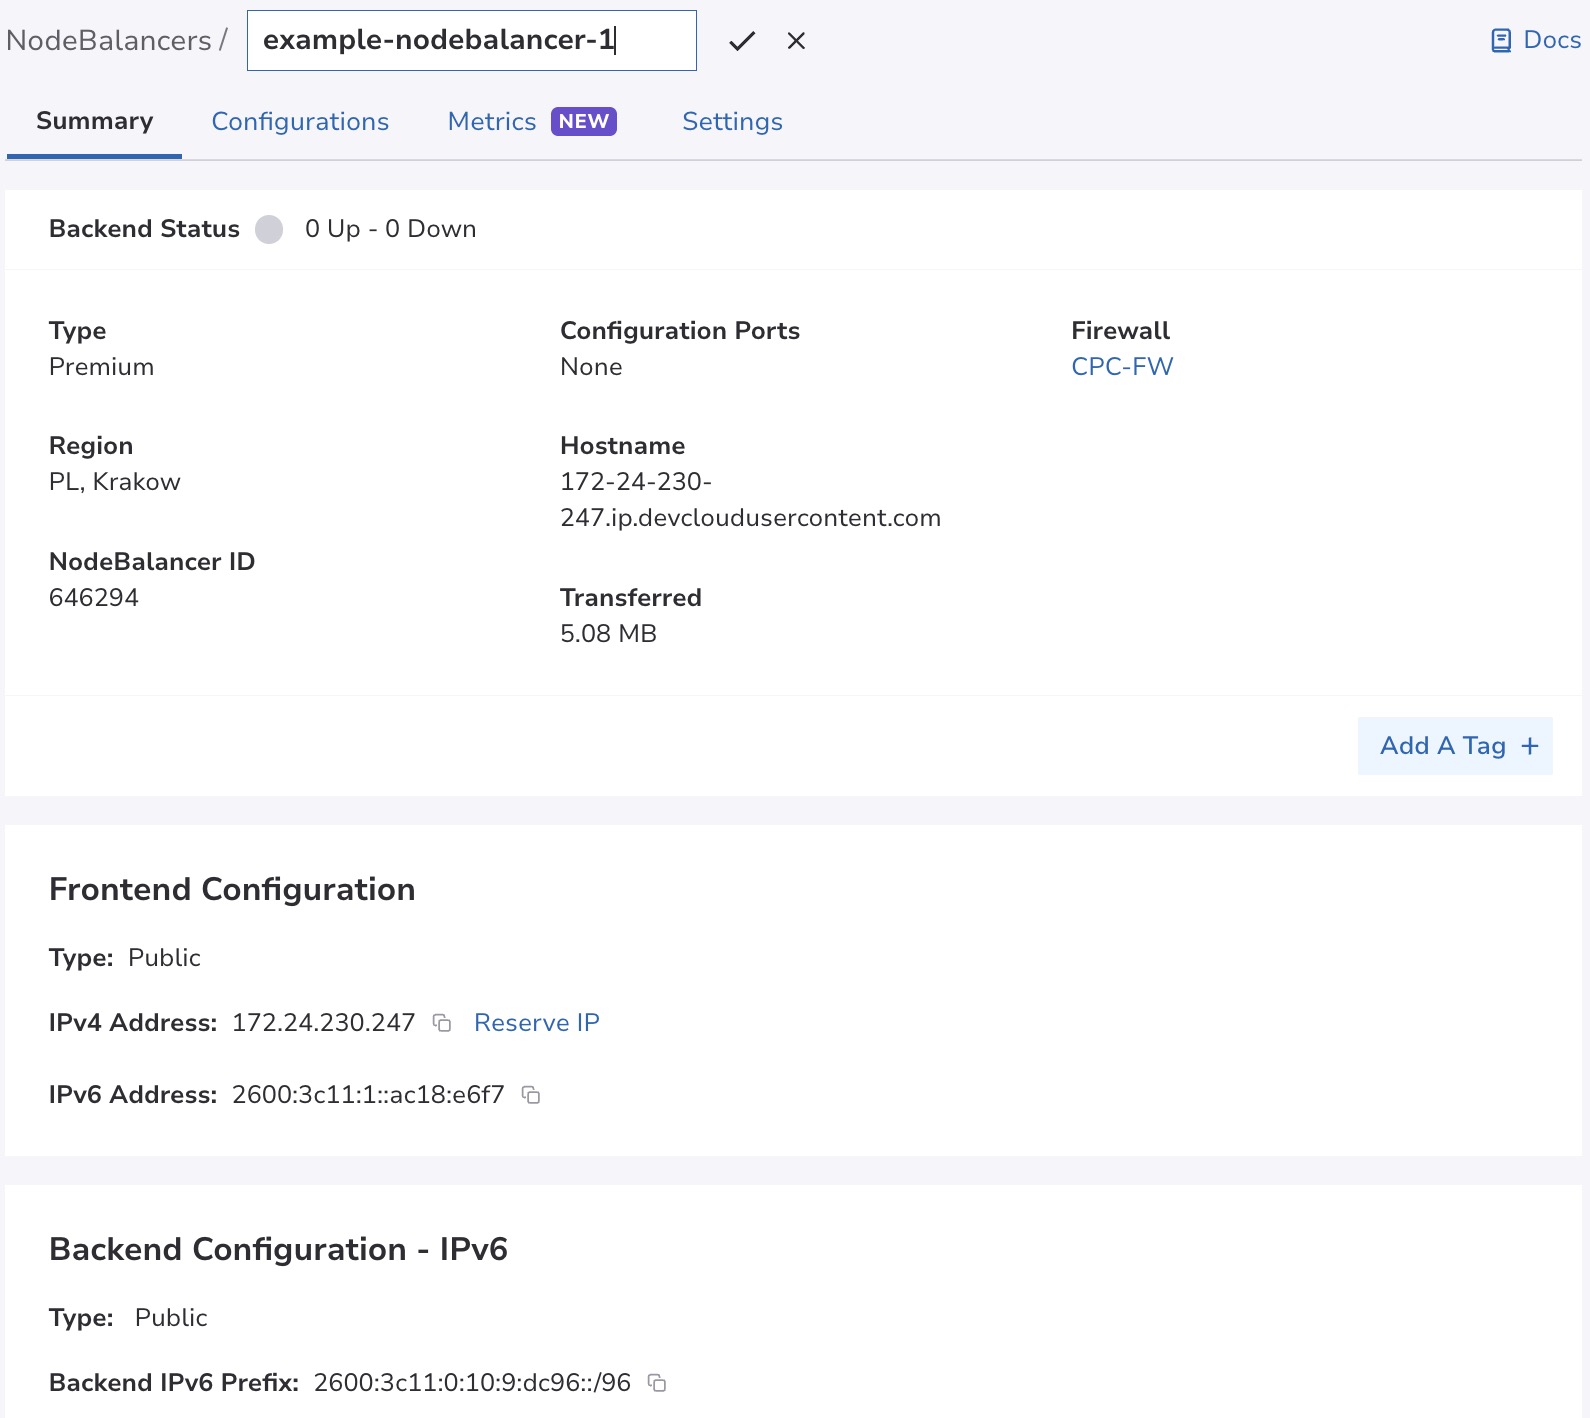
From here, the following tabs are available:
- Summary: View essential service information, including the NodeBalancer tier (basic or premium), assigned region, hostname, network transfer usage, configuration ports, and attached Cloud Firewalls.
This tab includes frontend and backend configuration information:- Frontend Configuration: Displays your public IPv4 and IPv6 addresses. If the NodeBalancer uses an auto-assigned IPv4 address, click the Reserve IP link next to the address to open the Reserve an IP Address drawer and permanently allocate that static IP to your account.
- Backend Configuration: Displays the networking details used to route traffic to backend nodes. The connectivity method (IPv6, VPC, or Legacy) is displayed. The Type field shows whether the connection is Public or Private. Depending on your configuration, this section also displays the specific backend IP details, such as the backend IPv6 prefix, assigned VPC and subnet IPv4 range, or legacy private IPv4 range.
- Configurations: This lists each port configured for the NodeBalancer, with the ability to edit the settings for the existing port or add a new port. See configuration options for more information on each of these settings.
- Metrics. Graphs showing the number of connections and network traffic are also provided.
With Cloud Pulse Metrics, you can monitor and analyze NodeBalancer performance using detailed data that you can filter and export. For more information and a list of supported NodeBalancer Cloud Pulse metrics, see Monitor NodeBalancers.
- Settings: Displays additional settings for the NodeBalancer, including the label, firewall and connection throttle setting.
Delete a NodeBalancer
-
Navigate to the NodeBalancer page in Cloud Manager and select the NodeBalancer you wish to edit.
-
Navigate to the Settings tab, scroll to the Delete NodeBalancer section, and click Delete.

-
A confirmation dialog appears. To confirm deletion, type the name of the NodeBalancer in the field and click Delete to proceed with removing the service from your account.
Firewalls and Reserved IPsWhen you delete a NodeBalancer that has a firewall, the NodeBalancer is also deleted in Cloud Firewalls. Firewalls are not deleted when you delete a NodeBalancer.
If this NodeBalancer was using a Reserved IP, deleting the NodeBalancer doesn't delete or release the IP address. The IP address remains allocated to your account as an unassigned Reserved IP, allowing you to attach it to a different resource in the same region later. The hourly charges still apply to unassigned Reserved IPs on your account. To fully remove the IP and stop its billing, you must delete it from the Reserved IPs landing page under the Networking navigation menu.
Unassign, change or add firewalls
After the NodeBalancer is created, you can add a firewall, select a different firewall or unassign the current firewall using the following information;
Unassign the firewall
-
Navigate to the NodeBalancer page in Cloud Manager and select the NodeBalancer that has the firewall you wish to unassign.
-
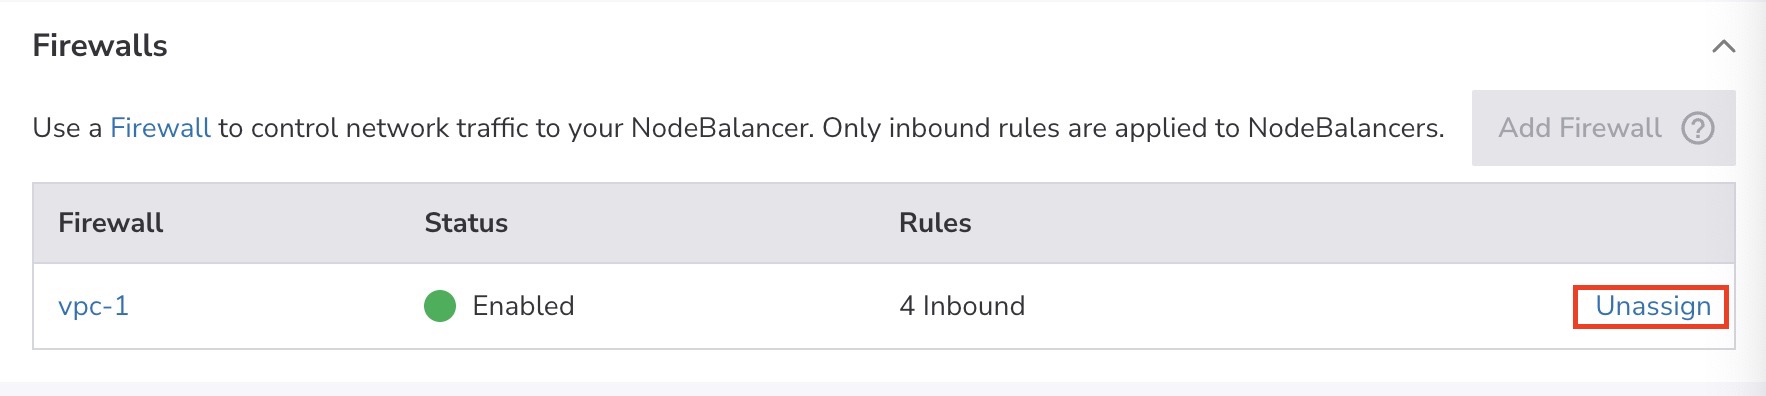
Navigate to the Settings tab. In the Firewall section, click Unassign.
-
A confirmation dialog appears. Click Unassign Firewall to proceed with unassigning the firewall from the NodeBalancer.
You can also remove/unassign firewalls from a NodeBalancer using Cloud Firewalls.
Add a firewall to an existing NodeBalancer
-
Navigate to the NodeBalancer page in Cloud Manager and select the NodeBalancer that you would like to assign a firewall to.
-
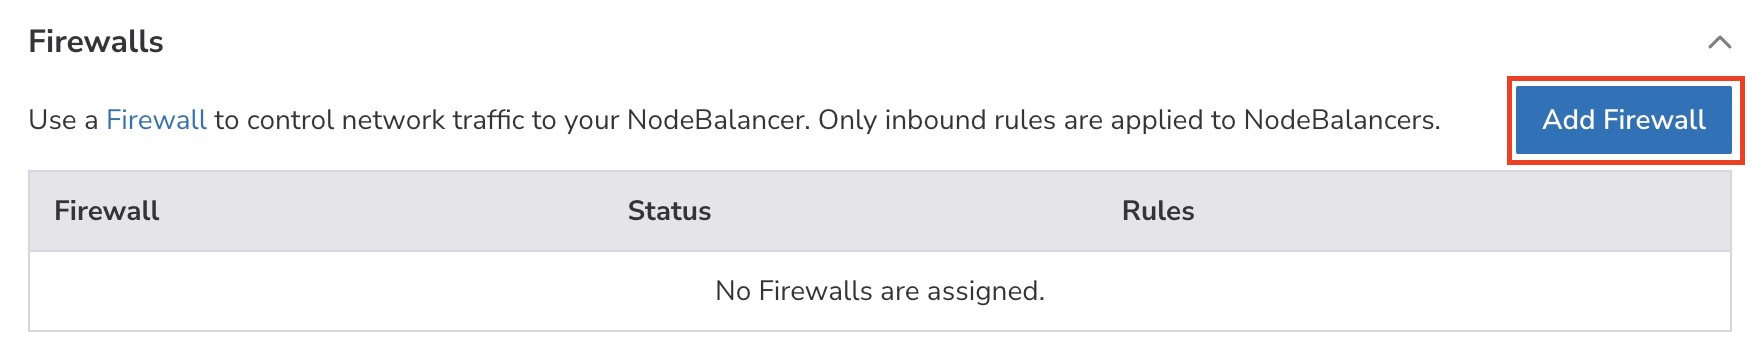
Navigate to the Settings tab. In the Firewall section, click Add Firewall.
-
The Add Firewall drawer opens. Select a Firewall to assign to your NodeBalancer, click Add Firewall.
Create a new firewall for the NodeBalancer
To create a new Cloud firewall for an existing NodeBalancer, follow the instructions in Create a Cloud Firewall and Add rules.
Change the NodeBalancer's firewall
Updated 17 days ago