Create a Linode
This guide walks you through creating a Linode in a core compute region using Cloud Manager. If you wish to create a Linode in a distributed compute region, see Create a Linode in a Distributed Compute Region.
To create a Linode, you will:
- Open the Create form in Cloud Manager
- Select a region
- Choose a distribution, app, or image
- Choose a plan
- Set the label, add tags, and assign to a placement group
- Create a password and add SSH keys
- Enable or disable disk encryption
- Add user data
- Set up networking
- Configure additional options
- Deploy the Linode
Open the Create form in Cloud Manager
Log in to Cloud Manager, click the Create dropdown menu on the top bar, and select Linode. This opens the Create form.

Select a region

Next, you must select the region where the Linode will reside. Regions correspond with individual data centers, each located in a different geographical area. You should likely select the region closest to you and/or your customers. This helps reduce latency and can make a significant impact in connection speeds and quality. If you wish to make use of a particular product or service, you may also wish to verify that the product is available within your desired data center.
You need to select a region before selecting your plan type. Pricing may vary between data centers. The following resources will help you choose a data center.
Choose a distribution, app, or image

One of the first steps to deploy a Linode is to decide what you actually wish to deploy. You're able to select a Linux distribution for a barebones install, a Marketplace App with your desired software, and a few other options.
-
Distributions: Select from any supported Linux distribution. This option lets you start with a stable Linux operating system and build your own software stack from scratch. Popular distributions include the latest LTS releases of Ubuntu, Debian, CentOS Stream, RHEL-derivatives (such AlmaLinux and Rocky Linux), and more. Each distribution comes with its own set of preinstalled software and commands. See Choose a Linux distribution for a full list of distributions.
-
Marketplace: Select from the many Apps currently featured in Marketplace. This installs and configures your desired software, allowing you to start using your applications right away. Popular apps include Wordpress, WooCommerce, LEMP, cPanel, Plesk, and Nextcloud. See Marketplace Apps - Get started.
-
StackScripts: Select from any StackScripts previously created on your account or from a community StackScript. StackScripts automate the deployment of software and configuration by executing commands within your system after the first boot. See Deploy a Linode using a StackScript.
-
Images: Select from any Custom Image or Recovery Image stored on your account. Recovery Images are generated after a Linode has been deleted and Custom Images can be created based on existing Linodes or image files. See Images.
-
Backups: If you have the Backups service enabled on an existing Linode, you can select any available backup snapshot to deploy from. See Restore a backup to a new Linode.
-
Clone Linode: Creates a new Linode from the disks and configuration on an existing Linode. See Clone a Linode.
This guide assumes you are creating a Linode from a Distribution. If you select a different option, you may wish to follow the specific instructions within their own corresponding guides.
Choose a Linode type and plan
There are several different Linode types and plan sizes, each with a preset amount of hardware resources (such as vCPU cores, memory, and storage space). Review the Choose a Linode plan guide for advice on selecting the best plan for your needs, application’s requirements, and pricing considerations. Note that pricing and plan options may vary between data centers.
You can resize to a different plan size or Linode type at any time. This means your aren't locked in to whichever plan you select here. See Resize a Linode for instructions.
Set the label, add tags, and assign to a placement group

-
Label: The label is the name of the Linode, allowing you to easily identify it from other Linodes. A good label should provide some indication as to what the Linode is used for. As an example, a label of
acme-web-prodmay indicate that the Linode is the production website for the company Acme. If you have already implemented your own naming conventions for your cloud infrastructure, follow those conventions. Labels must only use letters, numbers, underscores, dashes, and periods. -
Tags: Adding tags gives you the ability to categorize your services however you wish. If you're a web development agency, you could add a tag for each client you have. You could also add tags for which services are for development, staging, or production.
-
Placement Groups: (Optional) Add this Linode to a placement group to manage its physical location in a data center ("region"). Placement groups can be set up to group your Linodes close together to help with performance, or further apart to support high availability. Placement groups are available at no additional cost, but they're not available in all regions. See Work with placement groups to learn more.
If you don't have a placement group
Click Create Placement Group to create one. This takes you to a separate interface, outside creating your Linode. For ease of use, create your Linodes in a supported region, then later create a placement group and assign your Linodes to it.
Create a password and add SSH keys
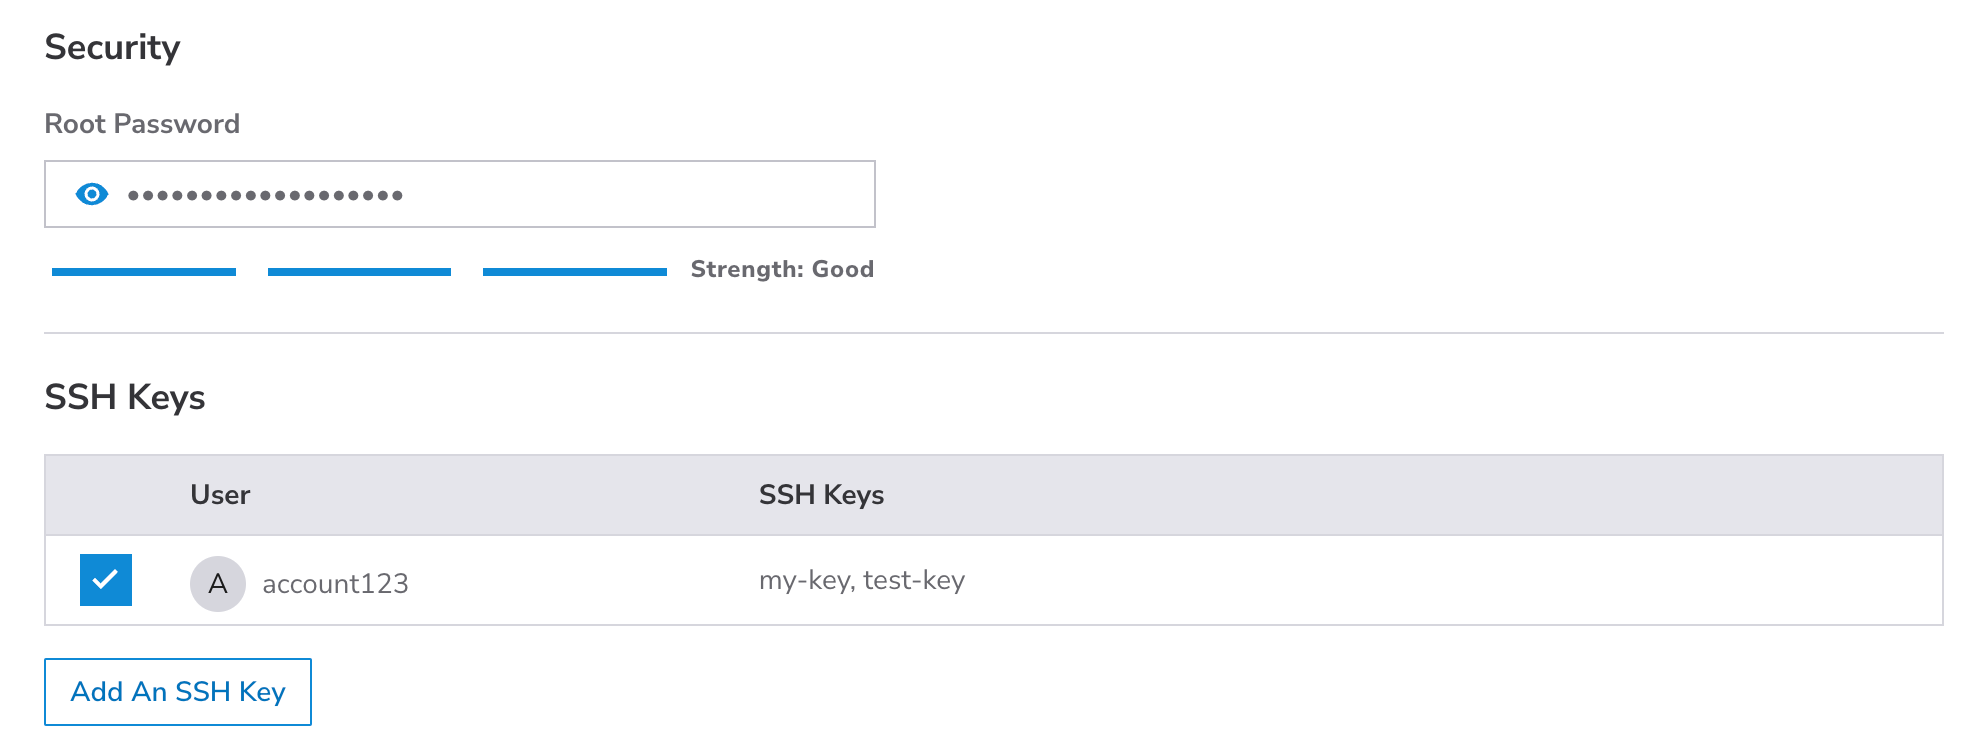
-
Root Password: The password used to log in to the system as the root user. The root user is the main account and has access to the entire system, including files and commands. This password should be extremely strong to prevent attackers from gaining access to your system. By default, the root user can log in over Lish and SSH using this password, though we do recommend disabling this in the Set up and secure a Linode guide.
-
SSH Keys: Add any SSH Keys to the root user account on the server. This enables you to log in through SSH without needing a password. SSH keys are created as a pair: a private key stored on your local computer and a public key that you can upload to remote systems and services. Since you only share your public key and your private key is kept safe and secure, this is a much more secure method for authentication than passwords. Learn more about uploading SSH keys through Cloud Manager on the Manage SSH keys guide.
Enable or disable disk encryption
Consider enabling Encrypt Disk on this Linode. The platform manages encryption and decryption for you. After a Linode is created, use Rebuild to change this setting.

More information is available from the Local Disk Encryption guide.
Add user data
User data can be provided to the Metadata service, which is then consumed by cloud-init when your Linode boots up for the first time. For information on the Metadata service, user data formats, and our cloud-init integration, see Metadata Service.
Set up networking (BETA)
Select the default interface type (required)
Select the default interface used by this Linode. Additional interfaces can be added after the Linode is created.
- Public Internet. One public interface is allowed.
- VPC. One VPC interface is allowed.
- VLAN. Multiple VLAN interfaces can be created, provided they belong to distinct VLANs, each with a unique VLAN label.
Assign to a Public Internet interface

Public Internet interfaces connect your Linode to the Internet. It enables inbound and outbound traffic over the automatically assigned public IPv4 address. After you select this option, continue to the section on selecting the network interface type.
Assign to a VPC interface
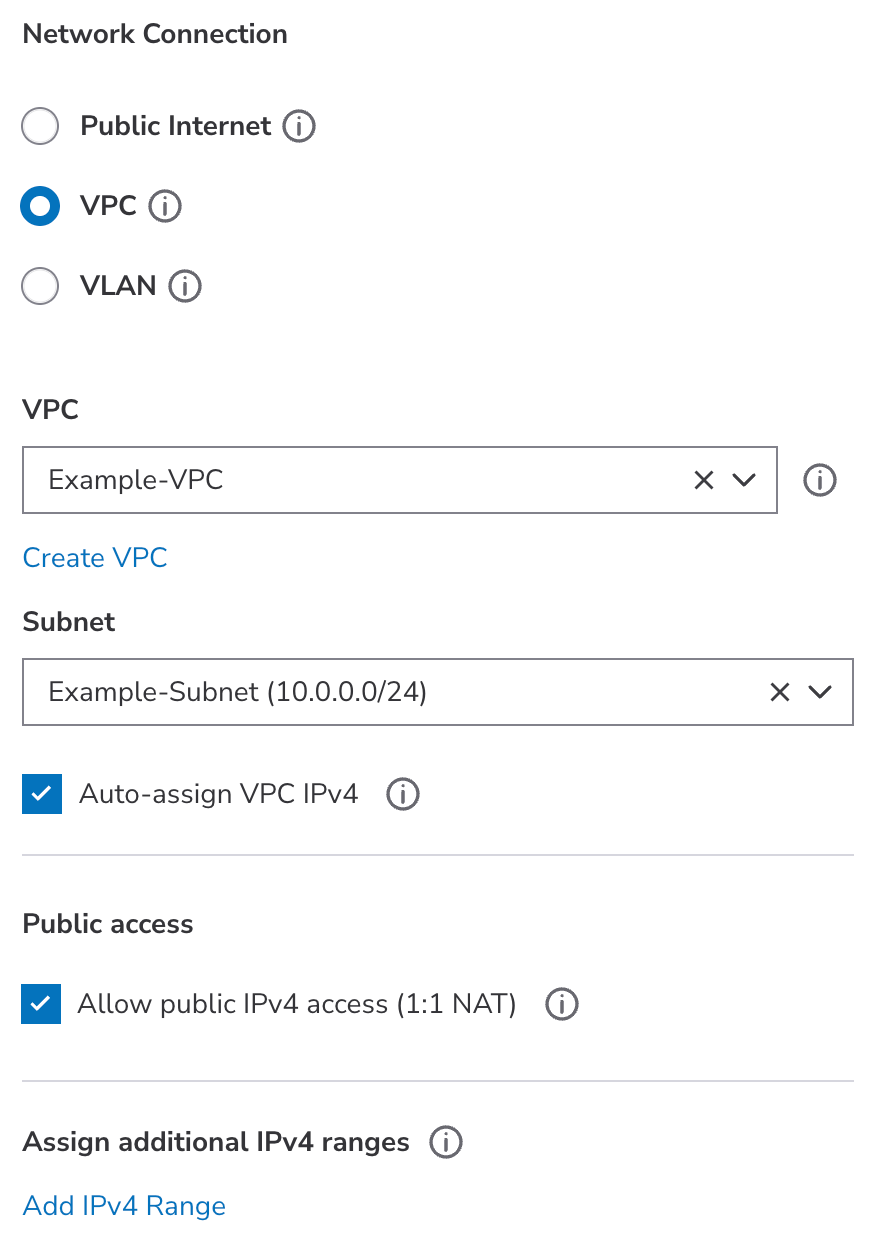
Consider using a VPC (Virtual Private Network) to isolate your new Linode from other systems on the Akamai Cloud platform and the internet. This adds an additional layer of privacy and can be used alongside Cloud Firewalls. VPC interfaces can be configured with IPv4 addresses or ranges.
You can add this new Linode to a VPC at any time in the future by following the steps within the Assign a Linode to a VPC guide.
- Select VPC. To assign this Linode to a VPC, select the VPC from the VPC dropdown menu. If you do not yet have a VPC in the selected data center, click the Create VPC button and follow the instructions on the Create a VPC guide.
- Select Subnet. A Linode can be assigned to a single subnet, which lets you further segment traffic and services within a VPC. Select the desired subnet from the Subnet dropdown menu.
- Auto-assign a VPC IPv4 address. By default, an IPv4 address will be automatically generated for the Linode on the subnet’s defined CIDR range. If you want to manually assign an IP address, uncheck the Auto-assign VPC IPv4 option and enter your custom IPv4 address in the VPC IPv4 field that will appear. This address must still be within the subnet’s IP range.
- Allow public IPv4 access. If you wish to enable public internet access on this new Linode, check the Allow public IPv4 access (1:1 NAT) option. By default, this is unchecked and you will not be able to access the internet from this Linode.
- Assign additional IPv4 ranges. You can assign additional IPv4 ranges that can be used to reach this Linode and/or the services running on it. For example, you may wish to assign additional IPv4 ranges to directly expose Docker containers to the VPC. Click the Add IPv4 Range button and enter IPv4 address range in the field that will appear.
- Continue to the section on selecting the network interface type.
For additional information and considerations, see the Assign a Linode to a VPC guide.
Assign to a VLAN
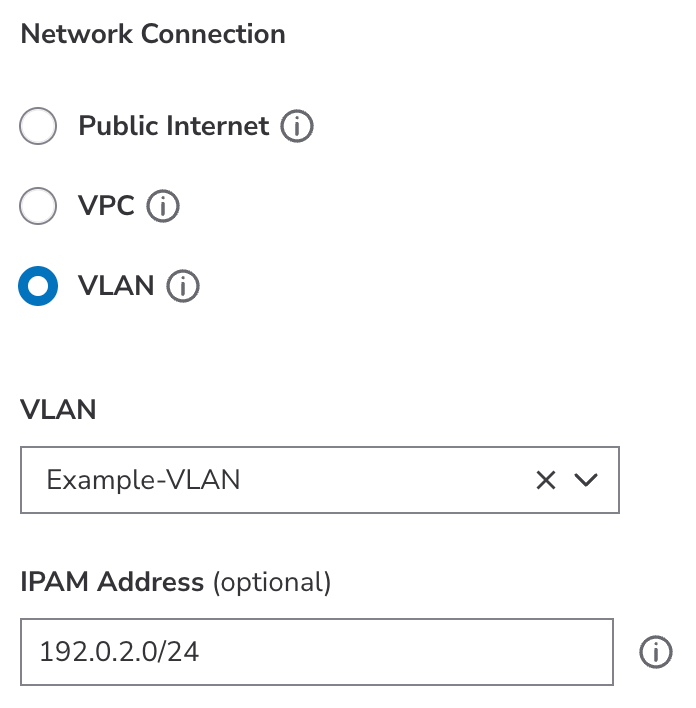
Add your Linode to a secure private network. VLANs are available at no additional cost, though not all data centers currently support this feature. See VLANs to learn more.
Consider using a VPC instead of a VLAN
In most cases, it's recommended to use a VPC over a VLAN. VPCs operate on a higher network layer and come with more IP addressing and IP routing functionality. Additionally, you can further segment out network traffic through subnets, each of which has its own CIDR range. Review these differences to learn more.
- Select VLAN. To assign this Linode to a VLAN, select the VLAN from the VLAN dropdown menu. If you do not yet have a VLAN in the selected data center, start typing and then click Create "new-label" to create it. Multiple VLAN interfaces on the same Linode must have a unique label.
- Assign an IPAM address. IPAM (IP Address Management) allows you to assign and manage IP addresses for each VLAN configured on a Linode. To assign an IPAM address, enter the value in the IPAM Address (optional) field. IPAM address must use IP/netmask format, for example
192.0.2.0/24. - Continue to the section on selecting the network interface type.
Select the network interface type (required)
Select Configuration Profile Interfaces or Linode Interfaces for networking.

Linode Interfaces and Configuration Profile Interfaces differ in the following ways.
Linode Interfaces. Use Linode interfaces for VPC or public networking setups and when private IPs are not required. Linode interfaces are directly associated with your Linode for easier visibility and management.
You can create, delete, or update Linode interfaces only when the Linode is powered off. Changes take effect when the Linode is powered up. This ensures a clear and reliable association between the Linode and its network interface settings. You can assign a Cloud Firewall directly to each VPC or Public Internet Linode Interface. VPC and Public Internet firewall templates are available for Linode interfaces and come with pre-configured protection rules. These interfaces are managed using the Linode’s Network tab.
For more information, see Manage Linode interfaces.
Configuration Profile Interfaces. Use configuration profile interfaces for Linodes requiring a private IP.
Linodes do not need to be powered off when making changes to the configuration profile interfaces. However, changes will only take effect if the Linode is rebooted. If a Cloud Firewall is assigned to the Linode, the same firewall applies to all non-VLAN configuration profile interfaces. These interfaces are managed using the Configurations tab.
For more information, see Manage configuration profile interfaces.
Assign to a Cloud Firewall (recommended)
Consider using a Cloud Firewall to protect your new Linode from unwanted traffic. This lets you cascade firewall rules across multiple services and manage those rules within Cloud Manager, Linode CLI, and Linode API.
| Configuration profile interfaces | Linode interfaces |
|---|---|
| Cloud Firewalls are assigned at the Linode level and apply automatically to all non-VLAN interfaces in the Configuration Profile. | Cloud Firewalls are assigned to individual interfaces. Templates are available for both Public Internet and VPC interfaces, with pre-configured rules to help protect your network traffic. |
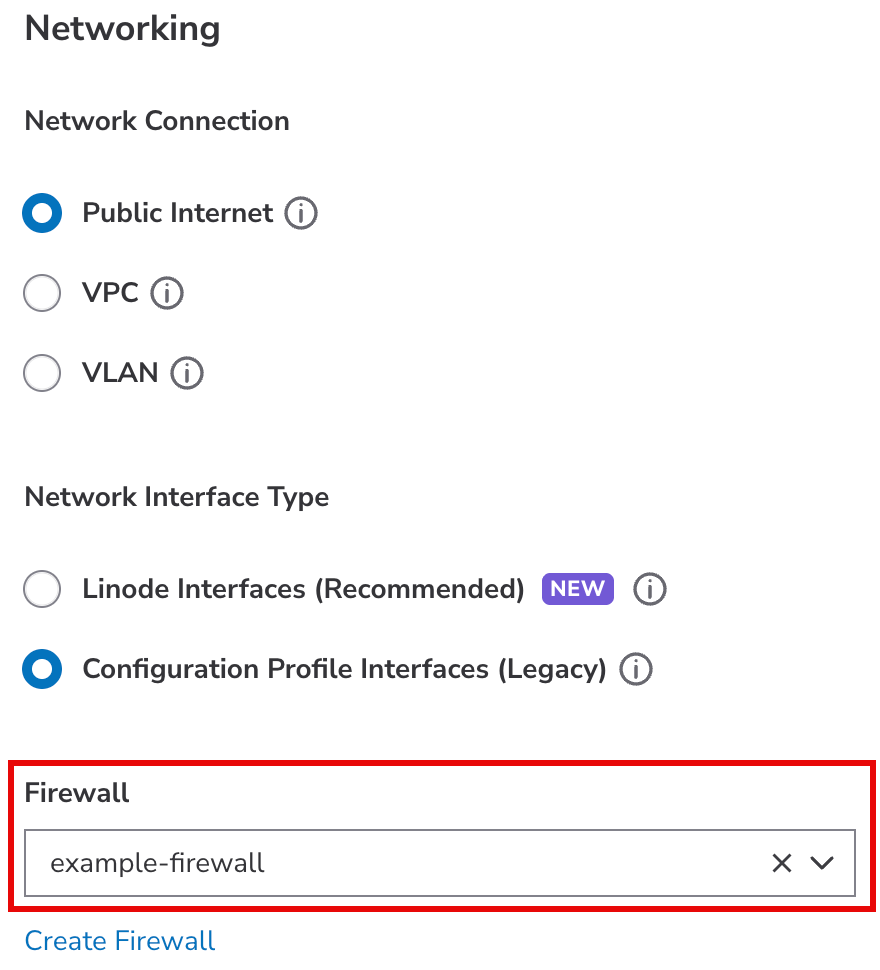 | 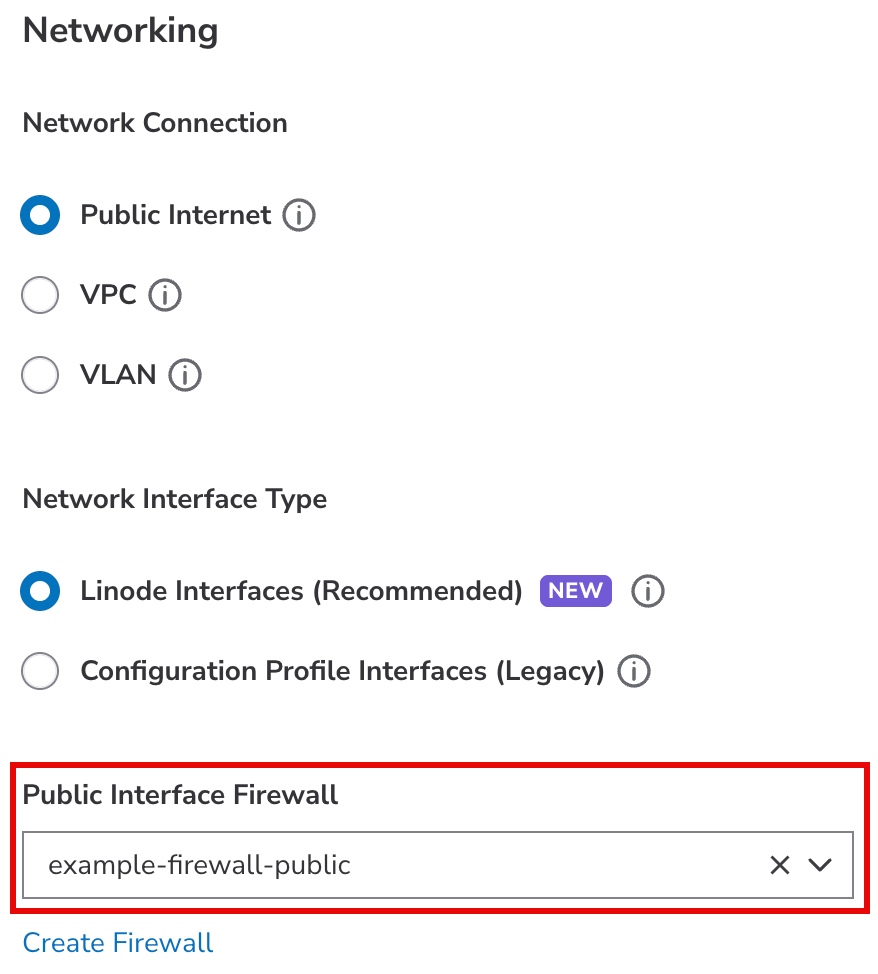 |
To assign your Linode to a Cloud Firewall, select the firewall from the dropdown menu. If you do not have a firewall or wish to create a new one, click the Create Firewall link and follow the instructions within the Create a Cloud Firewall guide.
You can skip this step and assign a firewall at a later time by following the instructions in the Apply firewall rules to a service guide.
Configure additional options
The following features and services can be configured during the Linode's creation or at any point after.
-
Set the maintenance policy: Set a preference for how routine maintenance is performed on your new Linode. Choose Migrate to perform maintenance while your Linode is running or Power off / power on to turn off your Linode during maintenance. To learn more about these policy options, see Maintenance events and policies .
-
Add the Backups service: Safeguard your data with the Backups service, enabling automatic backups of the disks on your Linodes. Up to four backups are stored as part of this service, including automated daily, weekly, and biweekly backups in addition to a manual backup snapshot. See Backups to learn more and view pricing.
-
Add a private IP (configuration profile interfaces only): A private IP gives you access to the data center's private network. This enables you to communicate with other Linodes with private IPs in the same region without using a public IPv4 address. The private IP feature requires a Public Internet network interface. You can use private IPs to configure your Linode as a NodeBalancer backend, but consider using a VPC instead.
Consider using a VPC instead of the private IP address feature
Private IP addresses are accessible by any other Linode in the same data center, provided that Linode also has a private IP. To further isolate your Linode, consider using a VPC instead. Review these differences to learn more.
Deploy the Linode

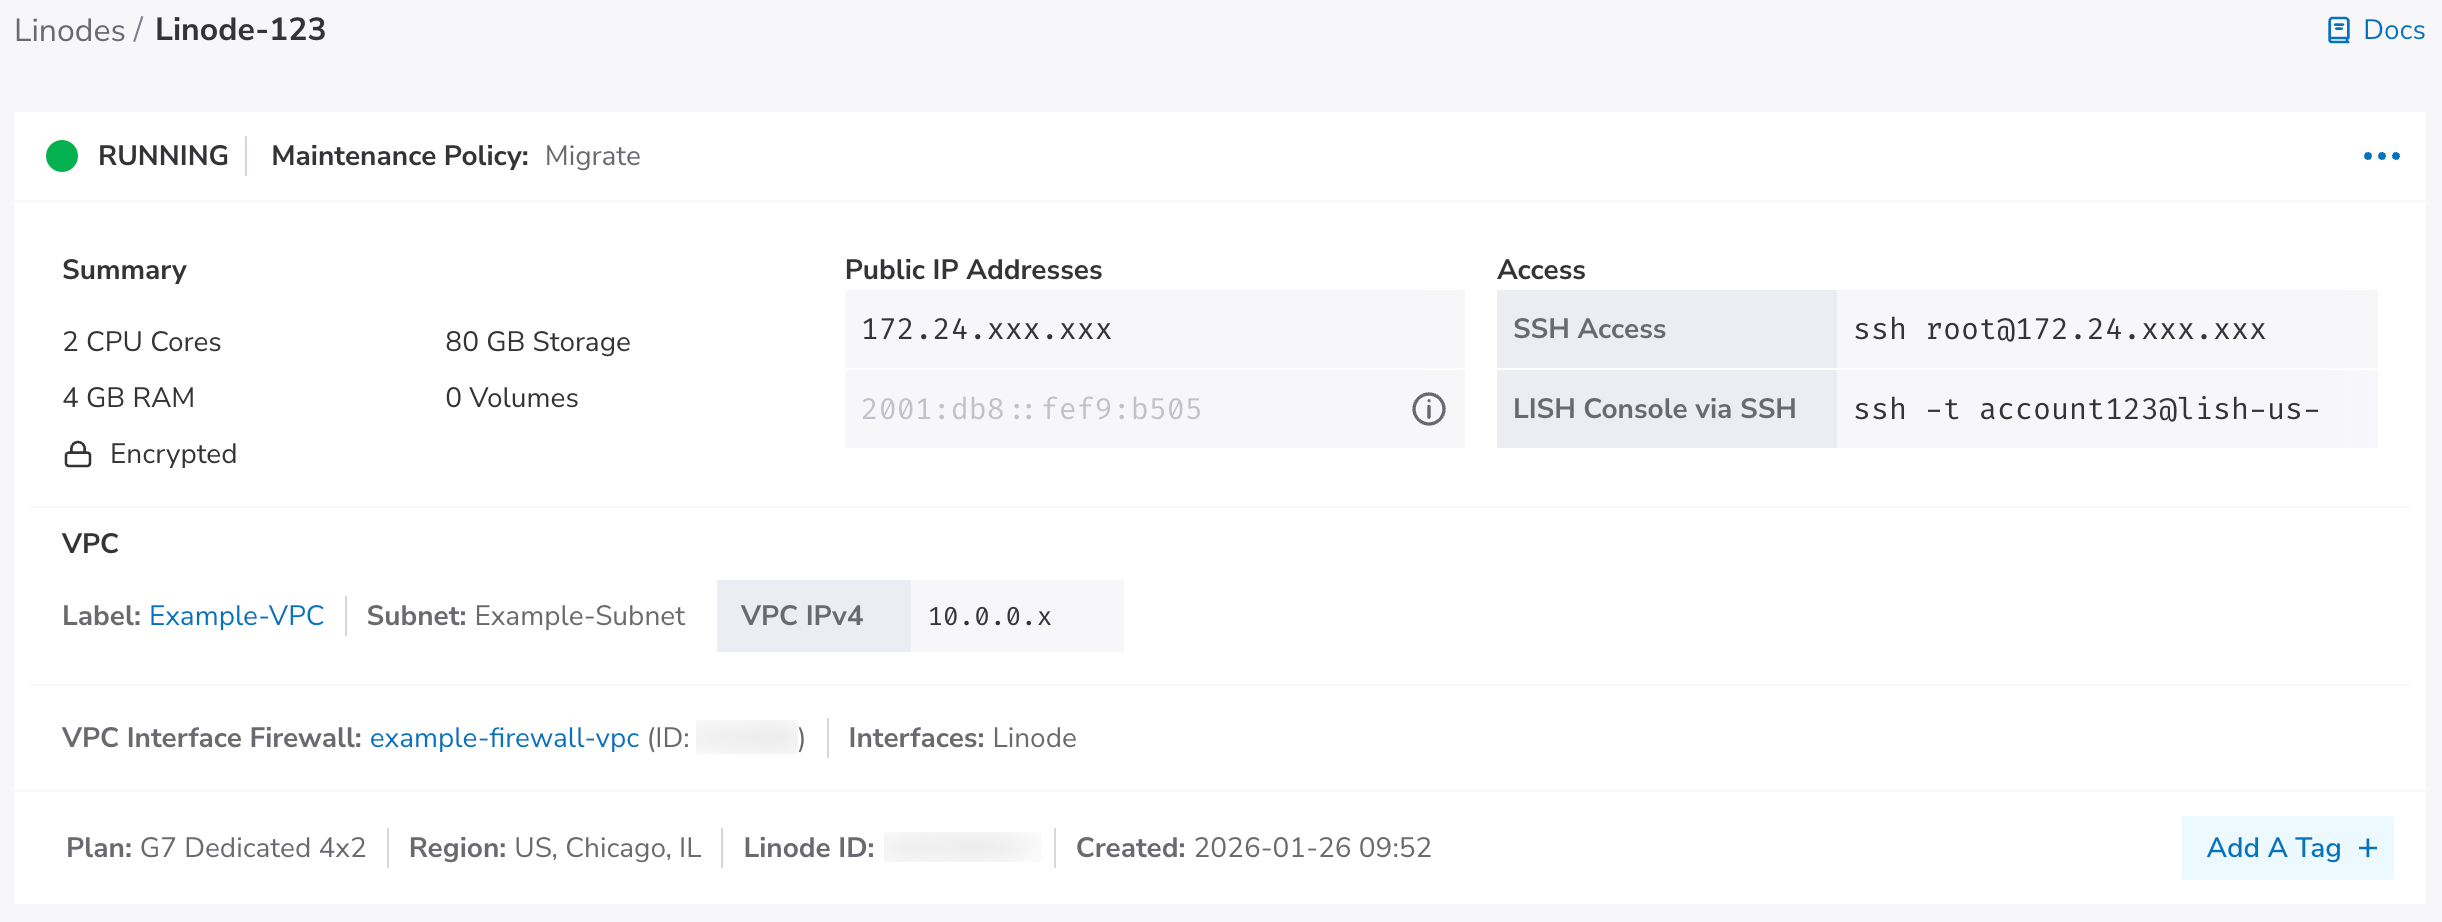
Confirm the details for this Linode within the Linode Summary section. Once you are satisfied, click Create Linode to start the deployment process. This process can take anywhere from 3 minutes for Distribution Images to up to 30 minutes for some Marketplace Apps. After the creation process has started, you are automatically redirected to the detail page for this Linode. From here, you can follow the status as the Linode is deployed as well as see information about the new Linode, such as the IP addresses.
Next steps
Once the Linode has been created and is done initializing, you can start configuring and using it. Follow Set up and secure a Linode for guidance on connecting your Linode, performing any initial configuration steps on your Linux system, and securing your server.
Email restrictions on our Platform
In an effort to fight spam originating from our platform, outbound connections on ports 25, 465, and 587 are blocked by default on Linodes for some new accounts. These restrictions prevent applications from sending email. If you intend to send email from a Linode, see Send email on Akamai Cloud to learn more about our email policies and to request the removal of these restrictions.
Updated 9 days ago
