Copy a disk to a different account
You can copy a disk of a Linode from one account to another. This is a great way to prepare a disk for another customer and transfer it from one individual account to another individual account. Or if you have multiple accounts, this guide provides instructions to consolidate all the disks in one account.
If you're copying a disk from a Linode that hosts applications, complete the backup and migrate steps for those applications.
Preparing the receiving Linode
You need to prepare the receiving Linode before initiating the transfer. First, create a Linode with a new disks to hold the files from the other Linode.
Creating a new receiving Linode
-
Log in to Cloud Manager with the username and password you created when signing up.
-
Click Create at the top of the page and select Linode.
-
Click X to not choose any Image in the Choose a Distribution section of the Distributions tab.

-
Choose the region where you would like the Linode to reside. If you're not sure which to select, see our Choosing a data center guide. You can also generate MTR reports for a deeper look at the route path between you and a data center in each specific region.
-
Select a plan.
-
Give the Linode a label. This is a name to help you easily identify it within Cloud Manager's Dashboard. If desired, assign a tag to the Linode in the Add Tags field.
-
Skip the Root Password and SSH Keys fields, as they are disabled when creating an empty Linode.
-
Click Create Linode. The system directs you to the Linodes page that reports the status of the Linode as it boots up.
Creating new disks
A Linode can have up to 50 disks.
To hold the files transferred from the other Linode, create two new disks labeled copy and swap:
-
Select the Linode that is receiving the disk. The Linode's dashboard appears.
-
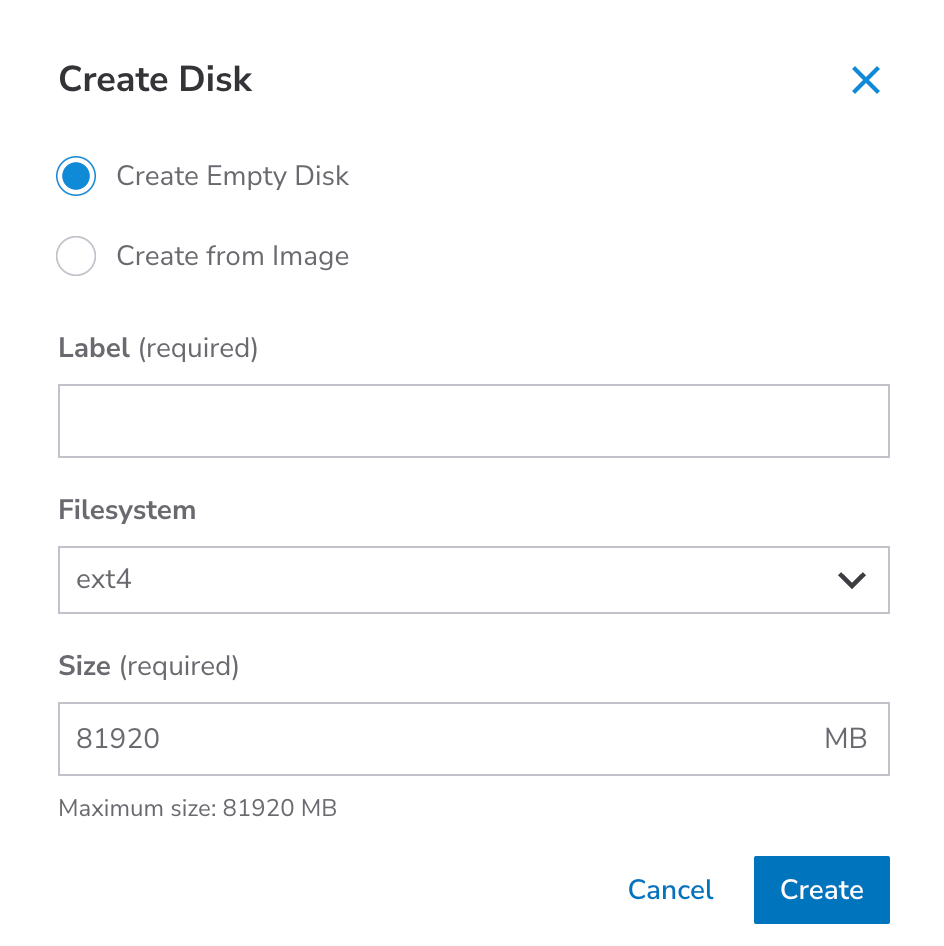
Go to the Storage tab and click Add a Disk in the Disks section. The Add Disk window appears.

-
Type a descriptive name such as
copyfor the disk in the Label field. -
Select
ext4in the Filesystem dropdown field. -
Set the size of the disk in the Size field. The size of the disk must be large enough to hold the contents of the disk that you want to copy.
-
Click Add to create the disk.
-
Repeat the steps to create a disk labeled
swapand selectswapin the Filesystem dropdown field. Ensure that the size of theswapdisk is the same as that of theswapdisk of the disk that you want to copy.
The system creates disks to hold the files from the disk of other account.
Booting into rescue mode
Start the receiving Linode in rescue mode:
-
Select the Linode that is receiving the disk. The Linode's dashboard appears.
-
Select the More Options Ellipsis and click the Rescue button.
-
Set the /dev/sda field to
copyand /dev/sdb toswap. -
Click Reboot into Rescue Mode.
Access the Linode in rescue mode
After the Linode has booted, connect to it through LISH.
-
Select the Linode that is receiving the disk. The Linode's dashboard appears.
-
Click Launch Lish Console . A new window appears that displays the Lish console, a
Welcome to Finnix!message, and a root prompt. -
Set the
rootpassword for the Finnix rescue environment by entering the following command:passwdThis root password is separate from the root password of the disk that you normally boot from. Setting the root password for Finnix does not affect the root account of the distribution.
-
Type the new password for the
rootuser. -
Start the SSH server:
service ssh start
You can now connect to the server as root with the SSH client on the local computer.
The Linode is now ready to receive the files from the other Linode account.
Copy the disk
To start copying the files on the disk from one account to another, initiate the file transfer:
-
Connect to the source Linode through an SSH client.
-
Type the following command to start copying the disk, replace
192.0.2.0with the IP address of the receiving Linode:dd if=/dev/sda | ssh -C 192.0.2.0 "dd of=/dev/sda" status=progress -
The following output appears. Enter
yesto continue connecting:The authenticity of host '192.0.2.0 (192.0.2.0)' can't be established. RSA key fingerprint is 20:f4:de:4d:5c:6e:a9:c7:e6:1f:8a:ad:60:62:96:3f. Are you sure you want to continue connecting (yes/no)? -
The system prompts you for the
rootpassword. Enter the password you created in the last section when you started the SSH server:root@192.0.2.0's password: -
The file transfer starts, as shown below:
2048000+0 records in
2048000+0 records out
1048576000 bytes (1.0 GB) copied, 391.504 seconds, 2.7 MB/s
2048000+0 records in
2048000+0 records out
1048576000 bytes (1.0 GB) copied, 387.843 seconds, 2.7 MB/s
Wait for the transfer to complete. Note that this process can take a while, depending on the size of your disk.
Verifying the disk
After the file transfer has completed, you should verify the disk by mounting it on the receiving Linode. Ensure that the Network Helper is on for the receiving Linode or the Static IP is configured to enable networking with the new IP addresses.
-
Connect to the receiving Linode through SSH as
root. -
To check that the disks are transferred successfully make a new directory for the disk by typing the following command:
mkdir linode -
Mount the disk by typing the following command:
mount /dev/sda linode -
View the directories in the disk by typing the following command:
ls linode/The output is similar to:
bin   dev  home  lost+found  mnt  proc  sbin     srv  tmp  var
boot  etc  lib   media       opt  root  selinux  sys  usr
If the system displays any disk errors, then perform the Copy the disk steps again.
Now the Linode is ready to boot from the disk.
Booting from the disk
Boot the receiving Linode from the disk. First, create a configuration profile on the receiving Linode, and then boot the receiving Linode with the disk that you just transferred.
Creating the configuration profile
To boot the receiving Linode from the transferred disk, create a new configuration profile:
-
Click the Linodes tab.
-
Select the Linode that received the disk. The Linode's dashboard appears.
-
Select the Configurations tab followed by the Add a Configuration button. The Add a Linode Configuration window appears.
-
Enter a name for the configuration profile in the Label field, such as Received disk.
-
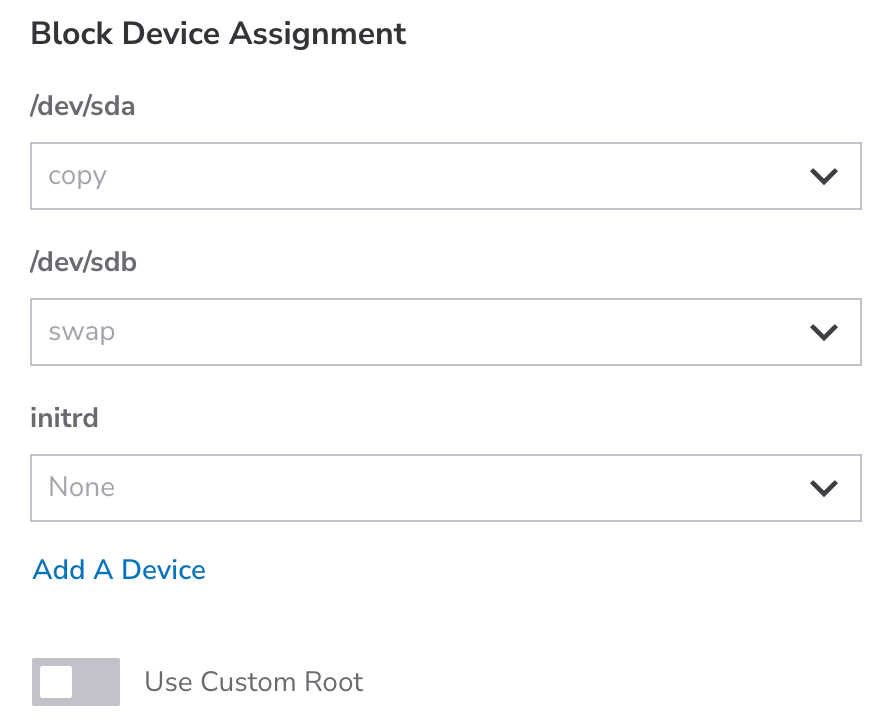
In the Block Device Assignment section, set /dev/sda to
copyand /dev/sdb toswapdisk.
-
Click Submit.
You have successfully created the configuration profile.
Booting the receiving Linode
Now to start the receiving Linode from the transferred disk, select the configuration profile that you created:
-
From the Configurations tab of the Linode's dashboard, find the Received disk configuration profile that you created.
-
Click the Boot button to restart the Linode using the selected configuration profile, and boot from the transferred disk.
The Linode boots using the disk you transferred.
Updated 8 months ago
