MySQL
These are MySQL guides specific to Managed Databases:
And here are general MySQL guides, that aren't specific to Managed Databases:
Connect to a MySQL managed database
To connect to a MySQL Managed Database, you need to know a few important details, such as the username, password, and host (or IP). You'll also need a MySQL client. This guide details how to access your database using popular tools.
View connection details
-
Log in to Cloud Manager and select Databases from the left navigation menu.
-
Select your Managed Database from the list. This opens the detail page for that database cluster.
The Connection Details section contains information and credentials needed for you to connect to your database.
- Username: The default user for all MySQL Managed Databases is
linroot, which has superuser admin privileges. This replaces therootuser, which is not accessible. - Password: The randomly generated password for your database cluster. See Reset Root Password if you wish to change it.
- Host: The fully qualified domain name you can use to reach your database cluster through the public network.
- Private network host: The fully qualified domain name you can use to reach your database cluster through the data center's private network (not a VLAN). Communicating with a Database Cluster over the private network avoids network transfer fees, so it's recommended to use this host string when possible.
- Port: The default port for your database is
3306. - SSL: This field is set to
ENABLED, which means that it is required to use an encrypted TLS/SSL connection.
Under the Connection Details section, there is a Download CA Certificate link, which lets you download the CA (Certificate Authority) certificate. This certificate file can be used if you wish to verify the CA certificate when connecting to the database.
Connect using MySQL (CLI)
To connect direct to the database from a command-line, you can use the mysql tool. This tool is typically not available by default on most operating systems, but is included along with many MySQL clients (and servers)
-
Make sure the IP address assigned to your system is included within your database's access controls. If not, add it now. See Manage Access Controls.
-
Verify that the
mysqltool is installed on your system by running the following command:mysql --versionIf it is not installed, follow the steps for your operating system in the Installing MySQL guide.
-
Use the
mysqlcommand below to connect to your database, replacing[host]and[username]with the corresponding values in the Connection Details section.mysql --host=[host] --user=[username] --password --ssl-mode=requiredIf your system is using MariaDB instead of MySQL (such as when using the default packages in Debian's own repository), replace the
--ssl-mode=requiredparameter with--ssl=true.If you are connecting to the private network host, ensure your Linode is located within that same data center and you have added a Private IPv4 address to that instance. See Managing IP Addresses.
-
Enter your password at the prompt.
Once you are connected successfully, the MySQL prompt appears and you can enter SQL queries. See Introduction to SQL Commands for examples.
See Using the MySQL Command Line Client for more information or reference Connecting to the MySQL Server Using Command Options within MySQL's own documentation.
Connect using MySQL workbench (GUI)
The MySQL Workbench provides a graphical interface for connecting to MySQL databases. Using this tool, you can visualize your database, its structure, and the data it contains.
-
Make sure the IP address assigned to your system is included within your database's access controls. If not, add it now. See Manage Access Controls.
-
Install the MySQL Workbench software from the MySQL Community Downloads page. Be sure to select the operating system you're using locally.
-
Open the software and select Database > Manage Connections from the menu. This displays the Manage Server Connections window.
-
Enter a Connection Name for this new connection.
-
Under the Parameters tab, enter the details for your connection, including the Hostname, Username, and Port. You can optionally store your password by clicking the Store in Keychain... button and entering your password. If you do not store your password, you must enter it manually each time you connect. For security reasons, it's typically recommended not to store your password.

-
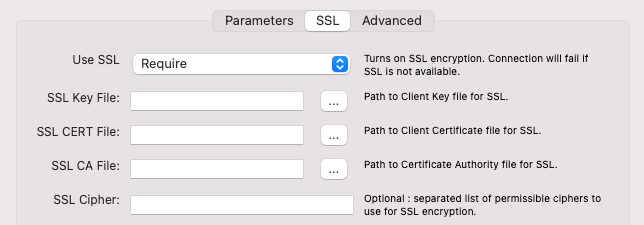
Under the SSL tab, set Use SSL to Require. You may also use Required and Verify CA if you wish to verify the CA (Certificate Authority) certificate each time you connect. If you choose this option, download the CA certificate from Cloud Manager and set the SSL CA File field to point to that downloaded file.

-
Click Test Connection to verify you can successfully connect to the database and then click Close to store the connection settings and return to the main screen.
-
To connect to the database, select Database > Connect to Database from the main menu. In the following screen, select the stored connection you just created and click OK.
For instructions on using MySQL Workbench to interact with your database, see Install MySQL Workbench for Database Administration or look through the MySQL Workbench Manual.
Connect using DBeaver
DBeaver is free and open source universal database tool for developers and database administrators. DBeaver provides a powerful SQL-editor, administration features, ability to migrate data and schema, monitor database connection sessions, and others.
-
Make sure the IP address assigned to your system is included within your database's access controls. If not, add it now. See Manage Access Controls.
-
Install the DBeaver Community (or Pro) software from the DBeaver Downloads page. Be sure to select the operating system you're using locally.
-
Open DBeaver, click the Database menu dropdown, and select New Connection.
-
The Connect to a database window appears. Select MySQL and click Next to continue.

-
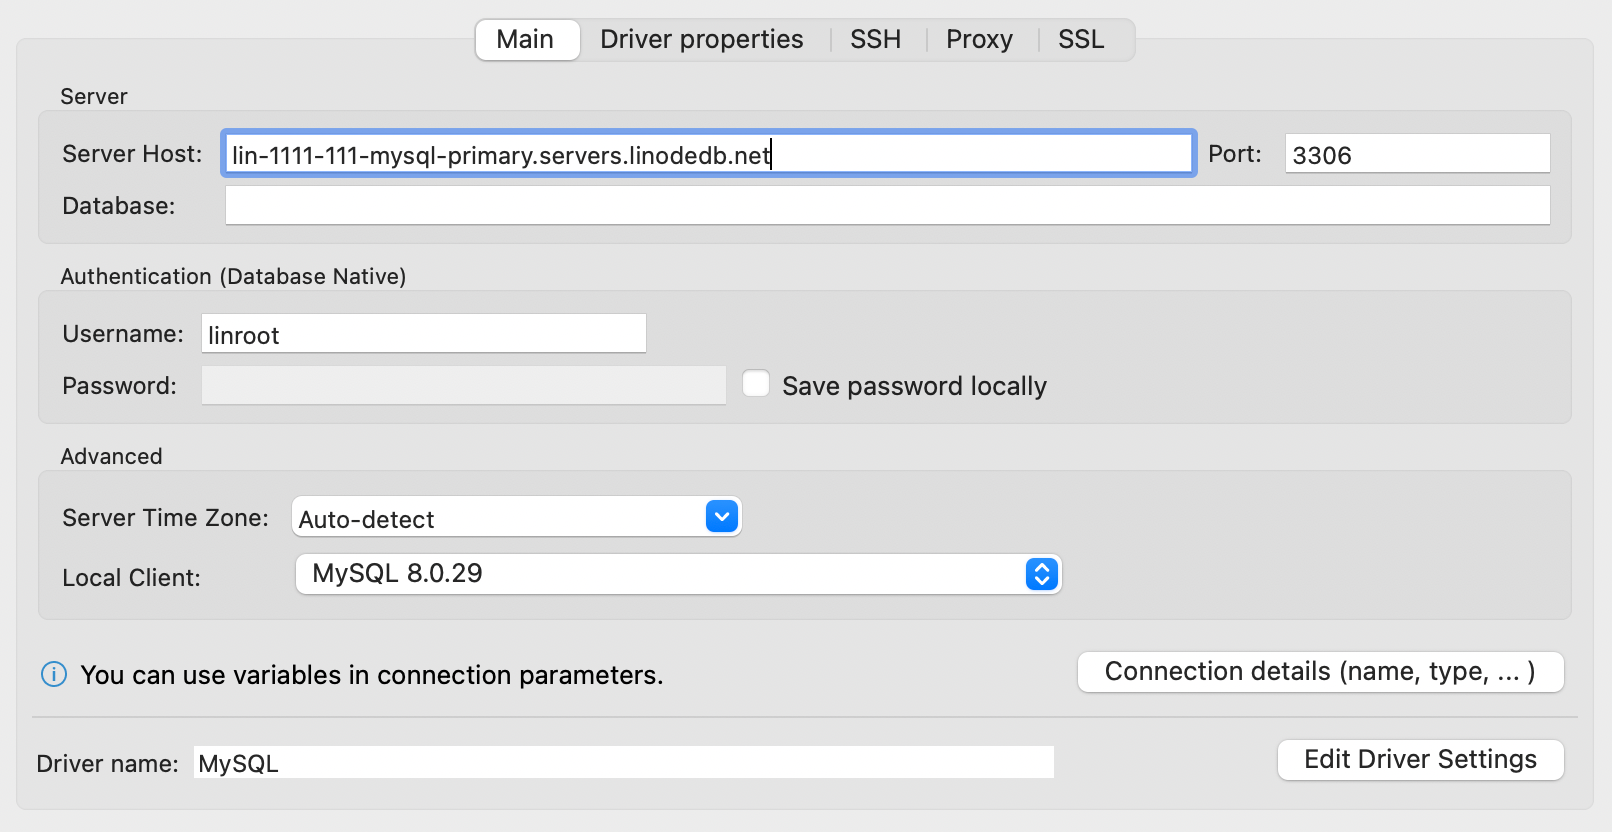
Within the Main tab, enter the details for your connection, including the Server Host (hostname) Port, and Username. You can optionally store your password by entering your password and clicking the Save password locally button. If you do not store your password, you must enter it manually each time you connect. For security reasons, it's typically recommended not to store your password.

-
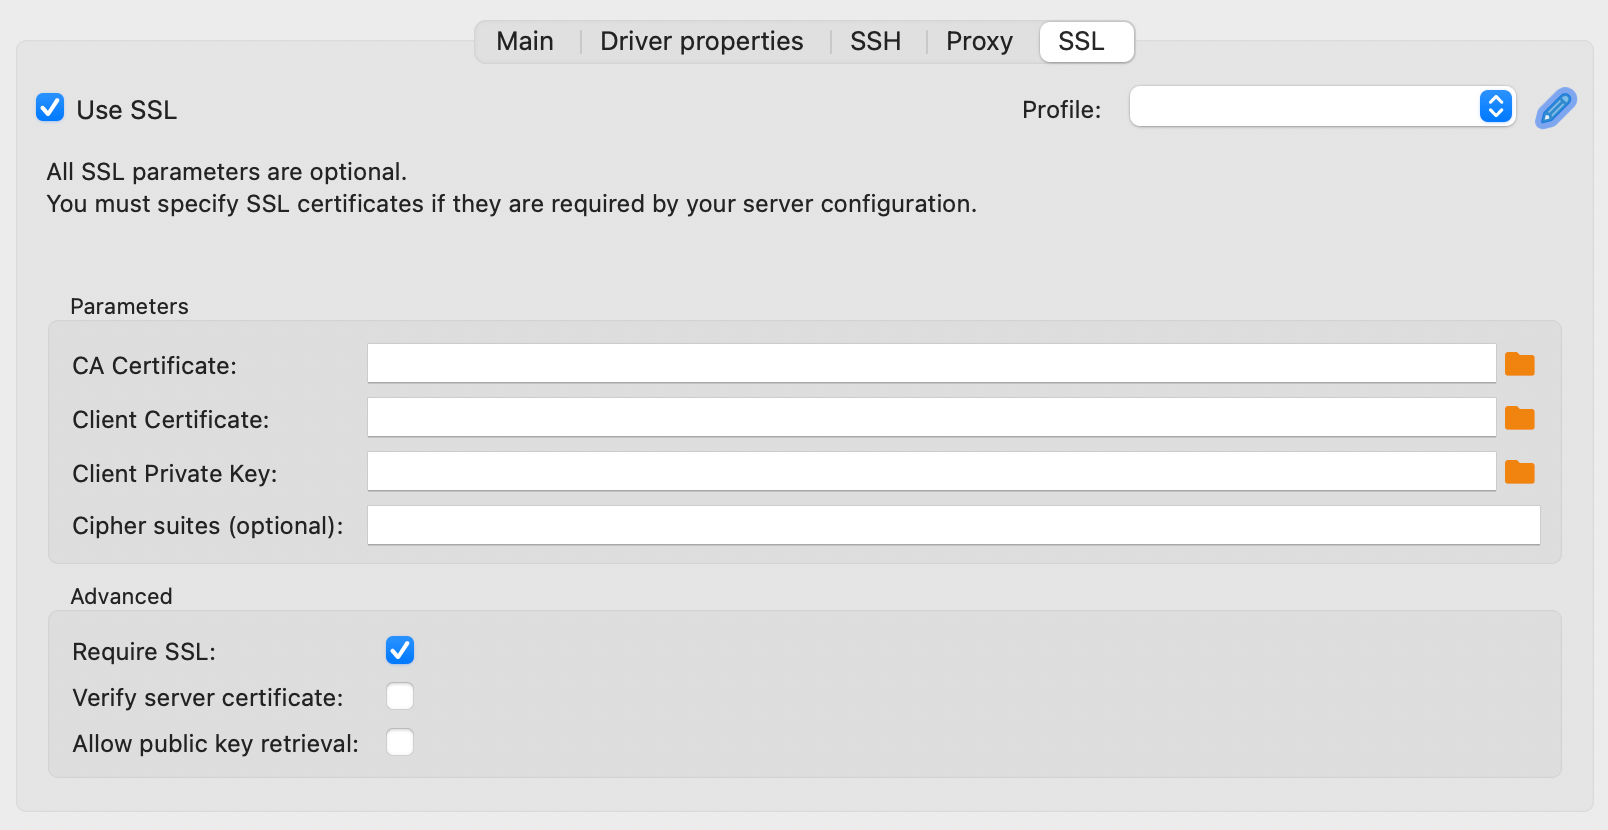
In the SSL tab, check Use SSL, check Require SSL, and uncheck Verify server certificate.

-
Click the Test Connection button to check if the connection is successful.
Migrate a MySQL or MariaDB Database to a Managed Database
This guide covers how to migrate an existing MySQL or MariaDB database to a Managed Database. When migrating a database, there are two important terms to keep in mind: the source database and the target database.
- Source database: The original database running on a software, system, or machine that you wish to decommission. This could be MySQL running within your own Linux server, a development database on your local machine, or even a cloud database.
- Target database: The new replacement database that you wish to use. For this guide, the target database will be a Managed Database running on Akamai Cloud.
Your individual migration workflow could deviate from the instructions provided here. You may need to consult your own developers or application's documentation to learn how to perform some of these steps and to gather any best practices. You should also perform the migration on a staging server first or during a time when downtime least affects your users and/or business.
Before you begin
-
You need to have a cluster already created.
-
Ensure proper MySQL user grants: The MySQL user you intend to use to export your existing database must have SELECT, LOCK TABLES, SHOW VIEW and TRIGGER grants.
Export the source database
Export the data from the source database into a .sql file. While this file is eventually used to import your data to a different machine, it can also be stored as backup. The best method for generating a backup of your data highly depends on the applications you are using and what other databases are also stored on that same system.
-
mysqldump: In most cases, you can export the data using the mysqldump command-line tool. The following command exports the specified databases within the local mysql instance into a file called
db-backup.sql. Replace [username] with the username you use to access the database and [database-name] with the name of your database.sudo mysqldump -u [user] -p --single-transaction [database-name] > db-backup.sqlNotes on additional command options:
-
-h: If you prefer to run this command remotely and have access to MySQL from a remote system, add-h [hostname], where [hostname] is the IP address or hostname of the remote database server. -
--ssl-mode=REQUIRED: Force SSL when your existing database has SSL enabled. -
--set-gtid-purged=OFF: Use this option if you have GTID-based replication enabled. -
--all-databases: Do not use this option. When importing this backup into your Managed Database, it may delete all existing users from the cluster.
See Backing Up MySQL Databases Using mysqldump for more details on running the mysqldump command.
-
-
cPanel: See Backup Wizard > Create a partial backup and How to Back Up and Restore MySQL® Databases in cPanel.
-
Plesk: See Exporting and Importing Database Dumps.
Preventing corruption
If data is modified during the export, your dataset may become inconsistent or corrupted. Because of this, you may want to prevent new data from being written during the time. This can be accomplished by stopping any services or applications that are currently using your database. In many cases, stopping the web server software is one of the quickest ways to do this, though its not recommended if that web server is also running other websites that need to maintain access. The following instructions cover stopping the two most popular web services, NGINX and Apache.
-
Stop NGINX:
sudo systemctl stop nginx -
Stop Apache on Ubuntu/Debian:
sudo systemctl stop apache2 -
Stop Apache on RHEL/CentOS:
sudo systemctl stop httpd
Alternatively, you can activate a maintenance mode (or whatever it may be called for your application) on any applications or services using your database. This typically disables some of your site's functionality and may present a web page to visitors to notify them of the downtime. The process for this varies greatly depending on the application you may be using.
Import the database
Next, you'll need to import the .sql file to your Managed Database (the target database). This process can be accomplished through the mysql command-line tool. Run the following command on a system that has the MySQL client or server software installed. Replace [host] and [username] with the appropriate values for your database cluster. See the Connect to a MySQL Database guide for additional information and to learn how to view your Managed Database's connection details.
mysql -h [host] -u [username] -p < db-backup.sql
Update the database connection details within your application
After the data has been imported into the Managed Database, you should update any applications that were using the original source database so that they use the new Managed Database instead. This typically involves editing the database connection details (such as the host, username, password, and port) within the code or within your application's GUI. Please consult the documentation for your application to learn how to adjust the database settings. In WordPress, for instance, the database connection details are stored within the wp-config.php file on your web server (see Editing wp-config.php > Configure Database Settings).
Enable your application
If you turned off your web server or placed your application in a maintenance mode, you can now enable your application again. While the instructions for turning off maintenance mode vary depending on your application, here are the commands for starting the two most common web servers:
-
Start NGINX:
sudo systemctl start nginx -
Start Apache on Ubuntu/Debian:
sudo systemctl start apache2 -
Start Apache on RHEL/CentOS:
sudo systemctl start httpd
Updated 5 months ago
