Manage legacy database clusters
Create a legacy cluster
Due to new solution available, you can no longer create legacy database clusters. To learn how to create a new database cluster, see Create a new database cluster.
Automatic updates and maintenance window
With the Managed Databases service, the database cluster is updated regularly. This includes security updates and patches for the underlying operating system. These updates occur on a maintenance window that you can configure. By default, the maintenance window is set to start every week on Sunday at 20:00 UTC and lasts for 3 hours.
Due to the new Database service being introduced, the legacy clusters' OS and engines are no longer being updated.
View and modify the maintenance window
-
Log in to Cloud Manager and select Databases from the left navigation menu.
-
Select your Managed Database from the list. This opens the detail page for that database cluster.
-
Navigate to the Settings tab.
-
In the Maintenance Window section, you can view the day of the week the maintenance occurs, the time of day it starts, and if maintenance is performed on a weekly or monthly basis.
-
To modify the maintenance window, make any changes you wish and click the Save Changes button.
Manage access controls
Each Managed Database cluster has its own access control list, which allows specific IPv4 addresses or ranges to connect to the database. By default, all connections (both public and private) are blocked unless they appear on this list.
View access controls
-
Log in to Cloud Manager and select Databases from the left navigation menu.
-
Select your Managed Database from the list. This opens the detail page for that database cluster.
-
Within the Summary tab, access controls appears under the Access Controls section. A list of each allowed IP address or range is displayed.

Types of access
-
No access (blank): If no IP addresses are provided, the database will not allow any connections.
-
Open access (
0.0.0.0/0): Entering an IP address of 0.0.0.0/0 allows connections from any IP address. -
Individual access (
192.0.2.1/32): To grant an individual system access, enter that system's IPv4 address. The/32is added automatically if no prefix size is provided, which means only this single IPv4 address is included within this rule. -
Range access (
192.0.2.0/24): Allow connections from an entire range of IP addresses by specifying the prefix and the prefix length. For instance, entering 192.0.2.0/24 as an access control allows connections from 192.0.2.0 - 192.0.2.255.
Add or modify IP addresses or ranges
-
View your access controls by following the steps within View Access Controls.
-
Click the Manage Access Controls button to open the Manage Access Controls panel.
-
The Manage Access Controls panel appears and displays a list of allowed IP addresses and ranges. Here you can:
- Add a new entry by clicking the Add an IP button and enter your desired IP address or range into the new field.
- Modify an existing entry by updating it with the new IP address or range.
- Remove an entry by clicking the X icon to the right of the entry.
-
Once you've made your changes, click the Update Access Controls button to commit them.
Remove an IP address or range
-
View your access controls by following the steps within View Access Controls.
-
Find the IP address or range you wish to remove and click the Remove link. A confirmation dialog appears.
-
Click the Remove IP Address button to confirm and remove the address.
Manage backups
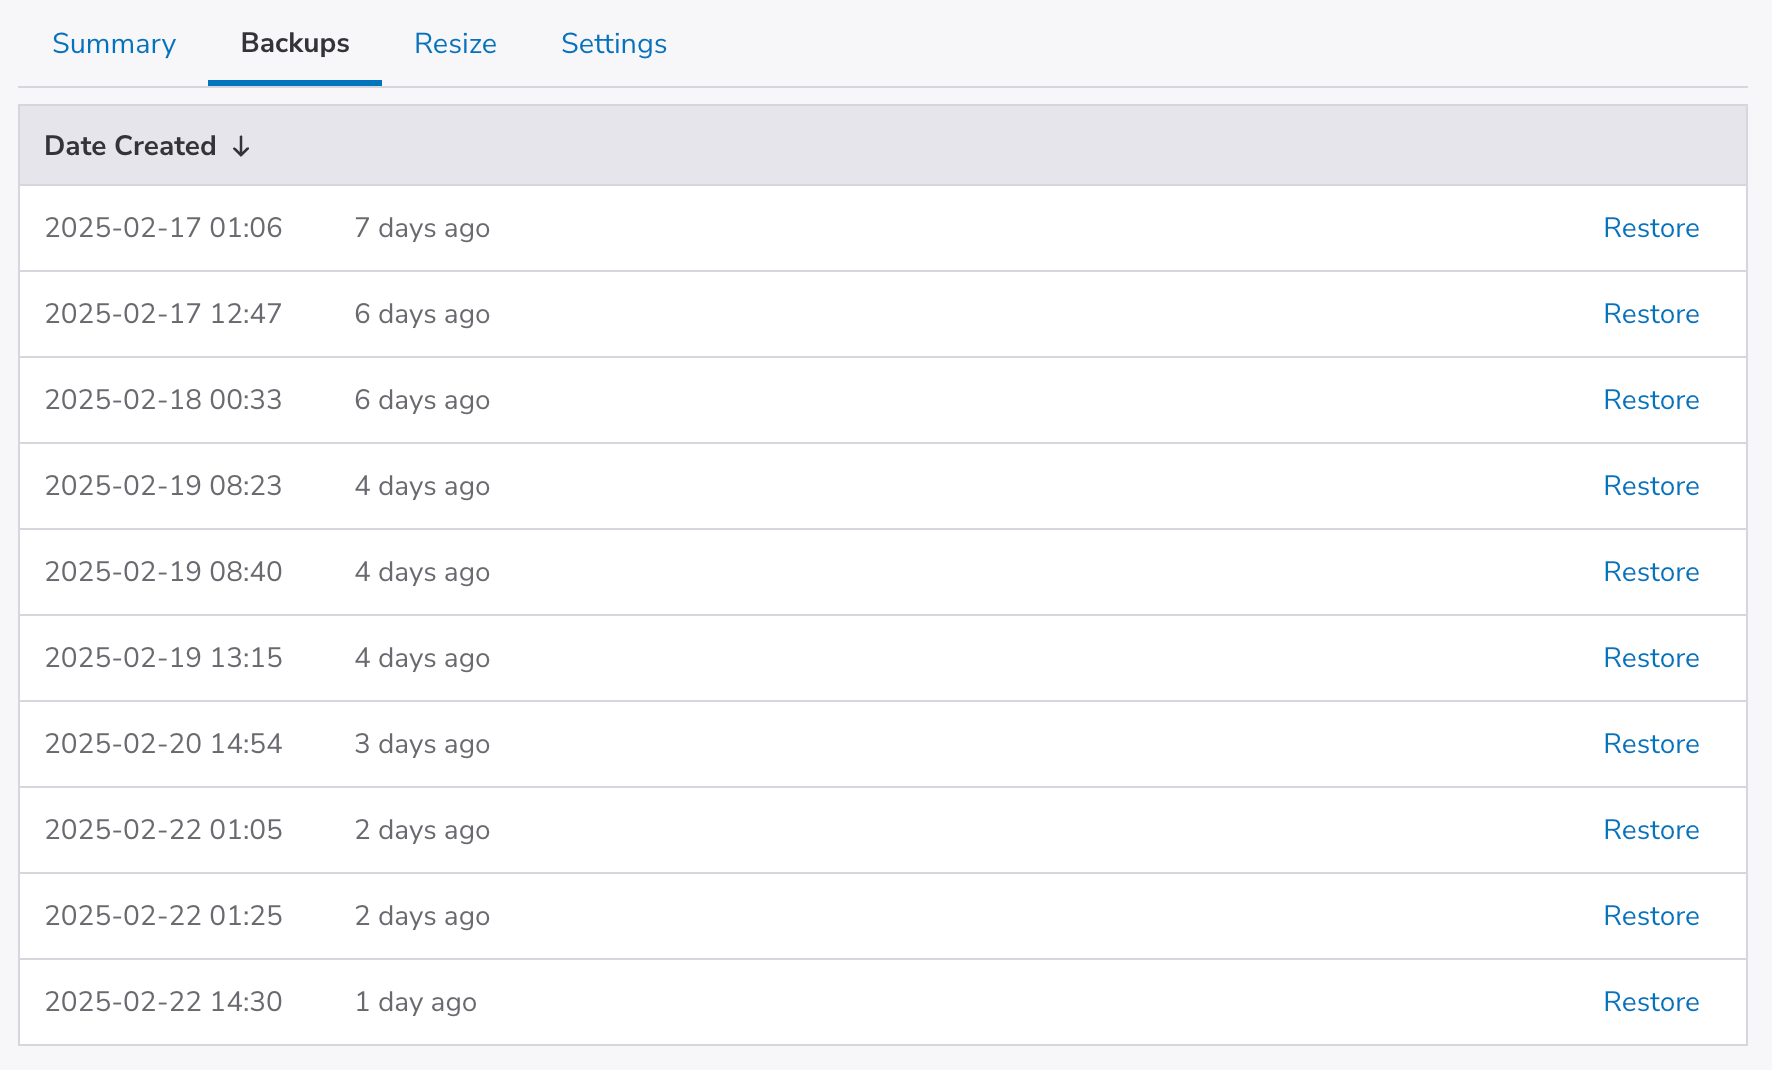
Each Managed Database includes daily backups of your data, taken on a 24 hour cadence. Up to 7 backups are stored for each database cluster, which provides you with a restore point for each day in the last week. This guide walks you through viewing and restoring from these managed backups.
View managed backups
-
Log in to Cloud Manager and select Databases from the left navigation menu.
-
Select your Managed Database from the list. This opens the detail page for that database cluster.
-
Navigate to the Backups tab. A list of your available backups are displayed, organized by the date they were created.

Restore managed backups
Restoring from a backup erases all data stored within the database cluster and replaces it with the data from that backup.
-
View the available backups. To learn how, see View Managed Backups.
-
Locate the backup you wish to restore and click the corresponding Restore link. A confirmation dialog appears.

-
Enter the name of the database cluster in the Database Label field and click the Restore Database button. This deletes all the data currently stored on the database and restores the data from the selected backup. The restore process takes a few moments, the length of which depends on the amount of data. You can monitor the progress by viewing the listing page for all your database clusters.
Alternative backup methods
To fully protect your data, your backup strategy should include additional backup solutions. While managed backups provide several quick recovery points, you may wish to retain backups for longer periods of time, store backups offsite, or only backup certain databases or tables. In these cases, you can use built-in DBMS tools or other third-party solutions.
The following is a list of command-line tools included with each DBMS. These tools can all be used to create manual backups or to automate backups through cron jobs or other tools.
MySQL
The mysqldump utility captures logical backups of MySQL databases and is included as part of the MySQL software. The following command exports a database called Example within the MySQL Managed Database cluster and saves it as an .sql file. Replace the host and database name with your own values. To learn more, see Connect to a MySQL Managed Database.
mysqldump -h lin-1111-1111-mysql-primary.servers.linodedb.net -u linroot -p --single-transaction --set-gtid-purged=OFF Example > backup-$(date +%F-%H.%M.%S).sql
For more instructions, see Backing Up MySQL Databases Using mysqldump.
Postgresql
pg_dump, included with PostgreSQL, captures logical backups of PostgreSQL databases. The following command exports the database called Example within the given PostgreSQL Managed Database cluster and saves it as a file. Replace the host and database name with your own values. To learn more, see Connect to a PostgreSQL Managed Database.
pg_dump -Fd --host lin-1111-1111-pgsql-primary.servers.linodedb.net --dbname Example --quote-all-identifiers --verbose --lock-wait-timeout=480000 --no-unlogged-table-data --serializable-deferrable --jobs=1 --username linpostgres --file database.backup
For more information, review the Backing Up a PostgreSQL Database (Database Dump) guide.
Reset the root password
If you need to reset the root password on your Managed Database, you can do so through Cloud Manager. This process assigns a new randomly generated password to the linroot user. This is helpful when someone should no longer have access to that user or if you believe your password may have been compromised.
Resetting the root password will prevent you from restoring all previously taken backups. Ensure that you have offsite backups available if needed.
-
Log in to Cloud Manager and select Databases from the left navigation menu.
-
Select your Managed Database from the list. This opens the detail page for that database cluster.
-
Navigate to the Settings tab.
-
In the Reset Root Password section, click the Reset Root Password button. A confirmation dialog appears.

-
Click Reset Password to confirm. A new password will automatically be generated for this database cluster within a few minutes. To view the new password, navigate to the Summary tab and click the Show button next to the password field within the Connection Details section.
Resize a cluster
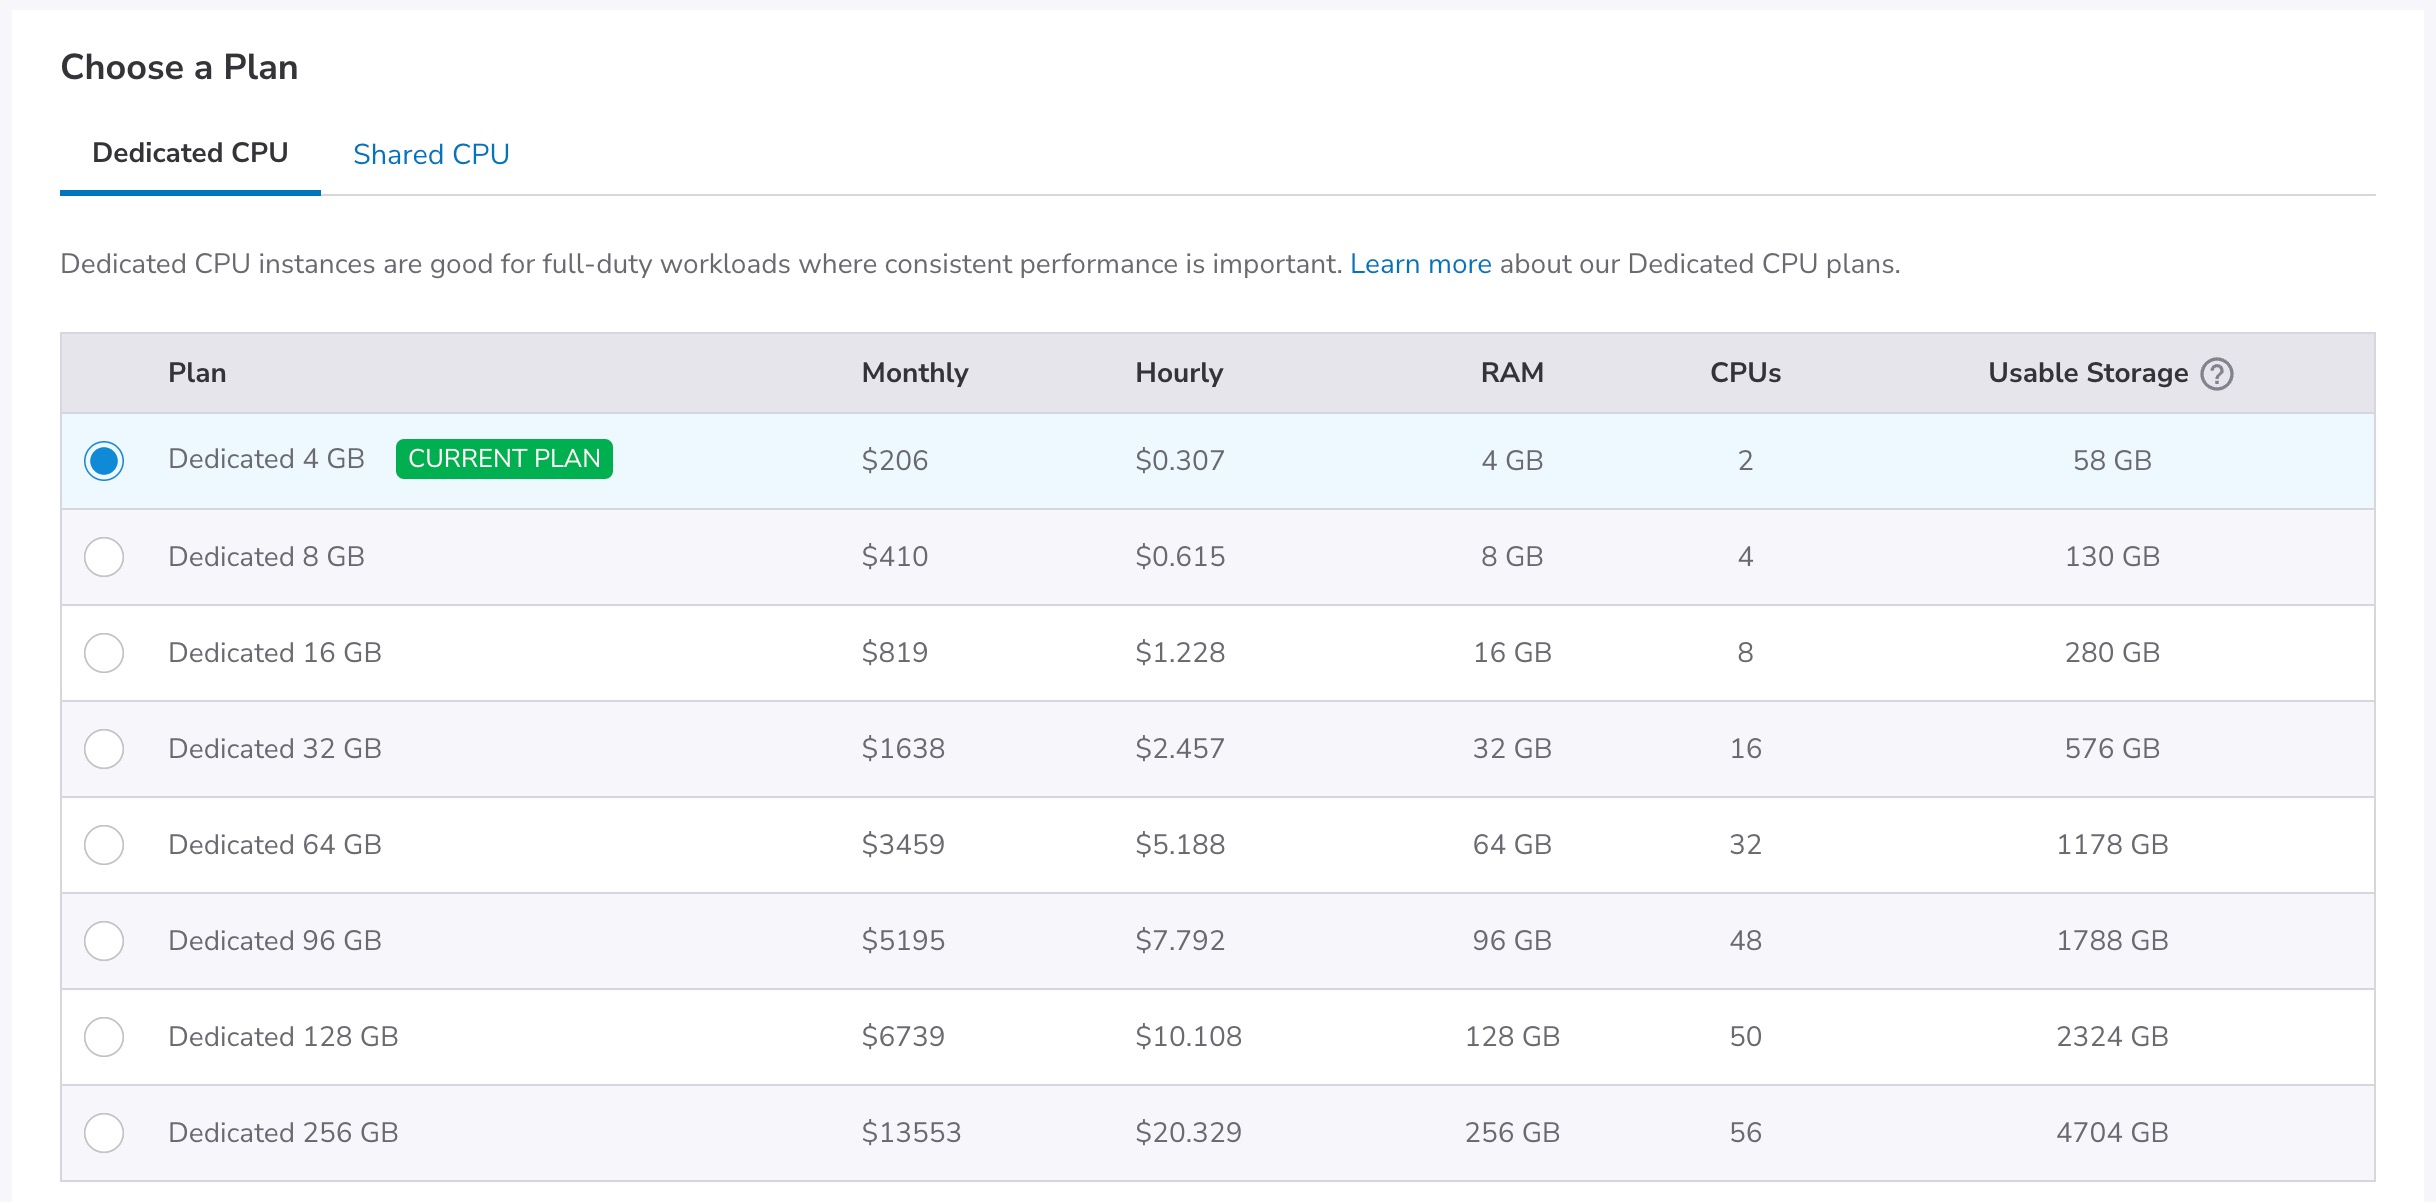
You can upscale database clusters to adapt them to your needs. Clusters can’t be downscaled.
This operation causes downtime for the resized node clusters.
-
Log in to Cloud Manager and select Databases from the left navigation menu.
-
Select a database cluster from the list.
-
Navigate to the Resize tab.
-
In the Choose a plan section, select a new plan for your database cluster.

-
In the Summary section, verify the changes. Click Resize Database Cluster.
-
Follow the on-screen instructions and click Resize Cluster to confirm. The cluster will be upscaled within two hours.
Updated 5 months ago
