Manage VPC subnets
A VPC contains one or more subnets, which are networks within the VPC whose services all share the same IPv4 CIDR range. Just like VPCs, subnets are restricted to a single data center. Multiple subnets can be added to isolate services that are used for certain functionality of an application (like front-end and back-end services) or can segment a VPC and its attached services into different environments (such as development, staging, and production).
Subnet components
-
Subnet Label: An alphanumeric string (containing only letters, numbers, and hyphens) used to identify the subnet. It should be unique among other subnets in the same VPC and should provide an indication as to its intended usage.
-
Subnet IP Address Range: VPC subnet ranges must be in the RFC1918 IPv4 address space designated for private networks. That said, it cannot overlap with the
192.168.128.0/17range set aside for Private IP addresses on Linodes. -
Assigned Services: Each subnet can have multiple services assigned to it. These services can communicate with other services in any subnet in the same VPC.
Considerations
- Up to 10 subnets can be created on a VPC.
- A subnet is located within a single data center.
- Each subnet can have at most one IPv4 CIDR block. Review Valid IPv4 ranges.
- Each service assigned to a subnet must have a unique IPv4 address in the defined range.
Valid IPv4 ranges for a subnet
When defining an IPv4 range for a subnet, use a CIDR block within the RFC1918 specification that can accommodate the number of Linodes you anticipate being assigned to the subnet. Your subnet must be within the following blocks:
10.0.0.0/8172.16.0.0/12192.168.0.0/16(excluding192.168.128.0/17which is reserved for the private IP address feature)
View subnets
-
Locate and click the name of the VPC you wish to inspect. This displays the details page for that VPC.
-
Review the Subnets section to view all of the subnets on the VPC.

Each subnet is listed alongside its defined CIDR block and the number of services assigned. Subnets can be expanded to view all services assigned to that particular subnet. These services are listed alongside their assigned IPv4 address and any firewalls that are applied to that interface.
Add a subnet
Up to 10 subnets can be added to each VPC.
-
Navigate to the Subnets section of a VPC. See View subnets.
-
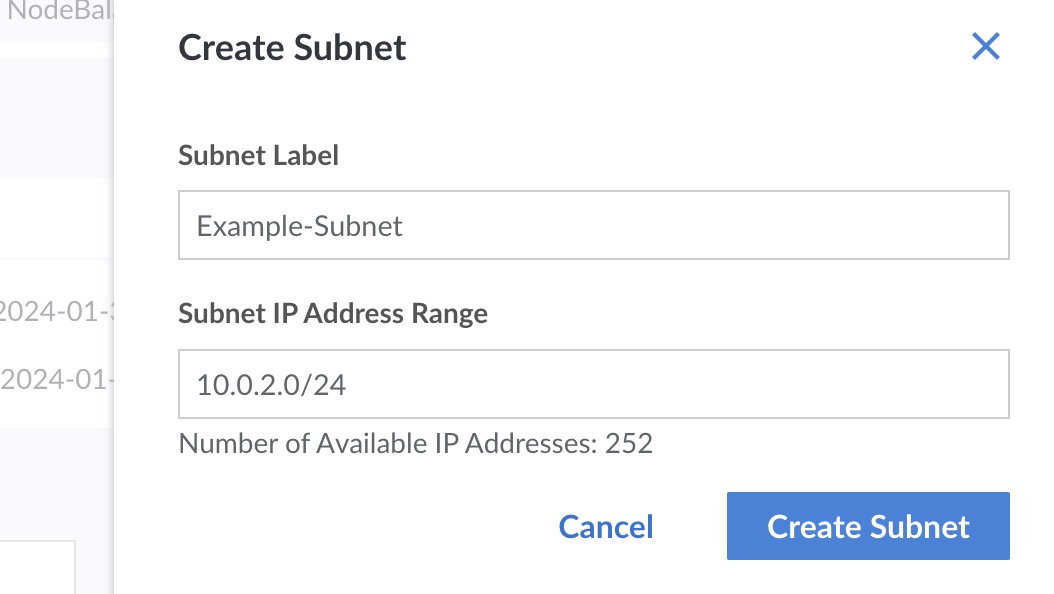
Click the Create Subnet button. This opens the Create Subnet panel.

-
Enter a unique label and IP address range for the subnet.
-
Click the Create Subnet button.
Edit a subnet's label
Once a subnet has been created, only its label can be edited. You cannot modify the CIDR block.
-
Navigate to the Subnets section of a VPC. See View subnets.
-
Locate the subnet you wish to edit, expand the corresponding ellipsis menu, and click the Edit option. This opens the Edit Subnet panel.
-
Modify the label and click Save.
Assign a service to a subnet
Review the Assign a Linode to a VPC guide.
Remove a service from a subnet
It is possible to remove a Linode from a subnet, though the Linode needs to be powered off to do so. Follow the instructions below to power off and remove a Linode.
-
Navigate to the Subnets section of a VPC. See View subnets.
-
Locate and expand the subnet that the service belongs to.
-
Within the list of assigned services, locate the Linode you wish to remove.
-
If the Linode is not already powered off, click the corresponding Power Off.
-
Once the Linode is fully powered off, click the corresponding Unassign Linode.
Once the Linode has been removed, you can power it back on or delete it. If you plan to continue using it, review the Configuration Profile interfaces (in the Configurations tab) or Linode interfaces (in the Network tab) to ensure proper operation.
Updated 13 days ago
