View, create, and delete Block Storage volumes
What is Block Storage? Block Storage is a scalable, high-speed, and fault tolerant network storage service used to add additional storage capacity to a Linode.
The Block Storage service lets you create volumes, which can be attached to Linodes and used to easily store your data. This guide covers how to view, add, manage, and delete Block Storage volumes.
View volumes
View all volumes
Log in to Cloud Manager and click the Volumes link in the sidebar. All Block Storage volumes on your account are listed here, including their region, size, attachment information, and encryption status.

View Block Storage volumes attached to a specific Linode
-
Log in to Cloud Manager and click the Linodes link in the sidebar.
-
Select the Linode for which you'd like to view all attached volumes. The detail page for that Linode should appear.
-
Navigate to the Storage tab and find the Volumes section, as shown below. All volumes that are currently attached to this Linode should appear in a list, along with the region, size, encryption status, and the file system path.

Add volumes
If your Linode was deployed before August 24th, 2021 and hasn't been rebooted since your data center was upgraded to NVMe block storage, you may need to reboot the Linode for it to properly work with a Block Storage volume.
-
Navigate to the Volumes page in Cloud Manager. Alternatively, if you know which Linode you wish to attach the new volume to, navigate to the Storage tab for that Linode. See View volumes.
-
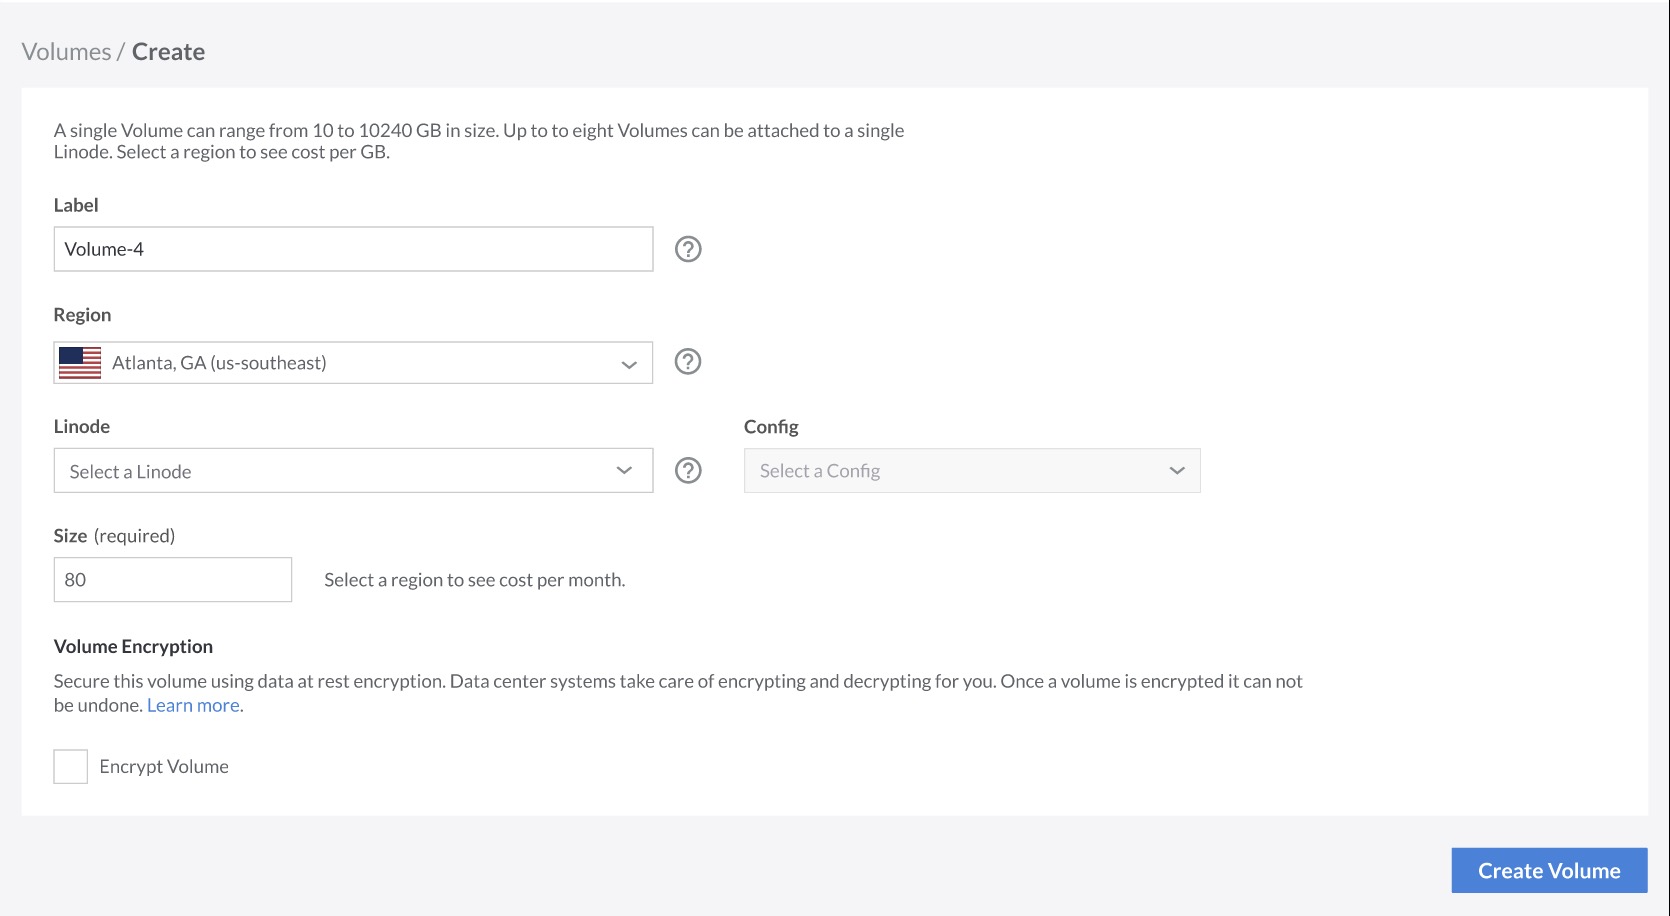
Click the Create volume button to open the creation form. This form may have slightly different options, depending on the page you were on in the previous step. If creating a volume directly from a Linode's Storage tab, select the Create and Attach volume option to create a new volume.

-
Enter the Label for the volume. The Label can be up to 32 characters long and can contain uppercase and lowercase letters, numbers, hyphens, and underscores.
-
Select the Region and Linode. These fields only appear when creating a volume from the main volume page (not on a specific Linode). If the Linode field is left blank, the volume is created in a detached state, meaning it is not attached to any Linode.
-
If a Linode has been selected, select a Configuration Profile within the Config field to attach the volume to the next available Block Device Assignment (such as
/dev/sdc). -
Enter the Size for the new volume. See the Limits and considerations section for the minimum and maximum size.
-
Consider enabling Encrypt Volume. The platform manages encryption and decryption for you. After a Volume is created, you can't change this setting. More information is available from the Volume Encryption guide.
-
Click Create Volume to create the new Block Storage volume.
-
A Volume Configuration panel appears, which contains the instructions needed to access the new volume with your Linode. These instructions include commands for creating the file system, mounting the volume, and configuring your Linode to automatically mount the volume at boot. For help with these commands, see Configure and mount a volume.
-
Once created, the volume is listed under the Volumes table.
Delete volume
Once a Block Storage volume has been deleted, the data contained on that volume will be permanently erased. This action cannot be reversed, so it’s always best to verify or backup the data in the Block Storage volume beforehand.
-
Log in to Cloud Manager.
-
If the volume is attached to a Linode, power off that Linode and detach the volume. To do so, follow the instructions within the Detach the volume guide.
-
Click on the Volumes link in the sidebar.
-
Locate the desired volume within the list, click the more options ellipsis dropdown menu, and select Delete. If the status of the volume is
Key Rotating, the option to Delete the volume is disabled. -
In the configuration dialog, click Delete once again.
Updated 8 months ago
