Clone a Linode
Cloning lets you duplicate a Linode's disks (and configuration profiles) to a new or existing Linode. Cloning is not supported for Linodes deployed to distributed compute regions.
Clone to a new Linode
This process copies all disks and configuration profiles to a newly created Linode on your account.
Before continuing, you should power off the Linode you want to clone. This helps prevent data corruption.
-
Log in to Cloud Manager.
-
Click the Create dropdown menu on the top left and select Linode.
-
In the Create New Linode form, navigate to the Clone Linode tab.

-
Under Select Linode to Clone From, search for and select the Linode you wish to clone. If the selected Linode is running, Power Off appears to the right.
-
To help prevent data corruption during cloning, click Power Off.
If you're using a mobile device, available Linode appear as cards without the Power Off option. To power off an Linode from a mobile device, go to the Linode details page.
-
Complete the remainder of the form. Enter a label and select the region, the plan, and other options for the new Linode.
-
The plan's storage must be greater than the combined disk size of the original Linode. If you wish to select a plan with less storage, you may need to resize your disks before cloning.
- If the target Linode is in a placement group, the clone isn't automatically included in the same placement group. You need to specify a placement group to include it in. The target placement group needs to have capacity to include a cloned Linode and it needs to be in the same data center as the clone.
-
-
Click the Create Linode button to start the cloning process. Cloning a Linode can be much longer than creating a new Linode based on a distribution image or custom image. The length of time depends on the size of the disks, among other factors. To keep track of the cloning progress, a status bar is displayed above the original Linode with the percentage of completion.
-
Once the cloning process is complete, you need to power on the new Linode to begin using it.
The new Linode IP address will be different than the original Linode. If desired, you can transfer the IP address from the original Linode to the new one. Swapping the IP address can prevent additional changes from being required, such as changing DNS records or the internal configuration of the new Linode. See Transferring IP addresses.
Clone to an existing Linode
This process lets you select specific disks or configuration profiles and duplicate them to an existing Linode. When cloning a configuration profile, all disks assigned to that profile are also cloned.
-
Log in to Cloud Manager and select the Linodes link in the left sidebar menu.
-
Locate the Linode you wish to clone and click its corresponding label, which displays the Linode's detail page.
-
To help prevent data corruption, click the Power Off link in the top right.
-
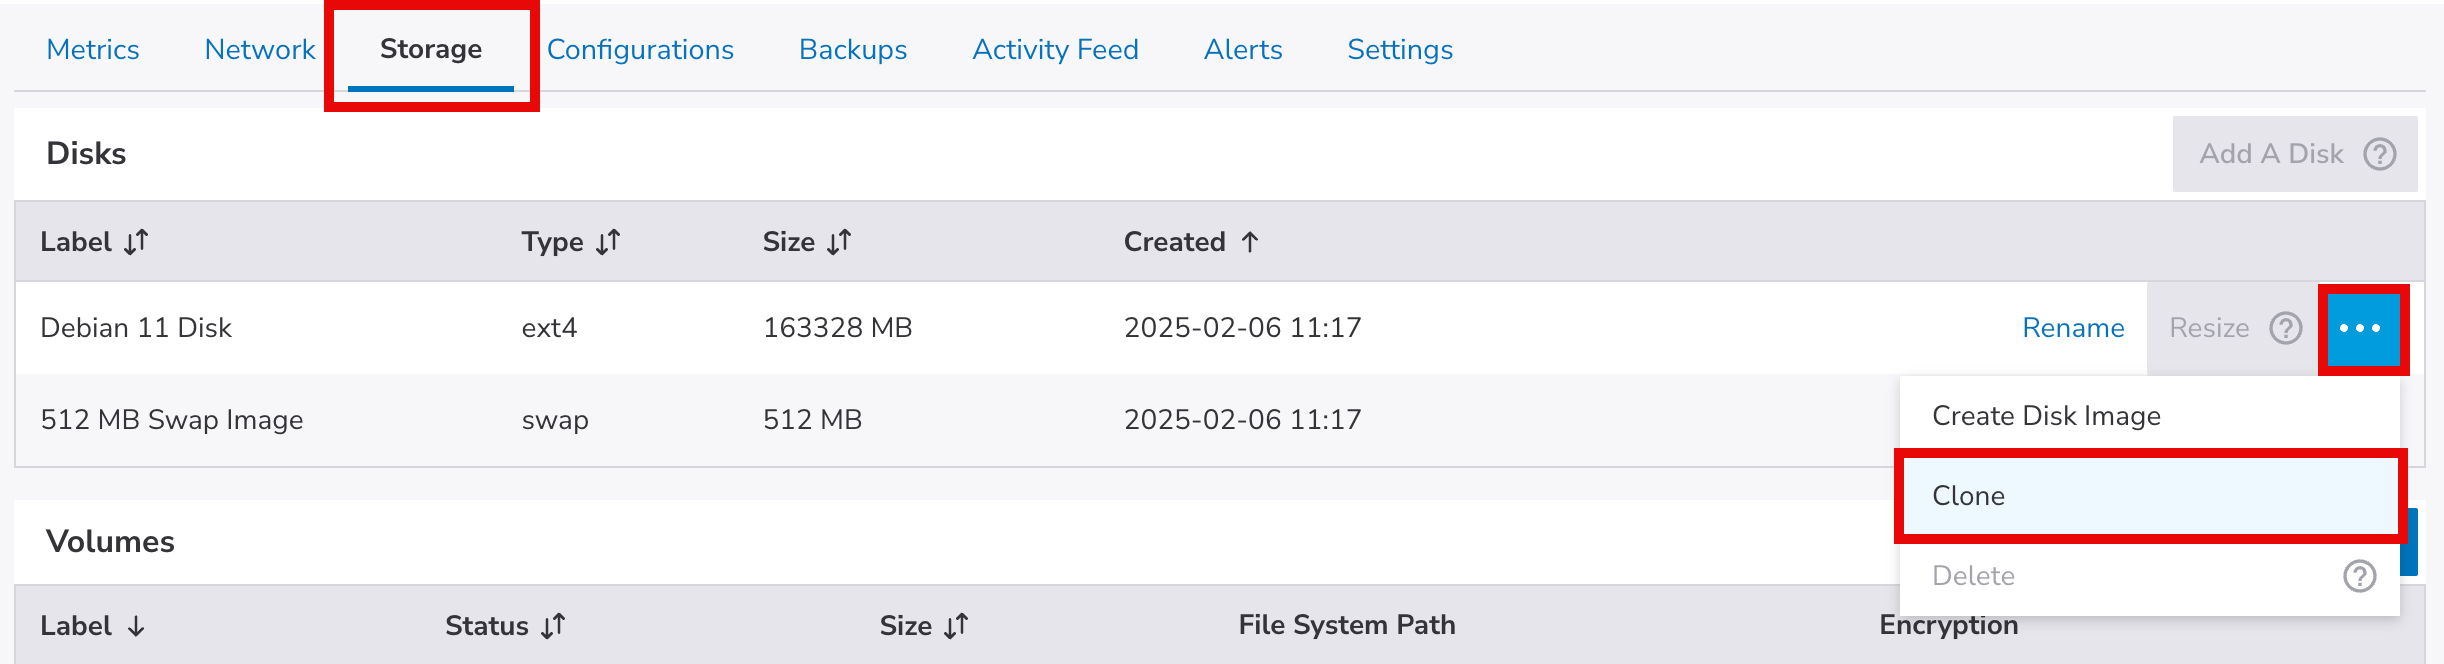
To clone a disk: Navigate to the Storage tab, locate the disk you wish to clone within the Disks table, click the more options ellipsis dropdown menu, and select Clone.
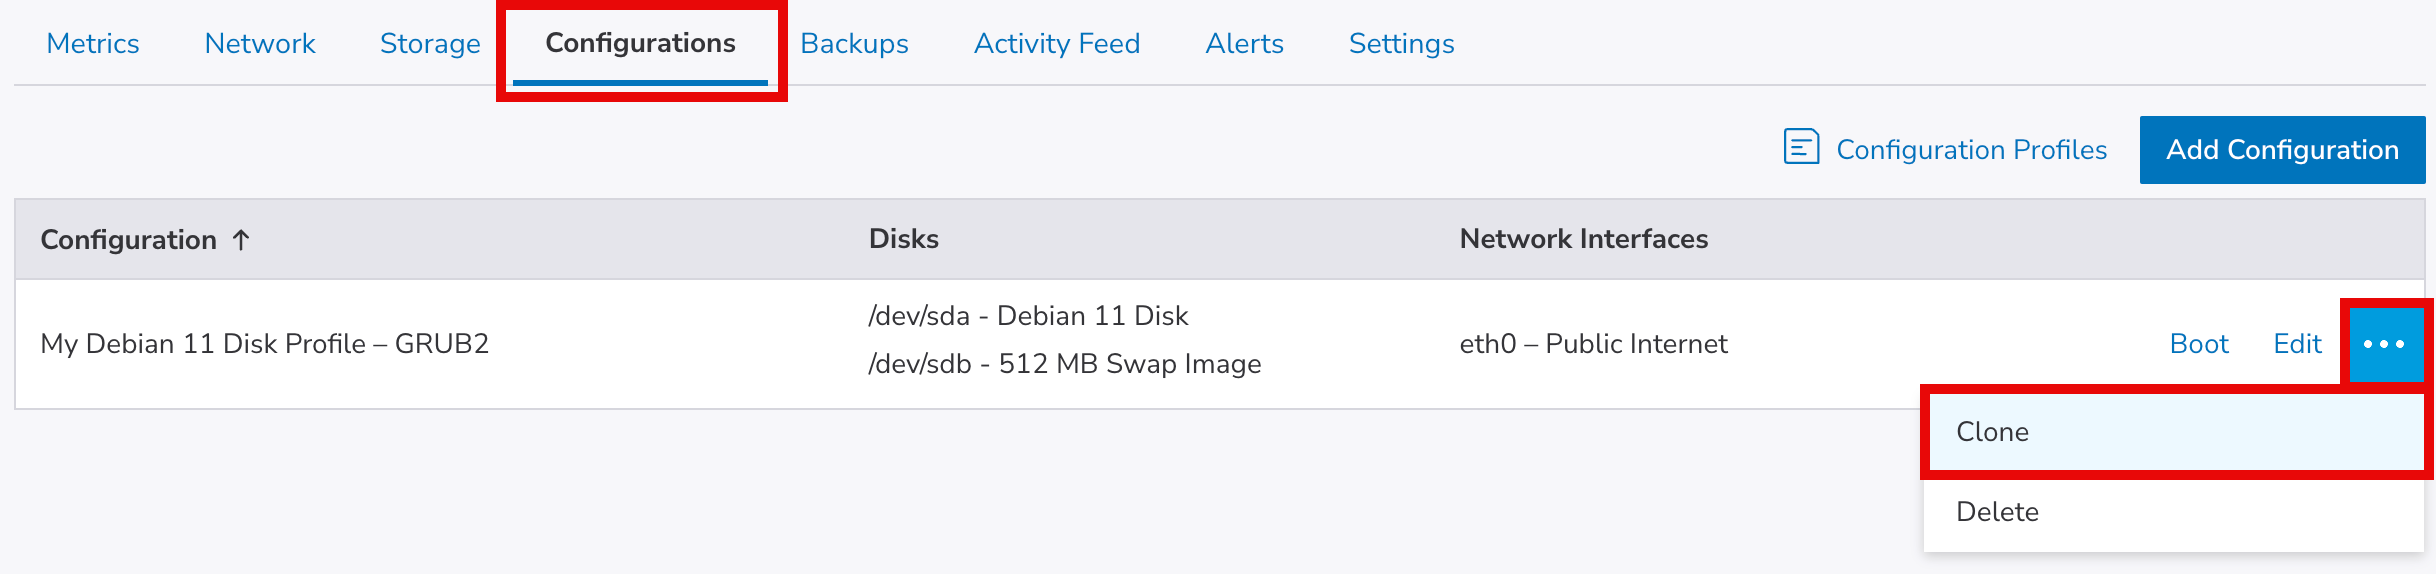
To clone a configuration profile: Navigate to the Configurations tab, locate the profile you wish to clone within the Config table, click the more options ellipsis dropdown menu, and select Clone.
-
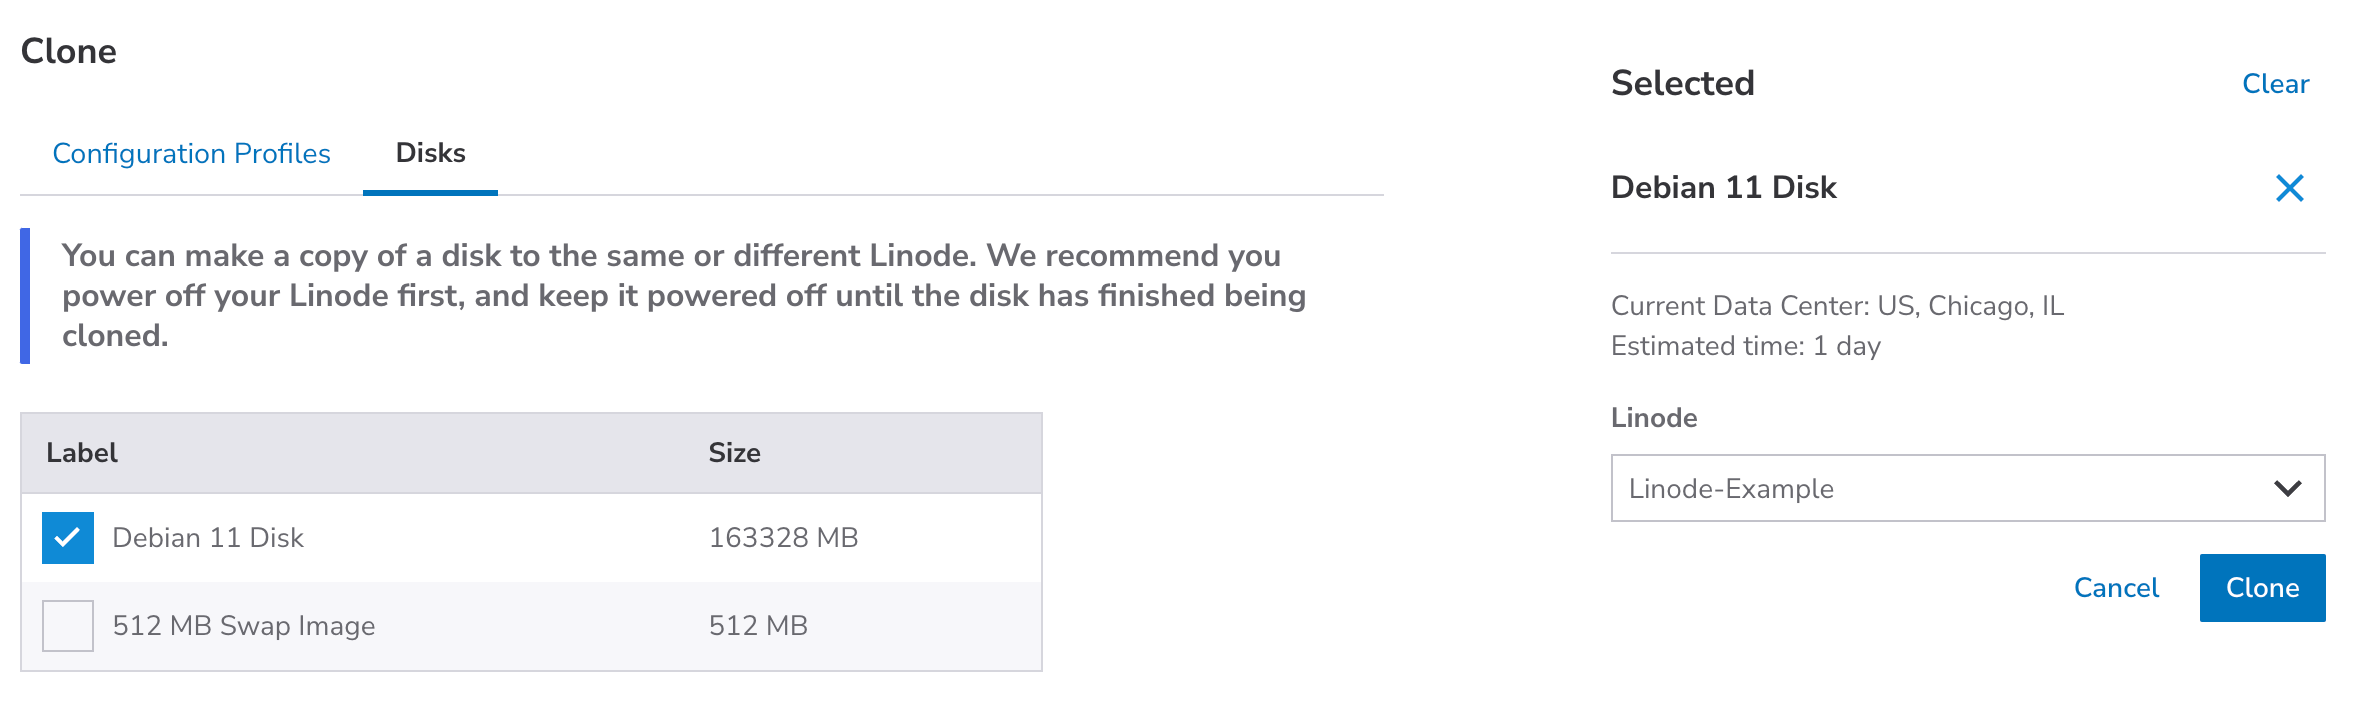
A Clone form appears with either the Disks or Configuration Profiles tab displayed, depending on the previous step. From here, select the exact disks and configuration profiles you wish to clone. When a configuration profile is selected, all disks assigned to it (through Block Device Assignments) are also selected.
-
In the Destination dropdown menu, select the destination Linode.
The destination Linode must have enough free storage to accommodate the disks that are to be cloned. If there's not enough free storage space, you'll need to either resize the disks (either on the original or destination Linode) or upgrade the destination Linode to a larger plan.
-
Click the Clone button to start the cloning process. The length of time this takes depends on the size of the Linode's disks (among other factors). To keep track of the cloning progress, a status bar is displayed above the original Linode with the percentage of completion.
-
Once the cloning process is complete, you may need to make changes to the destination Linode in order to begin using the disks. This involves either booting the Linode using the cloned configuration profile or adjusting the existing configuration profile to assign the cloned disks. See Manage configuration profiles on a Linode.
Updated 5 months ago