Create Limited Access keys using the Linode CLI
Follow these instructions to learn how to use the Linode CLI to create Limited Access keys for E2 and E3 endpoints.
You cannot currently use Cloud Manager to create Limited Access Keys for E2 and E3 endpoints.
Create a single region, single bucket Limited Access Key
Use this Linode CLI command to create a single region, single bucket access key.
$ linode-cli object-storage keys-create \
--label "test-limited-access" \
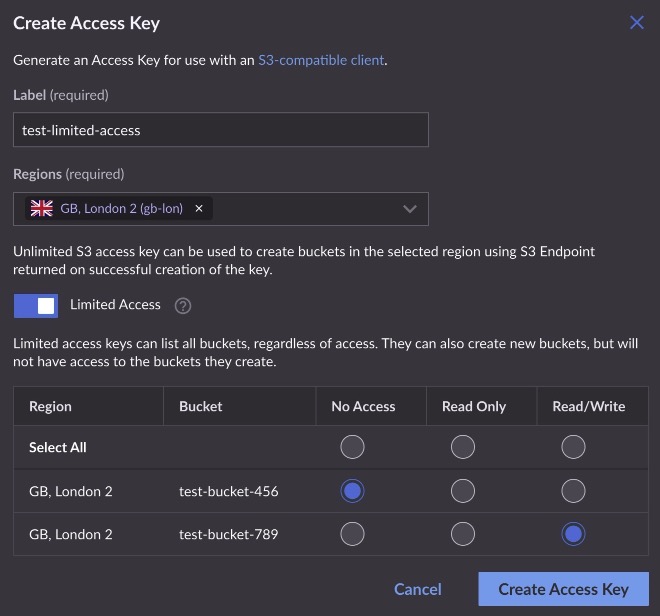
--bucket_access '[{"region": "gb-lon", "bucket_name": "test-bucket-789", "permissions": "read_write" }]' \
--regions "gb-lon"
┌──────────────────────┬─────────┬───────────────────────┬─────────┬───────────────────┐
│ access_key │ id │ label │ limited │ secret_key │
├──────────────────────┼─────────┼───────────────────────┼─────────┼───────────────────┤
│ ******************* │ 1615238 │ test-limited-access │ True │ ************** │
└──────────────────────┴─────────┴───────────────────────┴─────────┴───────────────────┘Here's an example of the permissions for the access key as they would appear in Cloud Manager.
Create a multiple region, multiple bucket Limited Access key
Use this Linode CLI command to create a multiple region, multiple bucket access key.
$ linode-cli object-storage keys-create \
--label "test-multiple-buckets" \
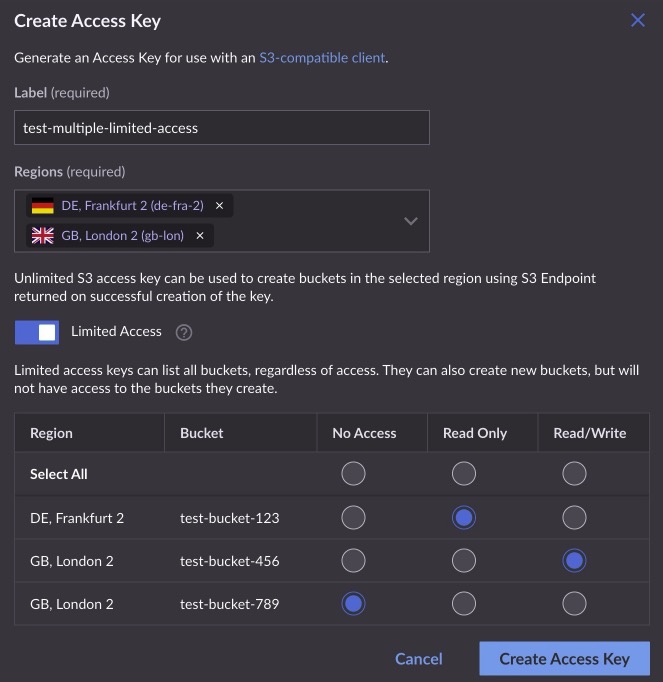
--bucket_access '[{"region": "gb-lon", "bucket_name": "test-bucket-789", "permissions": "read_write" }, {"region": "de-fra-2", "bucket_name": "test-bucket-123", "permissions": "read_only"}]' \
--regions "gb-lon" --regions "de-fra-2"
┌──────────────────────┬─────────┬─────────────────────────┬─────────┬───────────────────┐
│ access_key │ id │ label │ limited │ secret_key │
├──────────────────────┼─────────┼─────────────────────────┼─────────┼───────────────────┤
│ ******************* │ 1615238 │ test-multiple-buckets │ True │ ************** │
└──────────────────────┴─────────┴─────────────────────────┴─────────┴───────────────────┘Here's an example of the permissions for the access key as they would appear in Cloud Manager.
Tips to help build the Linode CLI parameters
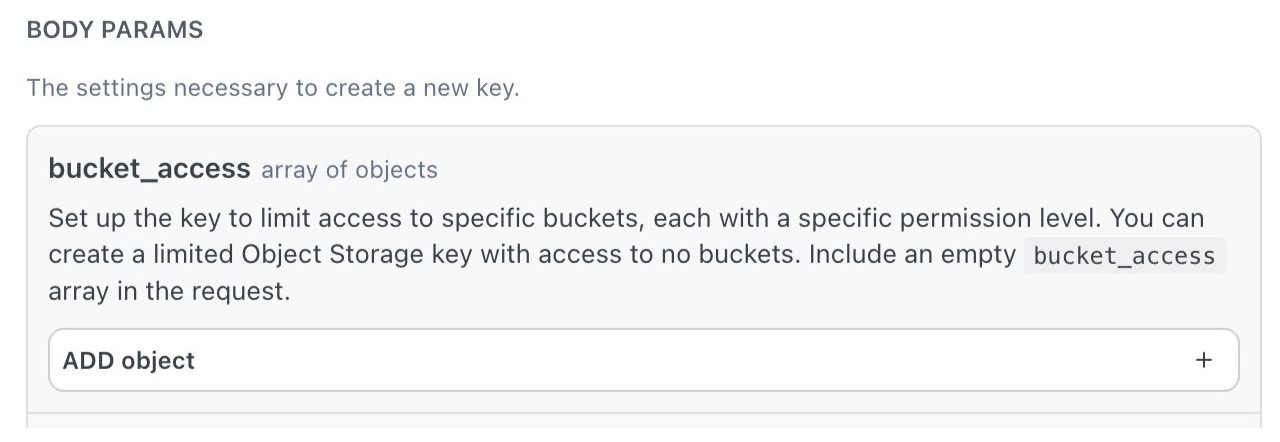
For more information about limited access keys and the bucket_access variable go to the Create an Object Storage key topic in the Linode API documentation.
You can also use the Create an Object Storage key topic to generate the correct value for bucket_access to use in the Linode CLI.
- Scroll down to the BODY PARAMS section and click ADD object under bucket_access.
- Fill in the fields that appear with the desired values. Here's an example of the fields as they would appear in Cloud Manager.

Here's an example of the parameters on Linode API page.
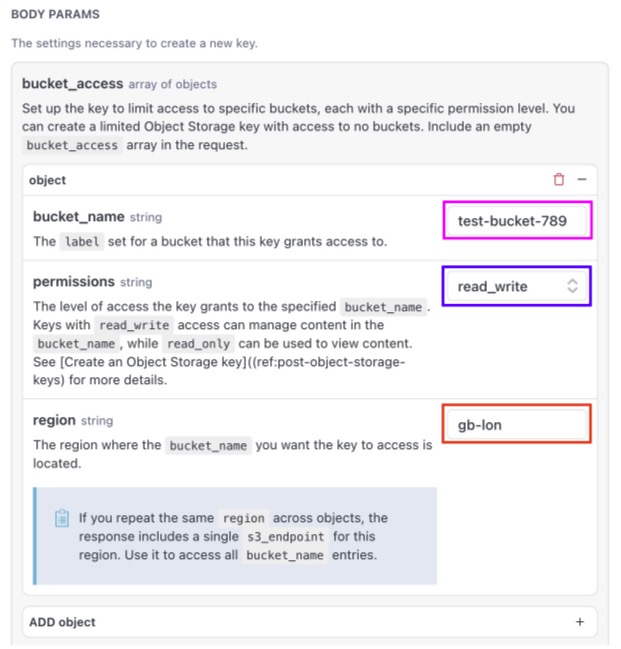
- You can continue clicking ADD object to add access to more buckets.
- When you're finished, you can get the correct value for bucket_access from the top right of the page.
- Copy the value within and including the square brackets ([ and ]) and paste it within the single quotation marks after
--bucket_accessin the Linode CLI command.
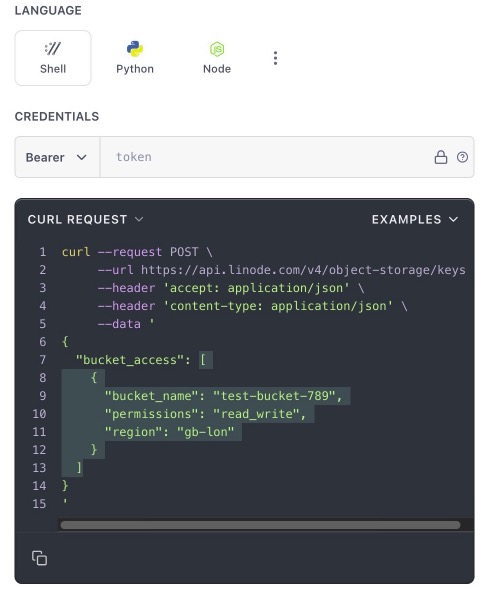
$ linode-cli object-storage keys-create \
  --label "test-limited-access" \
  --bucket_access '[
    {
      "bucket_name": "test-bucket-789",
      "permissions": "read_write",
      "region": "gb-lon"
    }
  ]
' \
  --regions "gb-lon"
Updated 23 days ago