Modern RDP end-user experience
In this release we have updated the library files for RDP applications for a modern RDP experience. End-users can easily do tasks like copy/paste to clipboard, and do file transfer.
Log into the RDP Server
This procedure describes how an end user can log into the RDP server.
- End user can authenticate into the EAA IdP login portal using his credentials.
- Double click on the RDP application.
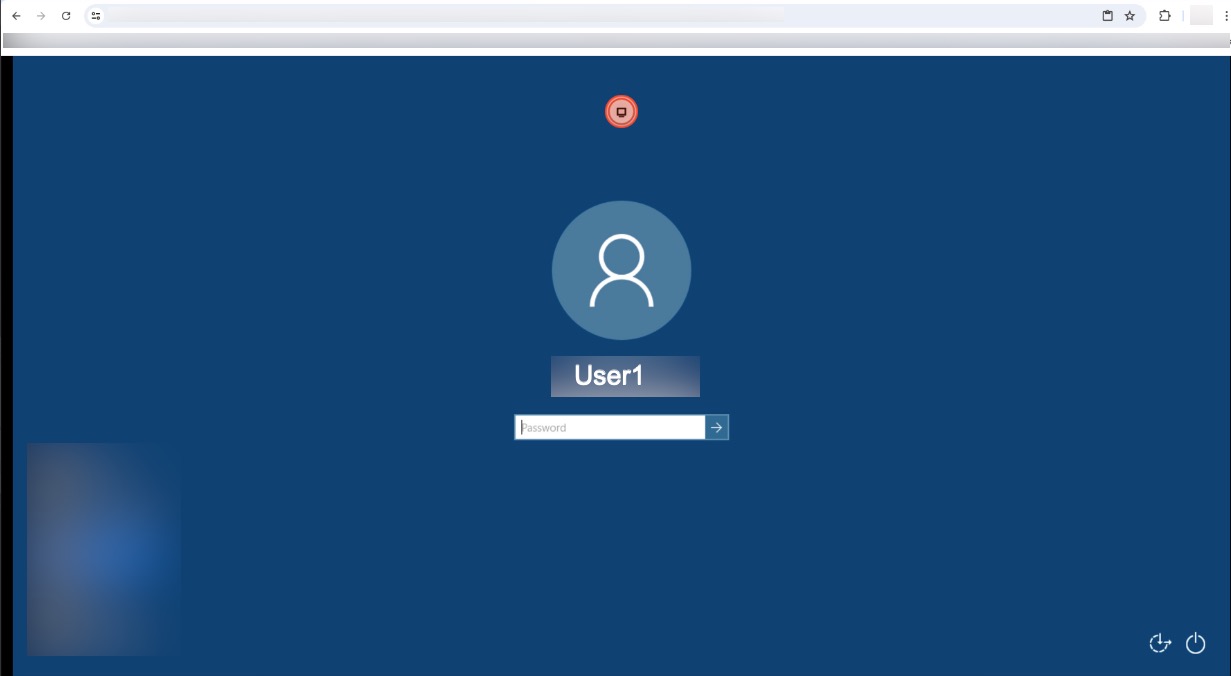
a. Enter the username and password to log into the RDP server.
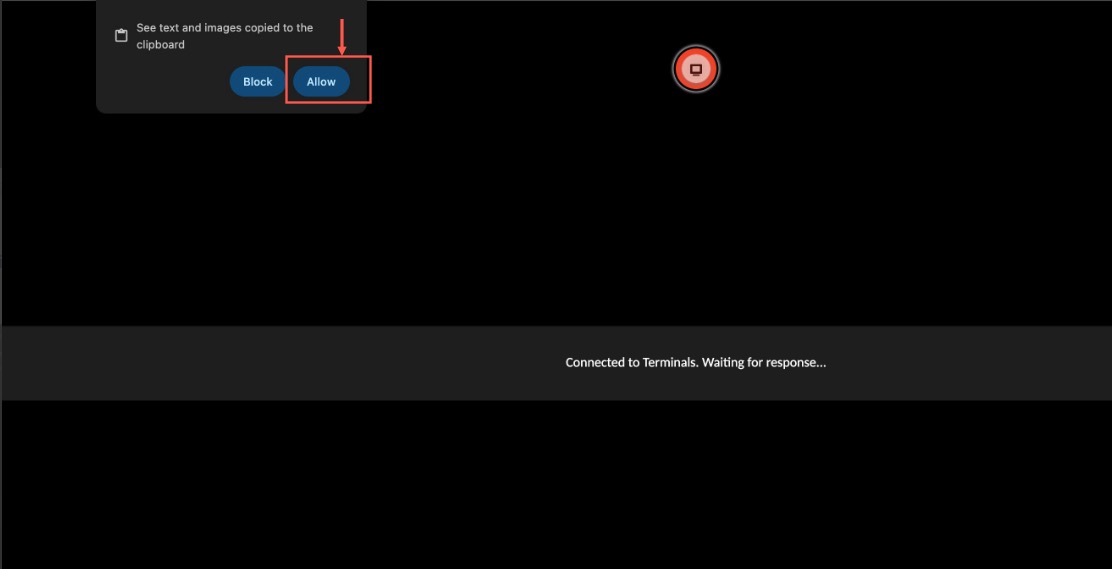
b. In the pop-up menu that appears while connecting to the RDP server, click Allow to “See text and images copied to clipboard”.
RDP menu options
Prerequisite:
Make sure that Enable remote copy/paste setting and Enable file sharing setting in your RDP Application configured in EAA, to allow copy/paste between your local machine and remote desktop portal and file upload and download between the shared drive and your local machine. See Configure an RDP application step 15.
After you have logged in to the RDP server, click the RED icon to open the menu options. If you are using a mobile device, swipe the screen to open the menu options.
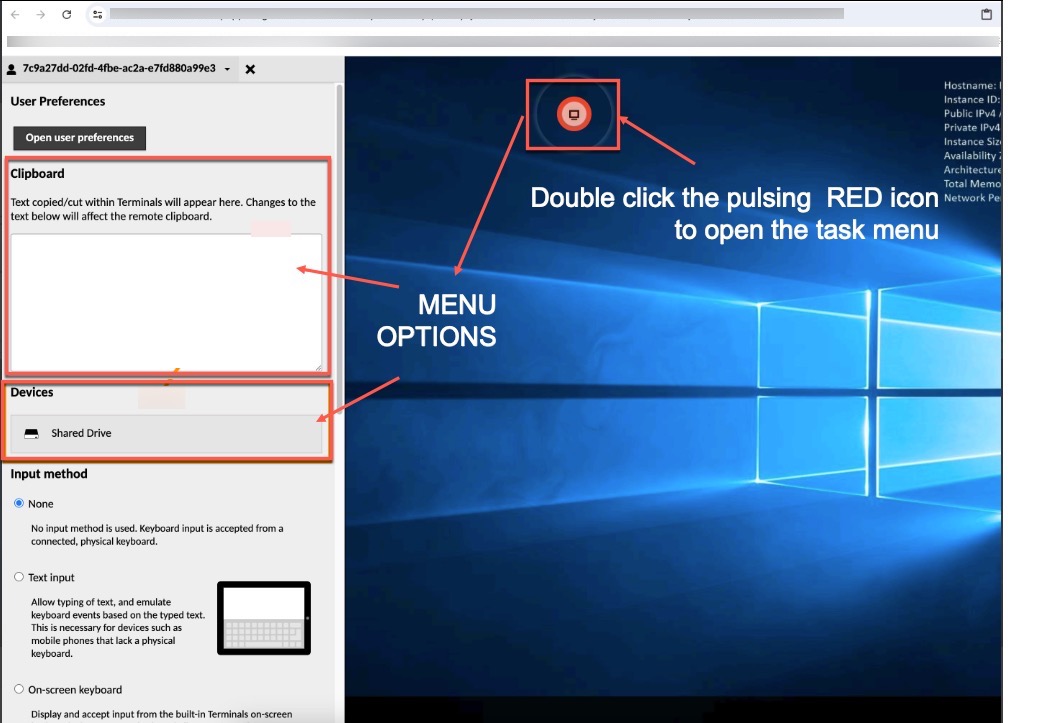
You can click on the Open User Preferences, a green dialog appears where the Display and Keyboard can be customized.
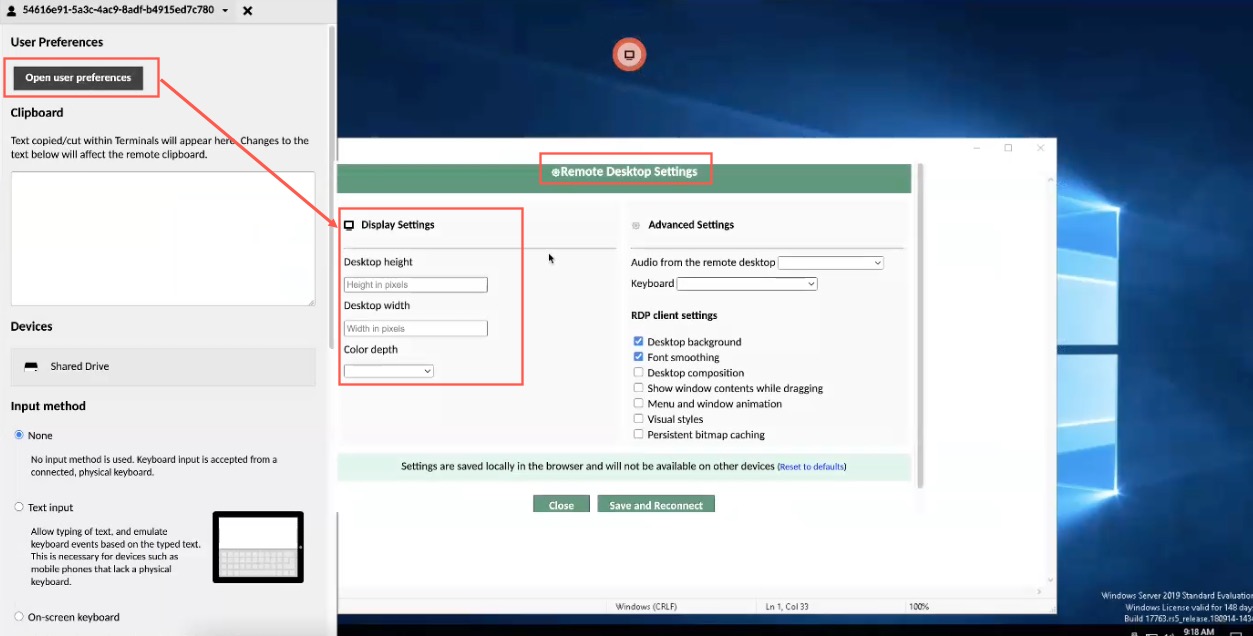
To enable keyboard shortcuts, select the pulsing red icon, select the Text Input or On-screen keyboard under Input method.
Use Clipboard for copy/paste
Prerequisite:
You must enable the Enable remote copy/paste option while configuring your RDP application in EAA to see the Clipboard and use it for copy paste.
In the Clipboard area, you see some basic instructions:
“Text copied/cut within Terminals will appear here. Changes to text below will affect the remote clipboard.”
The text area functions as an interface between the remote clipboard and the local clipboard. Text from the local clipboard can be pasted into the text area, causing that text to be sent to the clipboard of the remote desktop. Similarly, if you copy or cut text within the remote desktop, you will see that text within the text area, and can manually copy it into the local clipboard if desired.
Note:
Rich Text formatting is not supported with copy/paste functionality.
File Transfer methods
There are two methods for doing file transfer between your local machine and the RDP server:
- Using the file browser
- Using the RDP virtual drive
File transfer using the file browser
Prerequisite:
You must enable the Enable file sharing option while configuring your RDP application in EAA to use the file transfer feature.
Upload a file using Shared Drive
- Open the RDP menu by clicking on the red pulsing icon.
- Click on the Shared Drive in the Devices section.
- Click Upload Files.
- Locate the file on your machine and select the file to upload.
- The file is uploaded to the RDP server and copied to the temporary drive. You will see a Progress Bar called FILE TRANSFERS displayed on the bottom right corner for the upload process. You can click CLEAR after it is completed.
By default, the name of the temporary drive is LOCALSHARE. You will find the files on LOCALSHARE drive. You can change the name of the temporary drive by setting a different value for Shared Disk Name when you configure your RDP application in EAA. See Configure an RDP application step 15.
- After the file is uploaded it appears in the Shared Drive.
See example below:
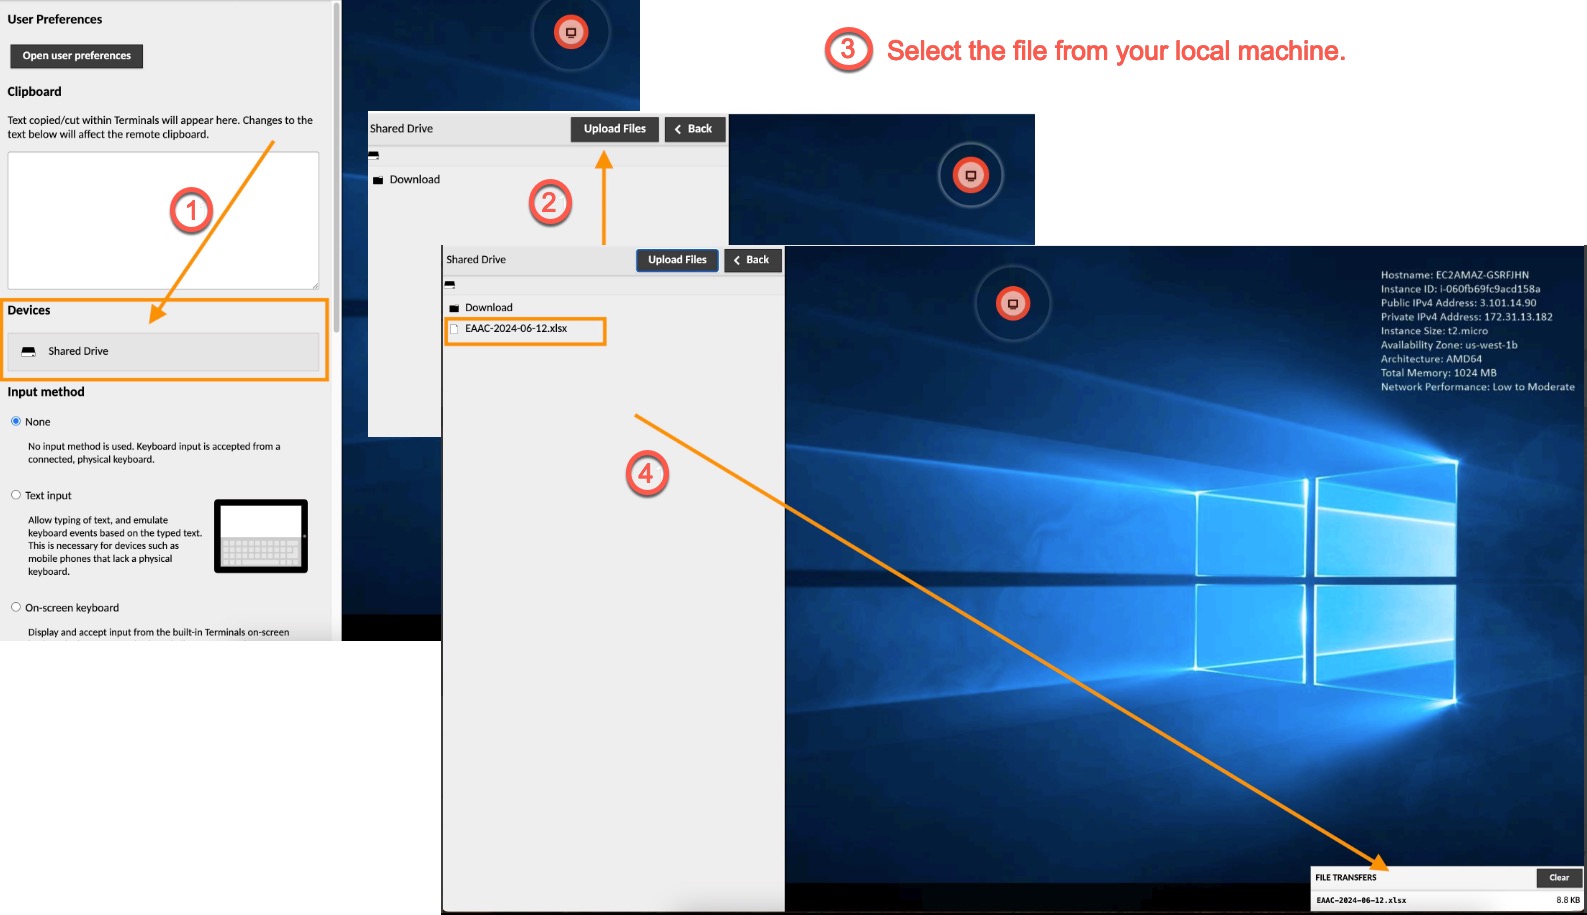
FIGURE: File Upload to RDP Shared Drive
Note:
You cannot cancel uploading a file after you have started the upload process. You will have to refresh the session to stop the upload process.
Download a file using Shared Drive
- Open the RDP menu by clicking on the red pulsing icon.
- Click on the Shared Drive in the Devices section.
- Within the Download folder, double-click the file you want to download to your local machine.
- It appears in your Recent Download History in the browser.
See an example below :
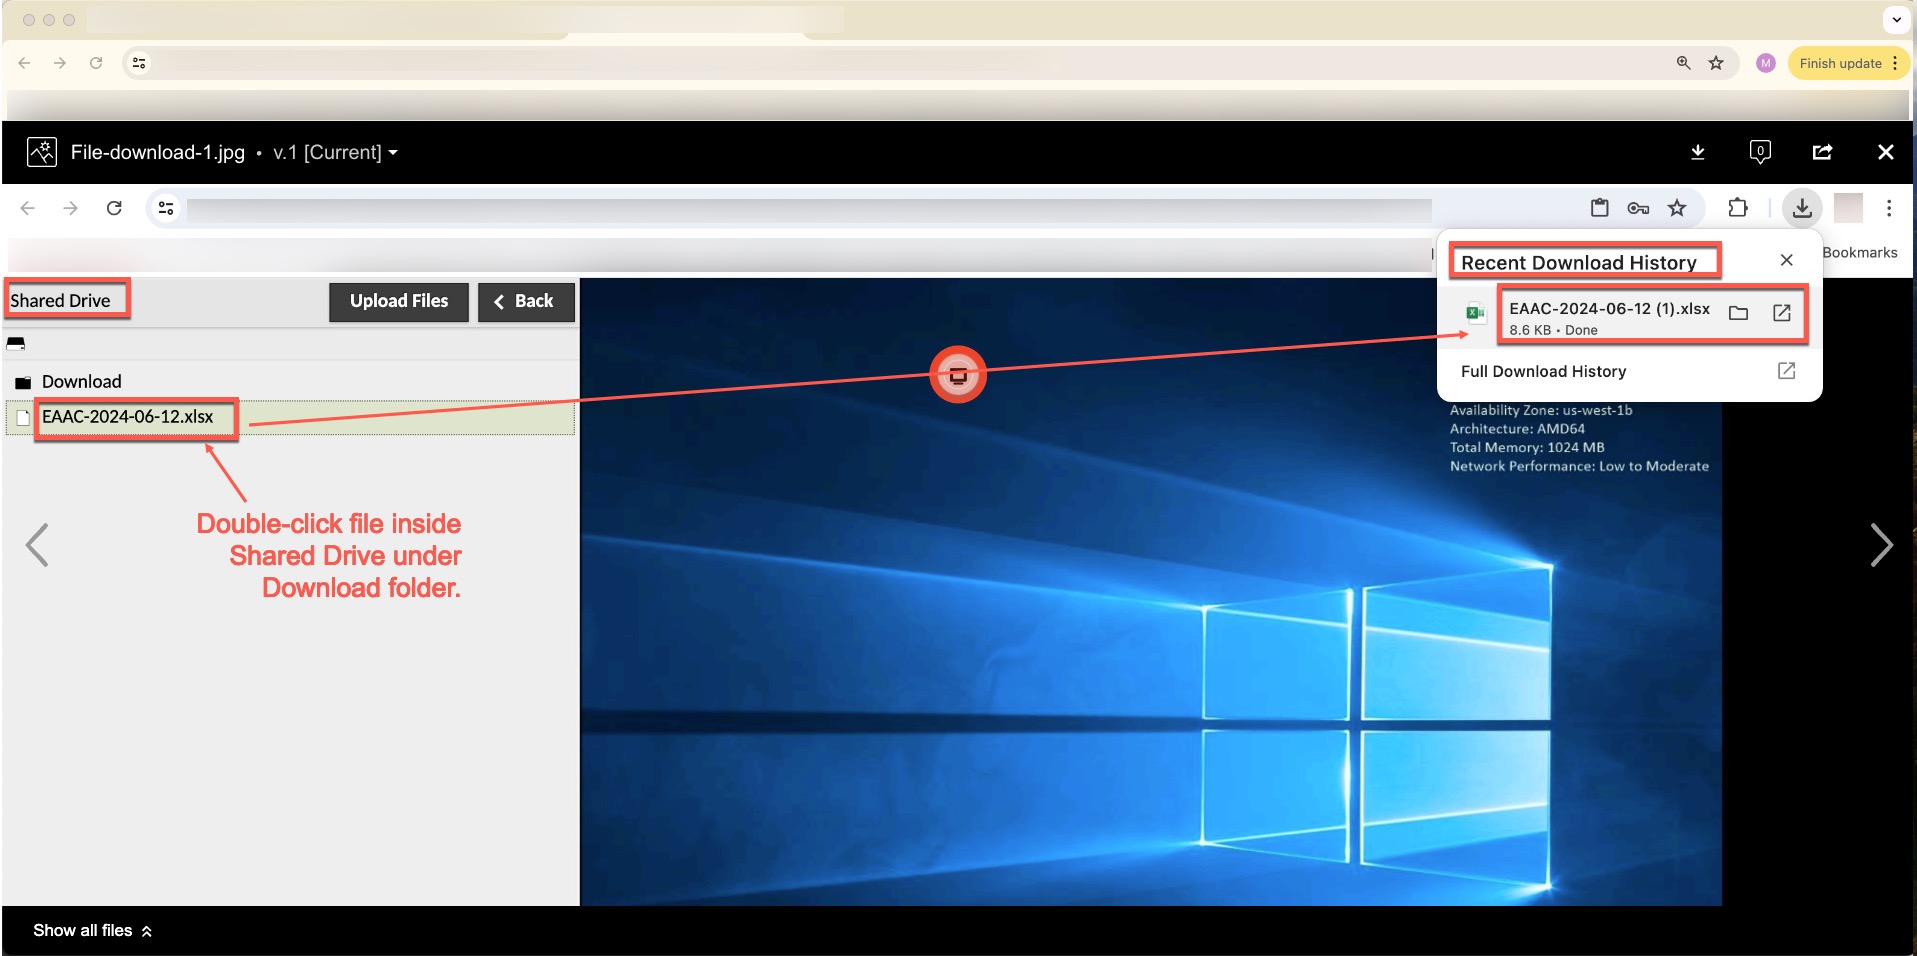
File transfer using the RDP virtual drive
Prerequisite:
You must enable the Enable file sharing option while configuring your RDP application in EAA to use the file transfer feature.
Download a file using LOCALSHARE
- Go to the Network tab on your machine.
- Select the LOCALSHARE > Download folder.
- Copy the file you wish to download to your local machine
- It appears in your Recent Download History in the browser.
See example below:

Note: By default, the name of the temporary drive is LOCALSHARE. You can change the name of the temporary drive by setting a different value for Shared Disk Name when you configure your RDP application in EAA. See Configure an RDP application step 15.
Print files
To print files inside your RDP server follow this procedure:
- Right click on the file and select Print.
- The print preview window opens and the file is shown in preview mode.
- Select the Destination for the file. The default setting is Save as PDF. You can select any local printer that is connected to your machine, if you want to print to it.
- Click Save.
The name of the file is saved in the default downloads location on your machine and you can print it from there.
Alternatively, if the file is open, click the Print icon on the top right corner, the file is sent to the Print Queue. The print queue processes the job. After it is done, save the file as PDF or print it to the local printer connected to your machine.
See example below:
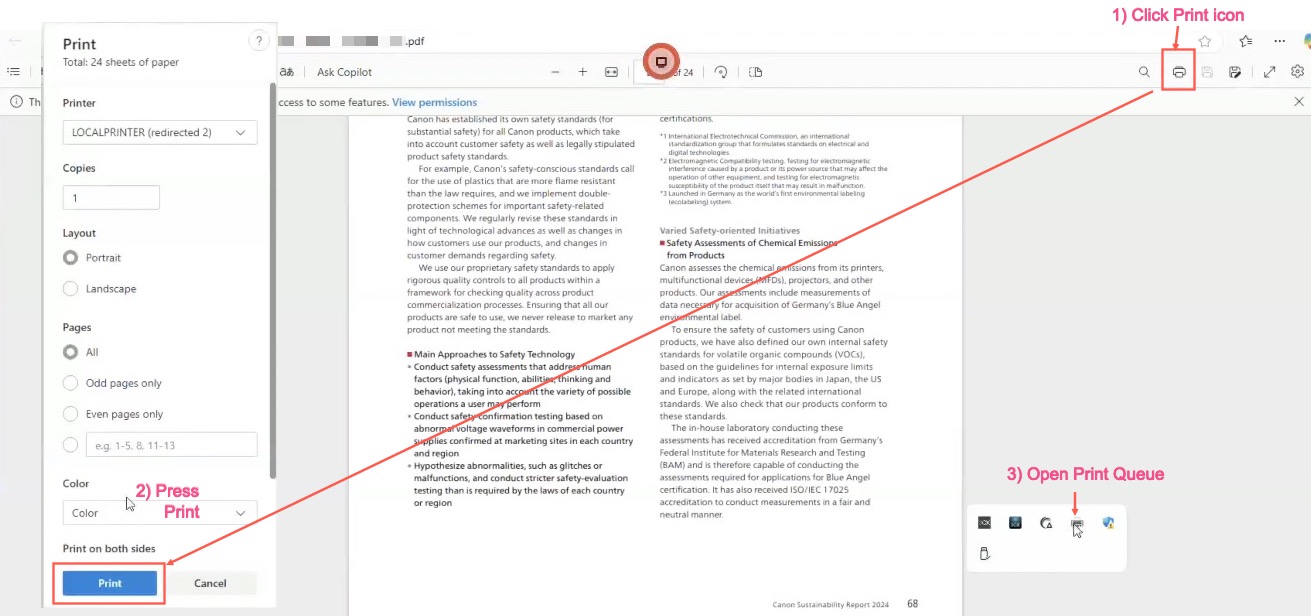
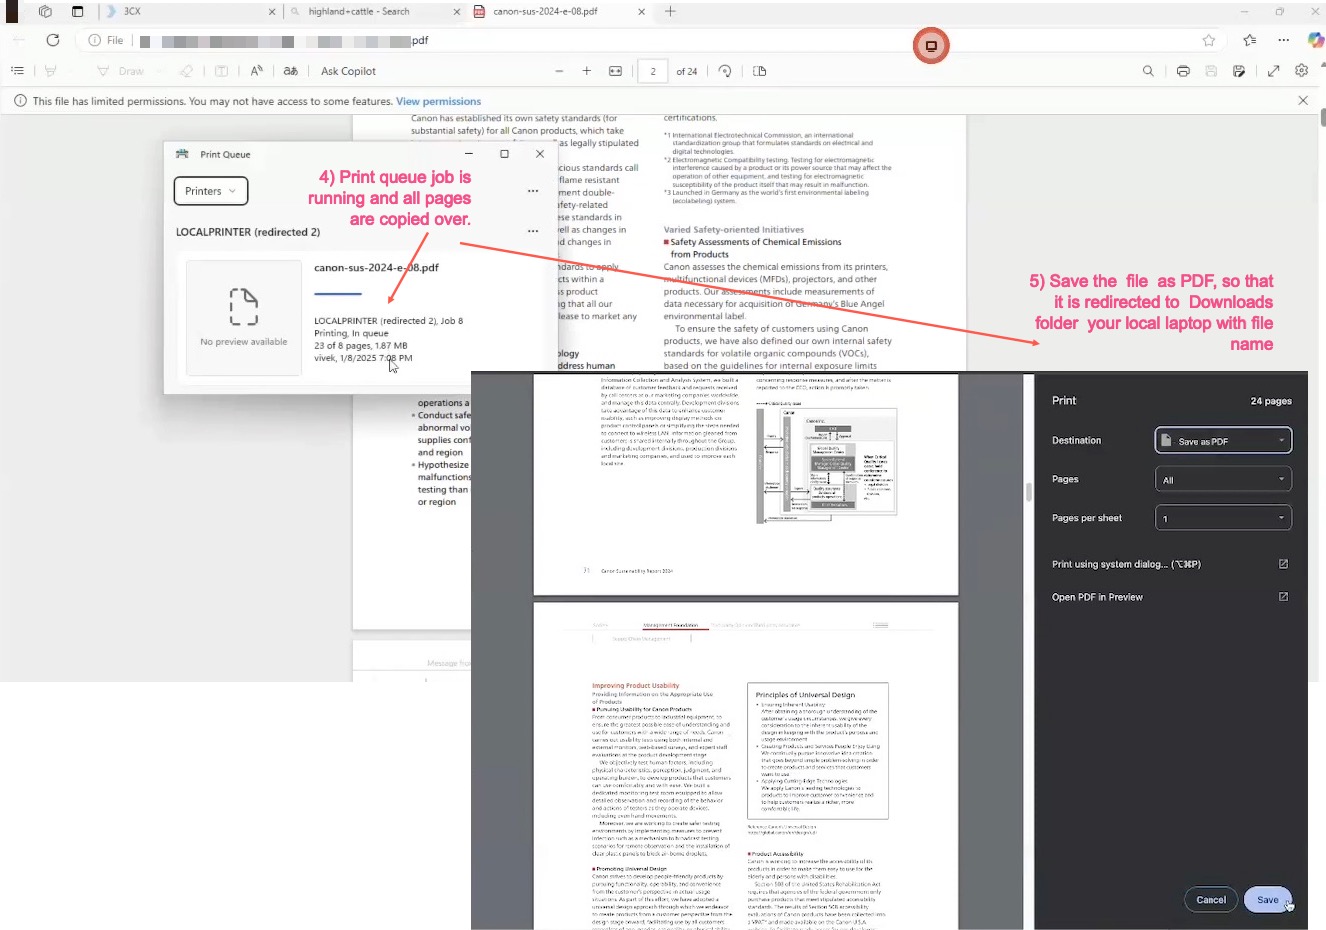
Note: By default, the name of the printer is LOCALPRINTER. You can change the name by setting a different value for Remote Printer Name when you configure your RDP application in EAA. See Configure an RDP application step 15.
Disconnect from RDP server
You can disconnect from the RDP server, if you have tasks running in the background while you perform other tasks on your local machine. The background tasks will continue to run till they complete and will not be terminated when you disconnect from the current RDP connection.
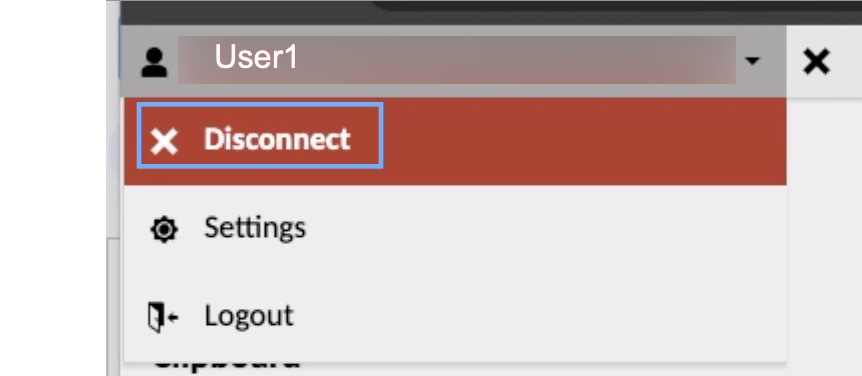
Go to the top left corner and expand the down arrow below your username and click Disconnect.
Log out from the RDP Server
After you have completed all of the work on the RDP server and you do not have any running jobs on it, you can log off. If you log off while the jobs are running, they will be terminated. A Logout of your RDP server, closes all current connections and ends the session.
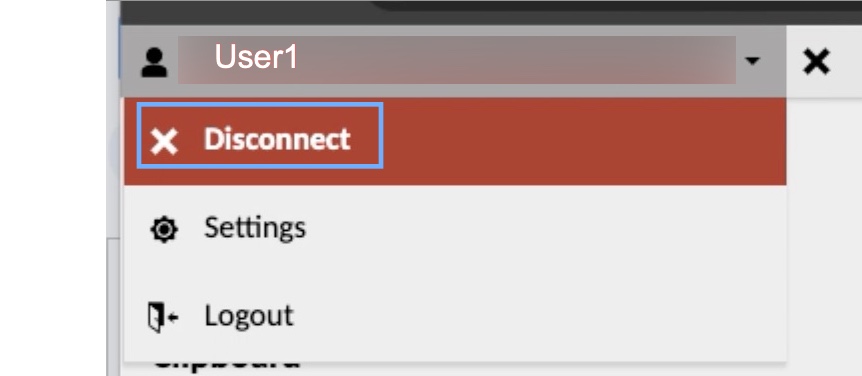
Go to the top left corner and expand the down arrow below your username and click Logout.
After you log out, you are redirected to the EAA IdP Login page.
Limitations
These options are not available in the User Preferences:
- Changing audio quality
- Disable remote cursor
Updated 6 months ago
