The authentication prompt
Learn about the components of the authentication prompt.
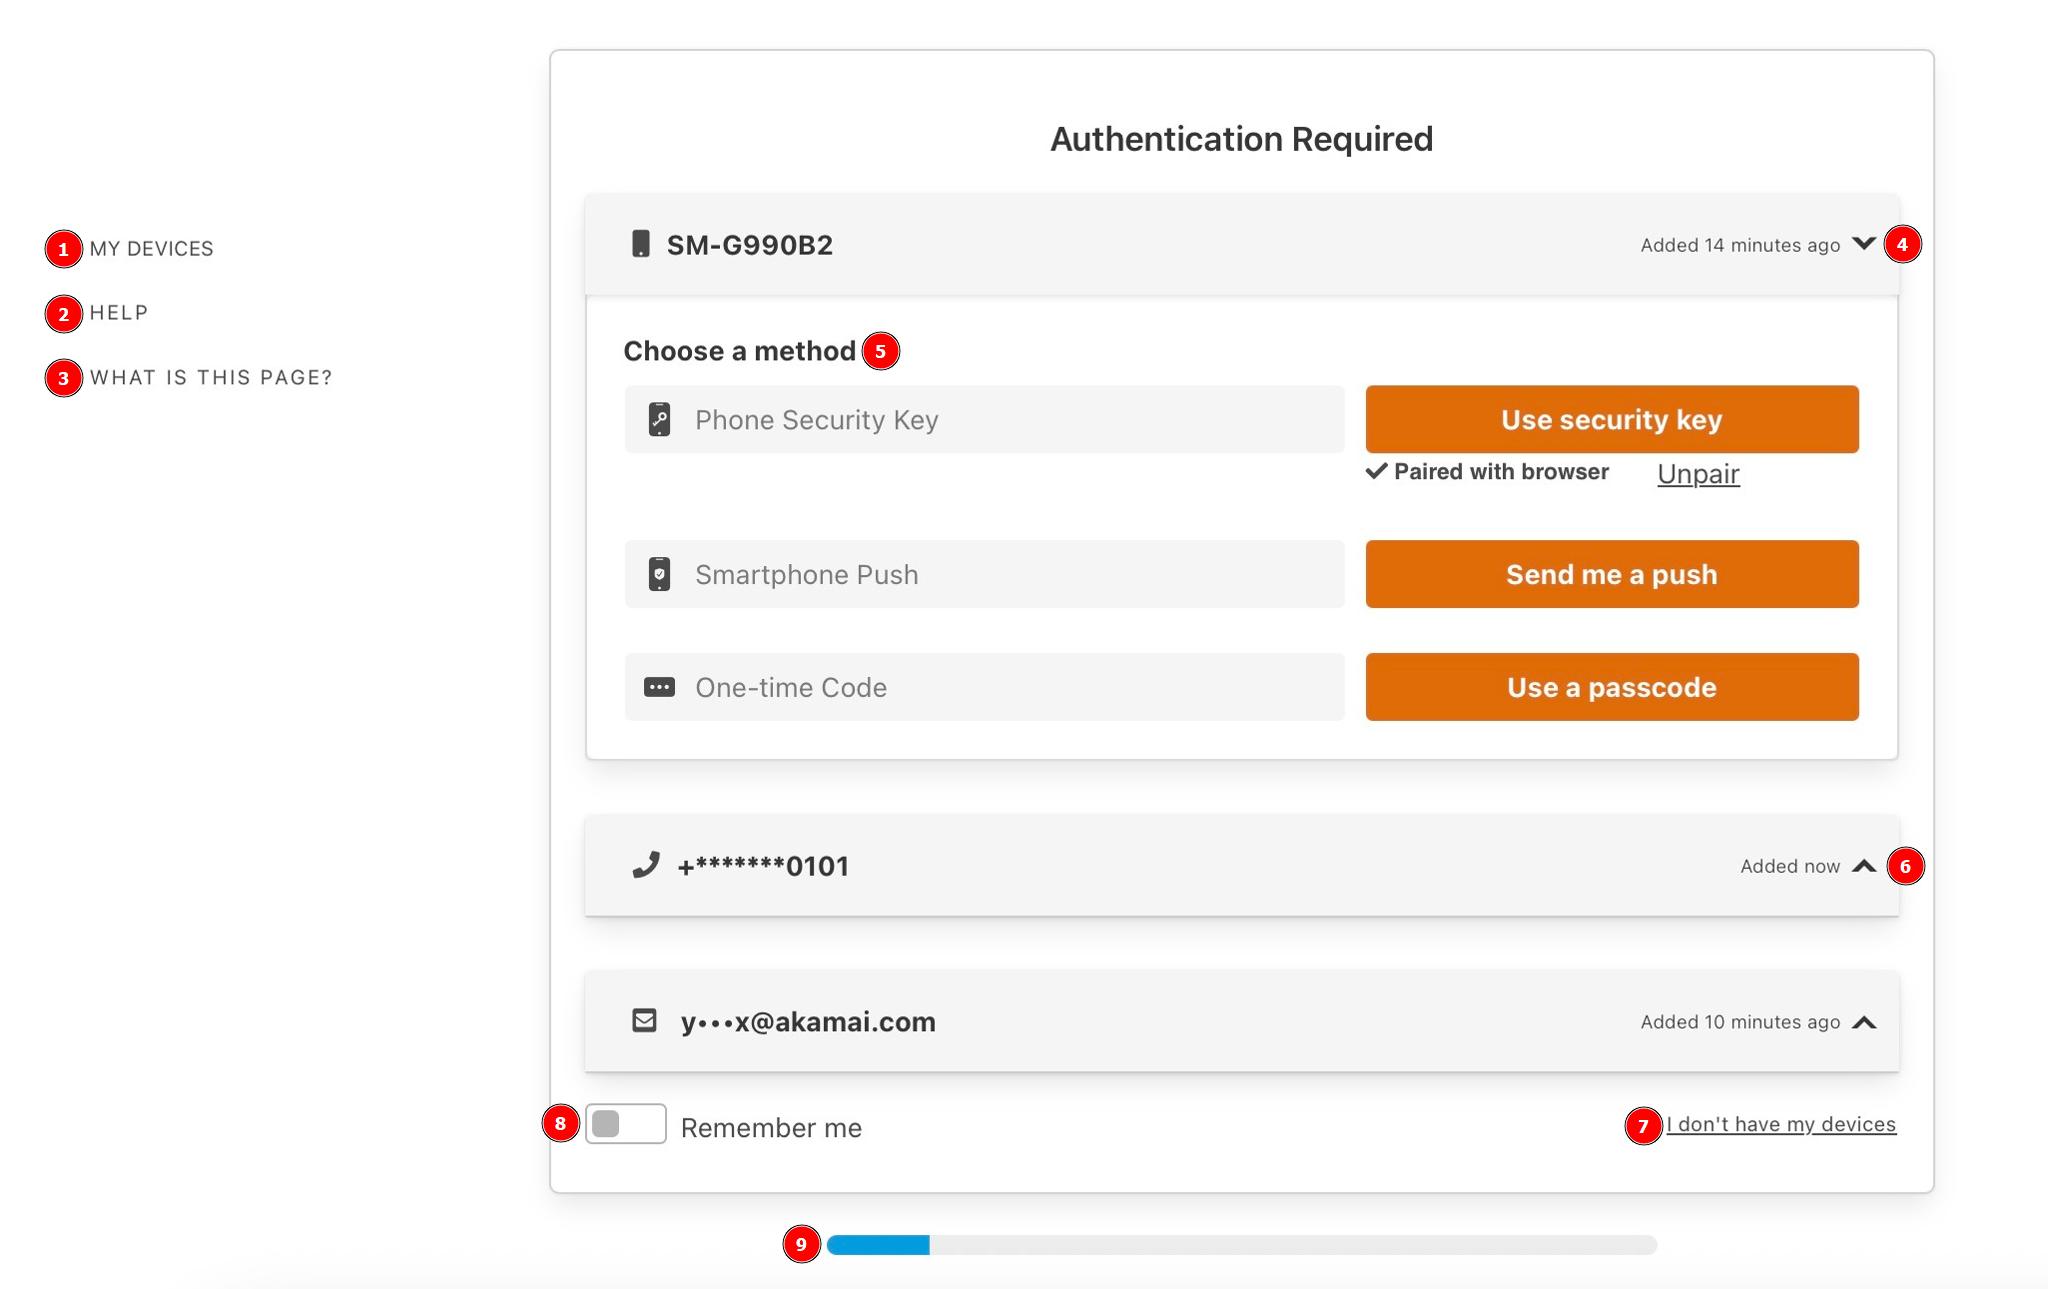
With Akamai MFA, when you attempt to access an enterprise application, apart from authenticating with your company username and password, you also need to complete an additional verification process. In the Akamai MFA authentication prompt that displays on your screen, you can confirm your identity, manage your enrolled mobile devices or enter the bypass code.
If you don’t complete the authentication process within the time allowed by policy, Akamai MFA redirects you to the Identity Provider (IDP) that initiated the authentication session.
Let's review all the tasks that you can perform using the authentication prompt.
-
My Devices. Lets you enroll a new device and manage your trusted devices. Here you can also enable automatic challenge for your last used device.
-
Help. Displays the installation help page with the link to the Akamai MFA mobile app, all enabled browser extensions, and the QR code that you have to scan to activate your phone security key.
-
What is this page? Displays this help page.
-
Expanded device card. Your last used authentication device is expanded by default. The expanded device card lets you select your authentication method. You can click the card to collapse it. Only one device card may be expanded at the same time.
-
Choose a method. Lets you select your preferred secondary authentication method. For example, click Send me a push to receive a push notification on your enrolled mobile device.
The list of the allowed second factors that you see in this area depends on the authentication settings enabled by your organization. This means that your authentication options may differ from the ones shown below. -
Collapsed device card. If you have more than one authentication device enrolled in the service, your other devices are collapsed by default. If you'd like to authenticate with this device, click its card to expand the list of available authentication methods.
-
I don't have my devices. Lets you submit the bypass code that you received from your admin to authenticate instead of using your usual secondary authentication method on your enrolled device. Once you confirm your identity using the bypass code, you can enroll your new authentication device.
-
Remember me. Enabling this option trusts your workstation for a set period of time, determined by your organization’s policy (up to a maximum of 7 days). During this time, multi-factor authentication isn’t required to access protected resources from your trusted workstation. This toggle is visible only if the feature is enabled by your administrator.
- For your security, only use the Remember me option on trusted workstations that you own and control.
- Enabling this option trusts the browser for Akamai MFA authentication for a period of time specified by your organization’s policy which means you will not see the authentication prompt until that time has passed. You won’t be able to manage your authentication devices during that time, unless you navigate to a protected resource from a different browser or device.
- This choice is unique to each integration (application or resource you access). You may still be prompted to authenticate when accessing a different integration.
- Timer bar. This bar indicates the time remaining to authenticate. If the authentication session expires, simply start over by repeating your last action (for example, logging in or navigating to a protected resource).
Your devices are ordered in the following manner:
Mobile (Push) device -> Security Key device -> Phone Number Only device -> Hardware Token device (HOTP/TOTP) -> External TOTP app
If more than one type of the same device is present, the newest one is displayed on top.
Updated about 1 month ago