Set up PingOne as an identity provider
Before you begin
You need to have a functional Ping server with administrator privileges or a Ping account with administrator privileges.
To integrate PingOne Identity service as an IdP in SIA:
-
Create an Akamai Enterprise IdP application in the PingOne identity service.
-
Download and deploy an identity connector. For more information, see Create and download an identity connector.
-
Add a directory to SIA. As part of this process, make sure you assign the identity connector you created to the directory. For more information, see Add a directory.
-
Assign the directory to the PingOne IdP. For more information, see Assign directory to the PingOne identity provider.
-
If this is the first PingOne IdP that you are creating in SIA, add domains that are specific to the PingOne Identity service to an exception list. For more information, see Add identity provider domains to an exception list.
Connect a directory to PingOne
This process synchronizes users and groups from the directory to PingOne.
To connect a directory to PingOne:
-
Log in to the PingOne admin service:
https://admin.pingone.com/web-portal/login. -
In the navigation menu, select Setup > Identity Repository.
-
Click Connect to an Identity Repository.
-
Select the service that your enterprise uses, and click Next.
-
Complete the steps that PingOne requires for the selected directory services. For detailed instructions, see the PingOne documentation.
Next steps
Create an Akamai Enterprise IdP application in the PingOne identity service
Create an Akamai Enterprise IdP application in the PingOne identity service
To integrate your Ping user directory, create an Akamai Enterprise IdP application in the PingOne Identity service, then add your users to this application:
-
In the PingOne navigation menu, click the Applications tab.
-
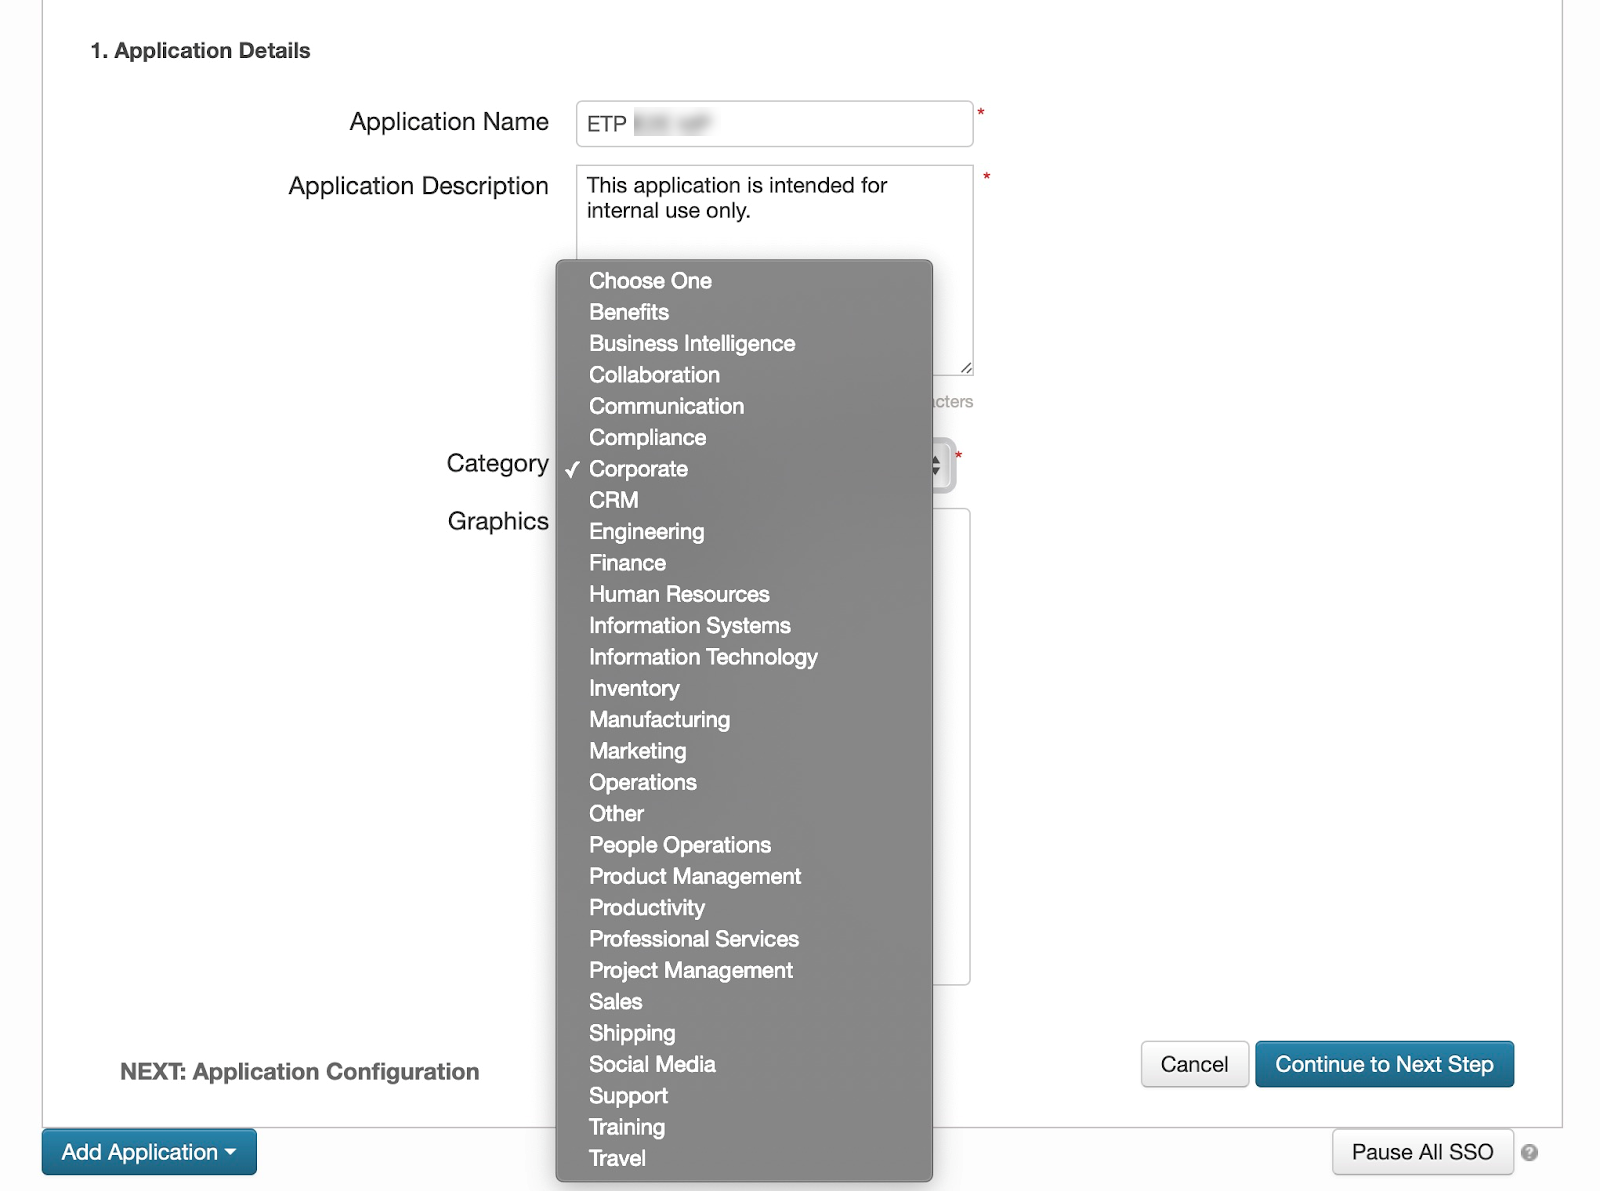
Click Add Application and select New SAML Application from the menu.

-
In the Application Name field, enter a name for the application.
-
In the Application Description field, enter a description for the application. You cannot hide the application from your users. As a result, you might want to state that this application is intended for internal or administrative use only.
-
In the Category menu, select a category.

-
Click Continue to Next Step.
-
Enter these settings for I have the SAML configuration option:
Note: You can leave the Single Logout Endpoint and Single Logout Response Endpoint fields blank. You can also leave the Force Re-authentication option deselected. You also don't need to select a Single Logout Binding Type.
| Field | Value |
|---|---|
| Protocol | SAML v 2.0 |
| Assertion Consumer Service (ACS) | https://[your_company].login.go.akamai-access.com/saml/sp/response |
| Entity ID | https://[your_company].login.go.akamai-access.com/saml/sp/response |
| Application URL | https://[your_company].login.go.akamai-access.com/saml/sp/response |
-
Click Continue to Next Step.
-
Configure attribute mapping:
-
Click Add New Attribute.
-
In the Application Attribute column, enter SAML_SUBJECT.
-
Based on the login preference of the directory that you'll associate to the PingOne IdP, enter one of these values into the Identity Bridge Attribute or Literal Value column:
- For SAM Account Name, enter
sAMAccountName - For Email, enter
mail - For User Principal Name, enter
userPrincipalName
- For SAM Account Name, enter
-
Add Group as an application attribute. In the Application Attribute column, enter
Groupand in the Identity Bridge Attribute or Literal Value column, enterMemberOf.
These steps may differ based on your PingOne configuration. For more information, see the official PingOne documentation.
-
-
Click Continue to Next Step.
-
Click Save & Publish.
-
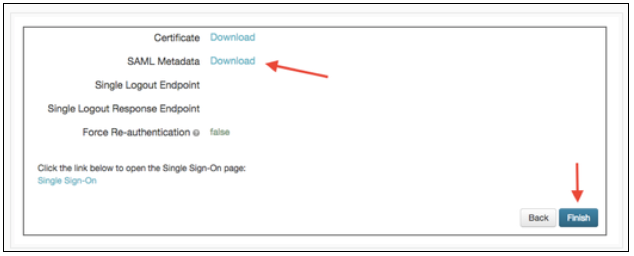
On the Review Setup page, click the Download link for SAML Metadata.

-
Click Finish
Next steps
Add PingOne as an identity provider
Add PingOne as an identity provider
Before you begin
-
Create an Akamai Enterprise IdP application in the PingOne identity service
-
Make sure you have the SAML metadata file that you downloaded.
To add and configure the PingOne identity service as an IdP:
-
In the Threat Protection menu of Enterprise Center, select Identity & Users > Identity Providers.
-
Click the plus sign icon
-
Configure basic IdP settings:
-
In the Name and Description fields, enter a name and description of the IdP.
-
In the Provider Type menu, select PingOne.
-
Click Continue.
-
-
Complete the IdP general settings:
-
Go to the General settings section or click the General tab.
-
For Identity Intercept, select Use Akamai domain and enter an external hostname that you want to use for the URL of the login portal.
-
In the Akamai Cloud Zone, select a cloud zone that is closest to the user base.
-
-
In the Authentication area, configure the URL and Logout URLs:
-
URL:
https://desktop.pingone.com/mycompany -
Logout URL:
https://desktop.pingone.com/mycompany/logout
where mycompany is the subdomain you created when setting up your PingOne service.
-
-
Upload the IdP metadata file. Click Choose File beside Upload IDP Metadata File.
-
In the Advanced settings section, select Enable Authorization.
-
In the Session Idle Expiry field, enter a time that is 35 minutes or more.
-
Click Save. Your PingOne service directory is now connected to SIA.
Next steps
-
Download and deploy an identity connector. For more information, see Create and download an identity connector.
-
Add a directory. As part of this process, make sure you assign the identity connector you created to the directory. For more information, see Add a directory.
Assign directory to the PingOne identity provider
Before you begin
Add a directory to SIA. For instructions, see Add a directory.
To review the overall setup process for a PingOne IdP, see Set up PingOne as an identity provider.
To assign the directory you created to your PingOne IdP:
-
In the Threat Protection menu of Enterprise Center, select Identity & Users > Identity Providers.
-
Click the name of the PingOne IdP.
-
Click the Directories tab.
-
Click the link icon and select the directory that you added.
-
Click Associate.
Next steps
-
Deploy the IdP:
-
In the SIA IdP configuration, you can click the icon next to the Ready for Deployment status. A deployment icon also appears next to a failed deployment status in case you need to deploy the IdP again. This action starts the deployment process.
-
Deploy IdP configuration changes in the list of Pending Changes. For instructions, see Deploy configuration changes.
-
-
If this is the first PingOne IdP that you are creating, add the PingOne IdP domains to an exception list. See Add identity provider domains to an exception list.
-
Associate the IdP with a policy that's enabled for authentication. For more information, see Require authentication to access a website or web application.
Updated 6 months ago
