Security Connector Web Console
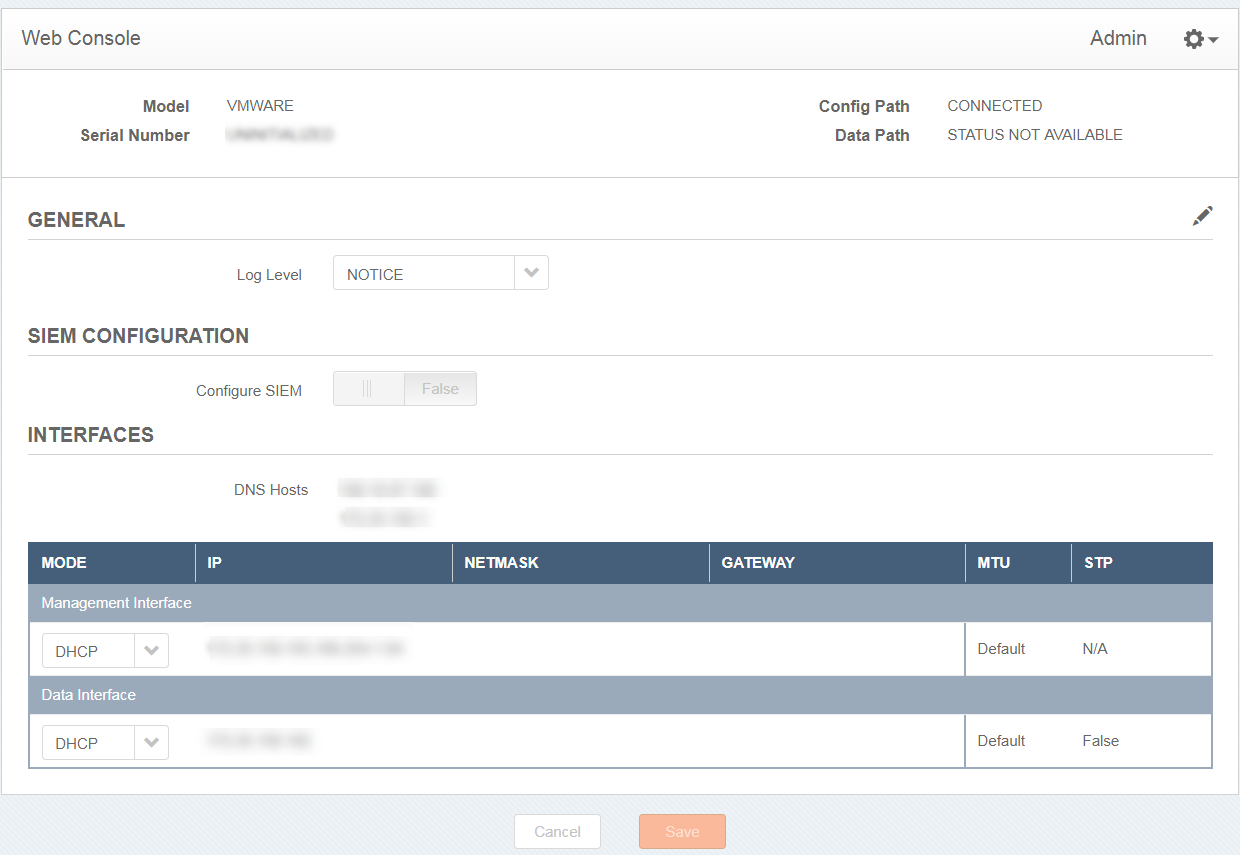
While you configure the network interfaces in the security connector, you can also access the Web Console to configure these interfaces. The Web Console is a web-based user interface where you configure settings for the VM and perform administrative operations.
On the Web Console, you can:
-
Generate a diagnostic report for debugging purposes. The diagnostic report contains logs and system files. When you encounter an issue that requires additional support, you can provide this report to Akamai Support.
-
Configure rsyslog: You can configure the VM to send logs to your organization's security information and event management product.
Depending on the interfaces you set up for Security Connector, the following applies:
- If you use one interface, the Web Console is on the en2 interface.
- If you use two interfaces, the Web Console is on the en1 interface.
If you enabled and set up the proxy, the Web Console is automatically secured with the TLS certificate that you generated or uploaded from your organization as part of the proxy setup. If you haven’t set up the proxy, you can generate the Akamai certificate or if your company already has a public key infrastructure (PKI), you can create a certificate signing request (CSR) and upload the signed certificate to SIA. For instructions on creating this certificate, see Create an Akamai certificate and Create a non-Akamai certificate.
The common name for this certificate is
<SC ID>.sc.akaetp.net, where<SC_ID>is the identification number that’s associated with Security Connector. This ID is shown on the Security Connector page (Threat Protection > Clients & Connectors > Security Connectors) in Enterprise Center.
Web Console

Log in to the Web Console
Before you begin:
-
Make sure you’ve generated an Akamai certificate, or if your organization has a public key infrastructure (PKI), make sure you upload the certificate that’s signed by your organization’s certificate authority (CA). If you've set up SIA Proxy, this is the same certificate that’s used for the proxy. For instructions on creating this certificate, see Create an SIA certificate and Create a non-SIA certificate. This certificate must be distributed to user laptops. For more information on distributing the certificate, see Distribute the SIA Proxy certificate.
-
Make sure the common name of the Security Connector certificate matches the ID of the Security Connector. You can see certificate information from the browser you use with the Security Connector. The common name for this certificate is
<SC_ID>.sc.akaetp.net, where<SC_ID>is the identification number that’s associated with Security Connector. This ID is shown on the Security Connector page (Threat Protection > Clients & Connectors > Security Connectors) in Enterprise Center.
Complete this procedure to log in to the Web Console.
To log in to the Web Console:
-
In your browser, go to
https://<SC_ID>.sc.akaetp.net:3000, where <SC_ID> is the identification number that’s associated with Security Connector. This ID is shown as the Connector ID on the Security Connector page (Threat Protection > Clients & Connectors > Security Connectors) in Enterprise Center. -
In the Web Console Login, enter the password for the security connector, and click Login.
Generate a diagnostic report
From the Web Console, you can generate a diagnostic report for debugging purposes. This operation creates a TAR file that you provide to Akamai Support.
To generate a diagnostic report:
-
Click the gear icon and select Generate Diagnostic Report. A report is generated and saved to wherever your browser saves downloaded files.
Next steps
Contact Akamai Support and securely send the diagnostic report TAR file to your Akamai support representative.
Configure rsyslog
From the Web Console, you can configure the security connector to send logs to your organization's security information and event management product. By default, the security connector uses TLS encryption. As a result, a client certificate and client key signed by the CA of the rsyslog server is not required. If a certificate is not provided, the security connector accepts the encryption of the rsyslog server.
Ensure that the remote rsyslog server is configured to accept logs with the TCP.
To configure rsyslog:
-
Click the edit icon to modify the VM settings in the Web Console.
-
Click the Configure SIEM slider to change it from FALSE to TRUE.
-
In the Server IP fields, enter the IP address and the port of the rsyslog server.
-
To enable TLS and transport logs securely with a certificate:
-
Click the Enable TLS slider to change it from FALSE to TRUE.
-
In the CA certificate field, paste the contents of a certificate from your trusted CA.
If a certificate is not provided, the rsyslog server is trusted by default
-
-
Click Save.
Modify the port of the Web Console
You can modify the port for the Web Console based on the ports allowed in your network. Make sure that the port you provide for this setting is not the one you use for the HTTP Forwarder explicit or transparent proxy.
To modify the port for the Web Console:
-
In the Security Connector console menu, press 8 or or use the arrow keys to select Advanced and press Enter.
If HTTP Forwarder is disabled, Advanced may appear as menu item 7.
-
Press 3 or use the arrow keys to select Configure WebUI port and press Enter.
-
Press C to edit this setting.
-
Type the new port number and press Enter. Make sure the port number you provide is not used for the transparent or explicit proxy configuration of HTTP Forwarder.
-
Type
yesand press Enter to confirm the change.
Updated about 1 year ago
