Create your MSL streams
Once your account is activated, you can use Control Center to create your streams. To see a quick demonstration of this process, watch this video.
Follow these steps, and your stream URL can be available for publishing in about 25 minutes.
If you create a new storage group or your existing storage group has automatic purge enabled, the setup process could take up to 70 minutes.
-
Click Add Stream on the Media Services Live dashboard in Control Center.
-
Enter a Stream Name.
Your stream name can be up to 90 characters in length and can include the charactersa-z,A-Z,0-9, underscores (_), and hyphens (-). -
Select a contract ID for the stream.
-
Select an option for the Ingest CP Code.
Option Next action Choose Existing Select a CP code from the drop-down that lists the available CP codes in the contract. Create New Enter a CP code name in the text field that appears. -
Toggle the slider to select the Media Services Live Ingest Acceleration feature.
The Ingest Acceleration feature improves encoder to Akamai ingest performance and provides more stability and reliability over the first mile. To learn more, refer to Configure ingest acceleration (IAS).If you enable the feature, you must specify a password. The username is the Media Services Live CP code.
-
Select an Input Format.
-
HLS for Apple HTTP Live Streaming
-
HDS for Adobe HTTP Dynamic Streaming
-
DASH for Dynamic Adaptive Streaming over HTTP
-
CMAF for Common Media Application Format
CMAF input format is only required when you're using both HLS and DASH manifests to deliver the segments under a single
streamID. If you want to move to the CMAF segments but keep HLS or DASH as the format, you can use your existingstreamIDcreated with either HLS or DASH without changing the input format to CMAF. -
-
Select an option for Encoder Verification.
-
Allow only fixed encoder IPs. Specify the encoder IP addresses in the Enter Allowed IP addresses field. Enter IP addresses in the format xxx.xxx.xxx.xxx or xxx.xxx.xxx.xxx/xxx. For example, 192.51.100.100 or 192.51.100.100/20. You can enter up to 50 comma-separated IP addresses.
-
Allow all encoder IPs (not recommended). Enables all encoder IP addresses to broadcast the stream.
-
-
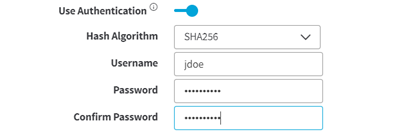
Toggle the Use Authentication slider to enable HTTP ingest authentication.
The HTTP digest authentication feature enables you to publish ingest streams with added security. It provides high availability of the Media Services Live origin. It also ensures that unauthorized uses cannot tamper with the published media and makes it hard to perform replay attacks.
-
Select a hash algorithm. You can choose:
-
SHA256. The Secure Hash Algorithm SHA256 is a type of cryptographic hash function that generates a 256-bit (32-byte) hash. A cryptographic hash is like signature for a text or a data file.
-
SHA512. A cryptographic hash function that when applied to the provided input results in a 128-digit hexadecimal number that is highly unlikely to match the value produced for a different input.
-
MD5. The MD5 message-digest algorithm is a widely used hash function producing a 128-bit hash value.
-
-
Enter a
username. The username should have a minimum of 4 and a maximum of 50 characters. -
Enter a
password. The password must have an uppercase letter, a number, and a special character. It should have a minimum of 4 and a maximum of 50 characters. You can set a password for the stream only when it is not active on production.
You can change the authentication credentials during the stream downtime, wait for the credentials to be successfully deployed, and then use the new credentials. Learn more about [Update username and password] (doc:update-username-and-password).
-
-
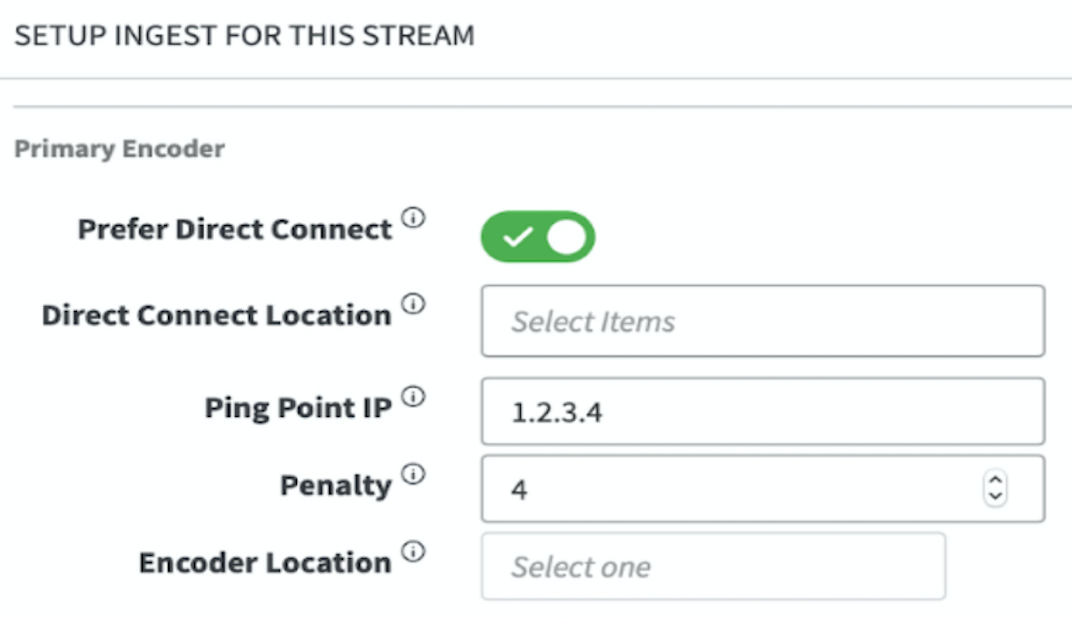
Select the Primary Encoder Location. Choose an encoder that is geographically close to your media content server location. Once you select Country from the menu, the State and City menus will be populated based on that selection.
If you have Direct Connect in your contract and want to use that as your primary encoder location, select that option. To learn more refer to the Direct Connect User Guide.

-
Backup Encoder Location: Deselect the Backup same as Primary option and select the backup encoder's geographical location from the list to set up a backup encoder for failover in case your primary encoder goes down.
-
Choose Ingest Location, if you want to select a preferred geographical location for the entrypoint. For example, this may be useful if you want to increase the likelihood that your stream will be ingested in a specific city.
This is an optional feature. The Intelligent Edge Platform algorithm selects the best mapping route based on latency, packet loss, and other criteria. If your selected entrypoint location would cause degradation of service, the platform may override that selection in order to provide a better experience for your stream viewers.

- This option is available for Geographical locations supported by MSL4.
- The locations displayed in the menu are a subset of the selected encoder location. The State, when applicable, and City menus will be populated based on that selection.
- If you select Enable Notification you will receive an email when your content is mapped outside of the selected geographical preference.
-
Click Next to go to the Archive Settings page.
Review the Archive options if you're not sure which one you need. -
Enter an email address in the Email Notification field.
Choose an email address that can accept notifications 24/7/365 in case the Ingest limits are breached. You will get an alert warning email when the limit is at 85%, so you can adjust your encoder settings.
-
Click Create to configure the stream with the specified settings.
The stream appears in the list of streams in the Media Services Live main page.

When you initially create or update a stream, the status will be Pending. Once all the steps are complete, the stream status changes to Provisioned. If any of the steps fail, the stream status changes to Failed.
Updated 10 months ago
