Ransomware
In this tutorial, we'll configure and run a ransomware simulation using Infection Monkey. You'll learn:
- How to set up an environment for a ransomware scenario
- How to configure Infection Monkey to perform a ransomware attack
- How to observe the results of the ransomware attack
Prerequisites
To complete this tutorial, you must have the sandbox environment set up. Follow the steps in Tutorial: First steps if you have not done so already.
Configure the vulnerable container
For this scenario, we're going to need some valuable data so that it can be held for ransom. We'll create a directory named vault, and we'll add a list of passwords to that vault.
Connect to the container:
docker exec -it --user user hello bash
Add a file named passwords.txt:
mkdir ~/vault
cat << EOF > ~/vault/passwords.txt
password
P@ssw0rd
supersecretpassword
EOF
Now let's see if we can get Infection Monkey to encrypt our data!
Configure Infection Monkey
Install plugins
Our first task is to ensure we have the required plugins installed. We'll need the SSH exploiter plugin to exploit the vulnerable container. Then, we'll need the ransomware plugin to run the ransomware simulation on the exploited container.
Navigate to the Plugins page by selecting Plugins in the navigation sidebar. You'll see a list of all the plugins that can be installed. Install the SSH Exploiter and Ransomware Payload by clicking their respective download icons in the right-most column of the table. The download icons transform into check marks once the installation is complete.
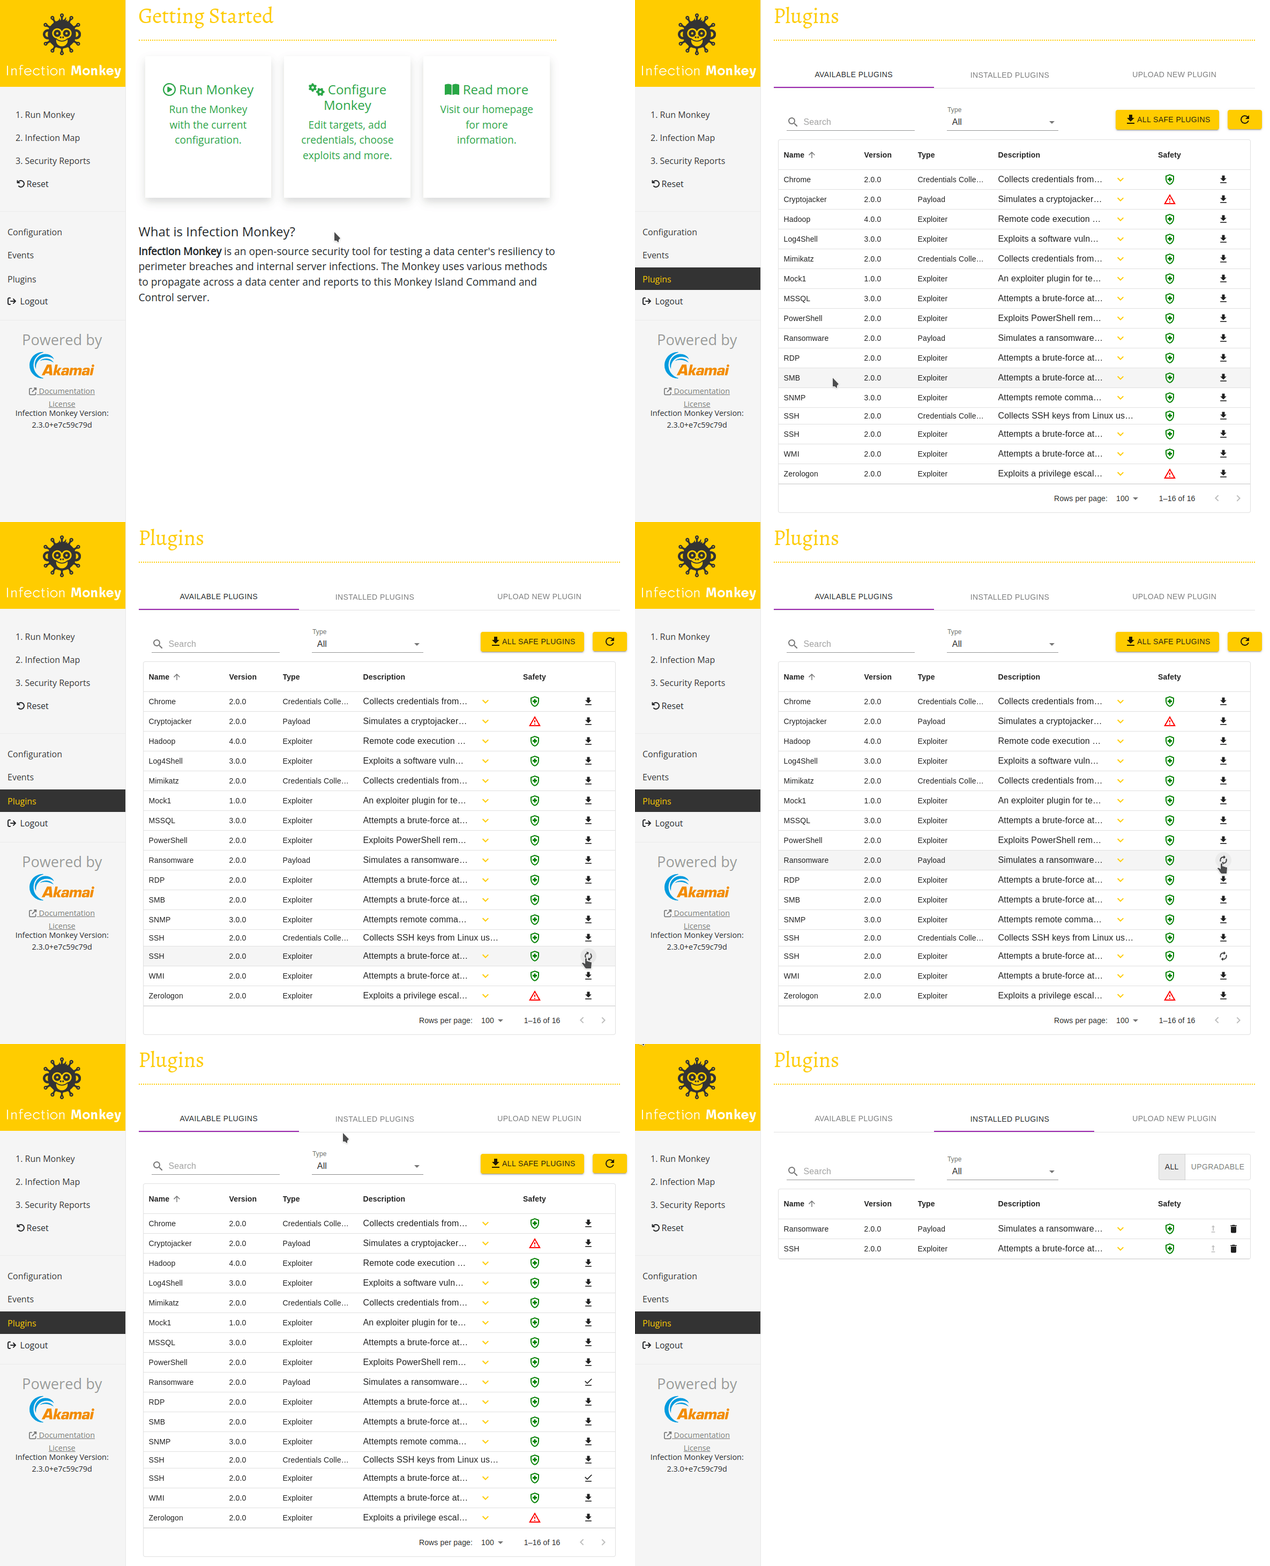
Now that the plugins are installed, we can configure our simulation.
Tell the Monkey which exploiter to use
Navigate to the Configuration page by selecting Configure Monkey on the Getting Started page (or select Configuration in the navigation sidebar). Check the box next to the SSH Exploiter to enable it.
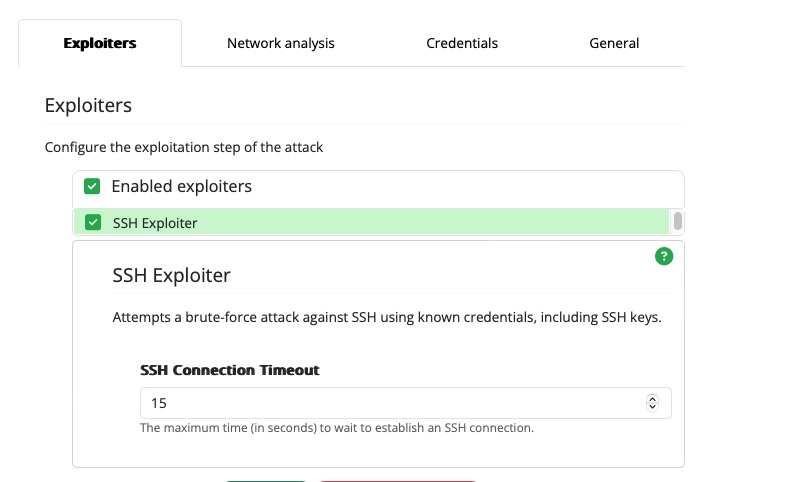
Tell the Monkey which machine to target
Switch to the Network analysis subtab and click the yellow + button under Scan target list. You'll see a new field. In it, enter the vulnerable container’s hostname—hello.
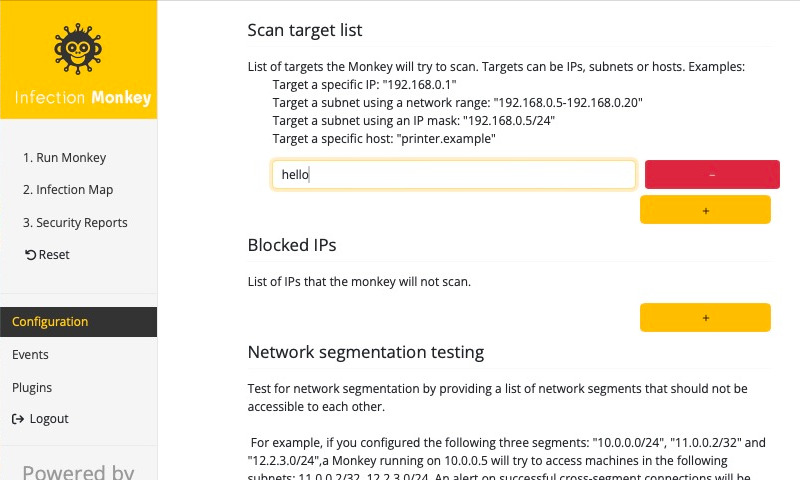
Tell the Monkey what credentials to use
The SSH exploiter needs one or more sets of credentials that it can use to attempt to access the target host. Switch to the Credentials subtab and enter user for Identity and password for Password. Click the blue SAVE button or hit the enter key. You'll see the credentials you've added appear below under Saved credentials.
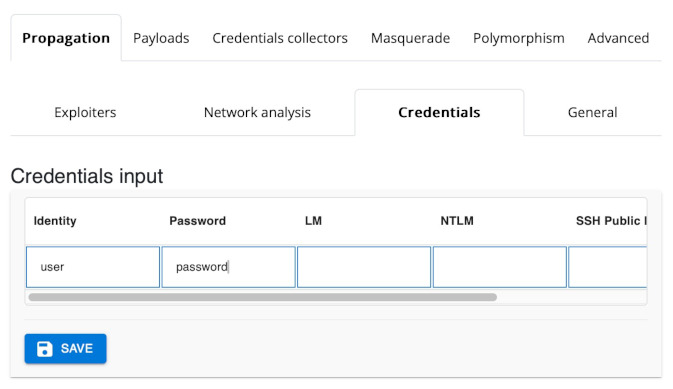
Tell the Monkey to use the Ransomware plugin
Our final configuration step is to enable the ransomware plugin. Select the Payloads tab at the top of the page and enable the Ransomware plugin in the Enabled payloads list by checking the box next to it.
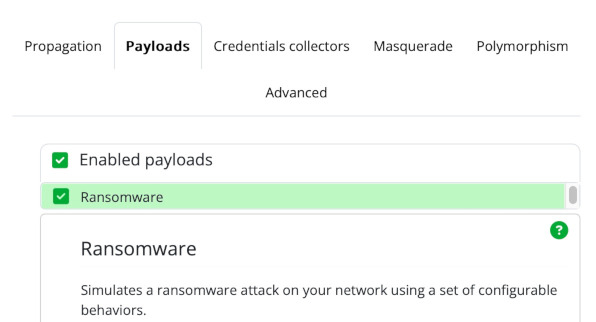
Next, we'll need to tell the Ransomware plugin which directory to hold for ransom. Since the hello container is Linux-based, set the Linux target directory to /home/user/vault (the directory that we prepared
earlier.
Target a directory with dummy data
Infection Monkey encrypts the contents of whichever directory we configure it to target. Therefore, when setting up a ransomware scenario, target a directory with dummy data or ensure you can recover the data in the target directory.
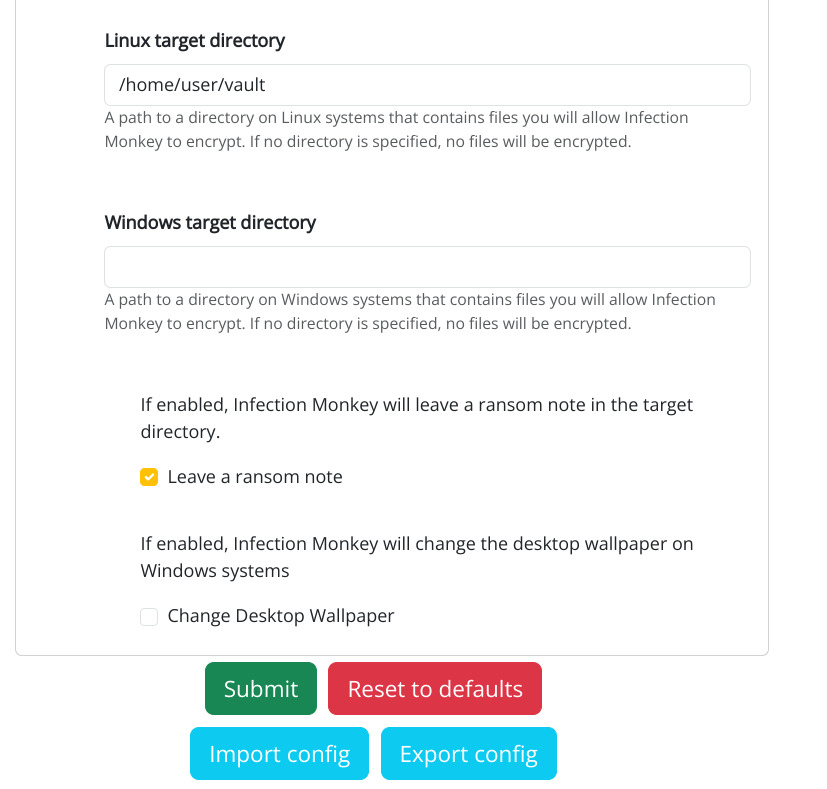
Make sure that Leave ransom note is checked and click the green Submit
button at the bottom of the screen to save our configuration.
Run Infection Monkey
Now that we've configured Infection Monkey, let's run it!
Go to the Run Monkey page by selecting 1. Run Monkey from the navigation sidebar. Click the From Island button to launch an attack on the vulnerable container from Monkey Island.
If you look at the Infection Map, you'll see that the hello container gets exploited as it did in Hello Monkey.
You can tell that the run is complete when a checkmark appears next to the Infection Map and Security Report in the navigation sidebar:
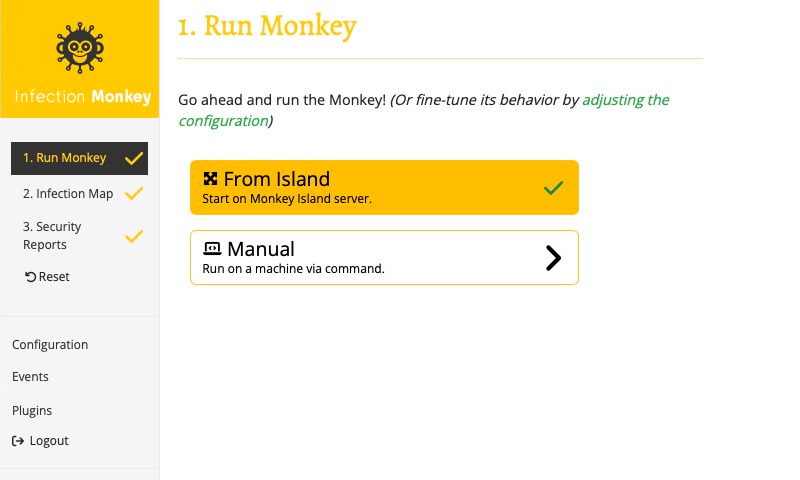
Great! The run is complete, but how do we know whether or not our ransomware
succeeded?
One good place to look is the Ransomware report. Navigate to the Security Reports page by selecting 3. Security reports on the navigation sidebar. Select the Ransomware report tab and scroll down to take a look at the 3.Attack section. It lists the files that Infection Monkey was able to encrypt:
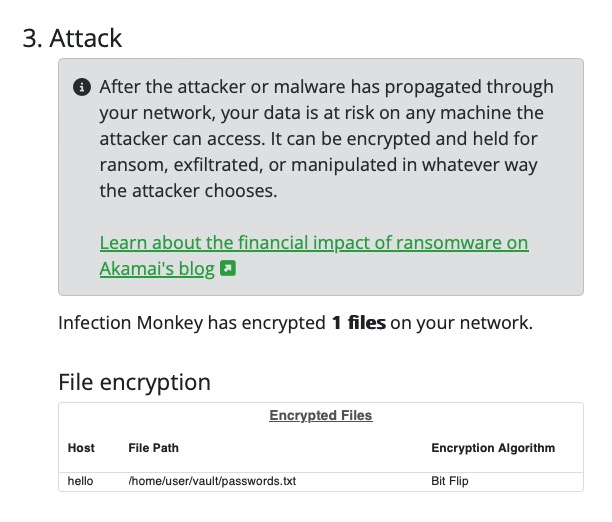
It looks like our passwords are being held for ransom! Let's connect to the container and observe the contents of the vault:
docker exec -it --user user hello bash

ls -1 ~/vault
We'll see two files:
README.txt
passwords.txt.m0nk3y
README.txt is the ransom note left by Infection Monkey in the directory targeted by the Ransomware plugin. passwords.txt.m0nk3y is our password list (formerly passwords.txt) that Infection Monkey encrypted. First, let's take a peek at the ransom note:
$ cat ~/vault/README.txt
You should see this printed to the console.
Next, let's print the contents of the encrypted password file to verify that the file is indeed encrypted:
$ cat ~/vault/passwords.txt.m0nk3y
��������������ύ����������������������
Looks like the Monkey did its job!
Reverse the encryption
Infection Monkey uses a bit-flip algorithm to "encrypt" files. So, if you need to reverse the encryption, you can drop the file extension that the Monkey adds and then re-run the ransomware simulation. This will re-flip the bits, returning the files to their original state.
Review
In this tutorial, you learned:
- Infection Monkey provides a ransomware plugin that enables you to simulate a ransomware attack.
- How to prepare systems for a ransomware simulation by deploying target files.
- How to configure Infection Monkey to use it's ransomware plugin.
- How to view and interpret the results of Infection Monkey's ransomware report.
Next Steps
- Try removing the extension Infection Monkey adds to the encrypted file
and re-running the ransomware simulation to "decrypt" the file. - Try playing with the Ransomware plugin's configuration options.
Updated over 1 year ago
