Hello Monkey
In this tutorial, we use Infection Monkey to exploit a simple vulnerability. We will configure Infection Monkey to exploit the vulnerability and target a specific machine, then run it to see if it can gain access to the machine. You will learn how to start Infection Monkey, configure it, and run it against a network.
Specifically, you will learn how to:
- Install plugins
- Specify targets for Infection Monkey to exploit in the network.
- Tell Infection Monkey what exploits to attempt against machines on the network.
- Provide Infection Monkey with credentials that it can use when trying to exploit machines.
- Run the Monkey and observe its progress.
We suggest reading our Getting Started guide as you progress through this tutorial.
Prerequisites
First, make sure that you have the following installed:
docker and docker-compose
Run the environment
Use docker compose to run Infection Monkey along with our vulnerable container.
- Download the yaml file
- Then, navigate to the directory where you downloaded the file and run the following command to start the environment:
docker compose up
Three containers should be running:
mongo- database used by Infection Monkeymonkey-island- the Infection Monkey serverhello- a vulnerable container
Next, open a browser to https://localhost:5000 to access the Monkey Island web interface. Since this is your first time accessing this Infection Monkey instance, you need to register by providing a username and password.
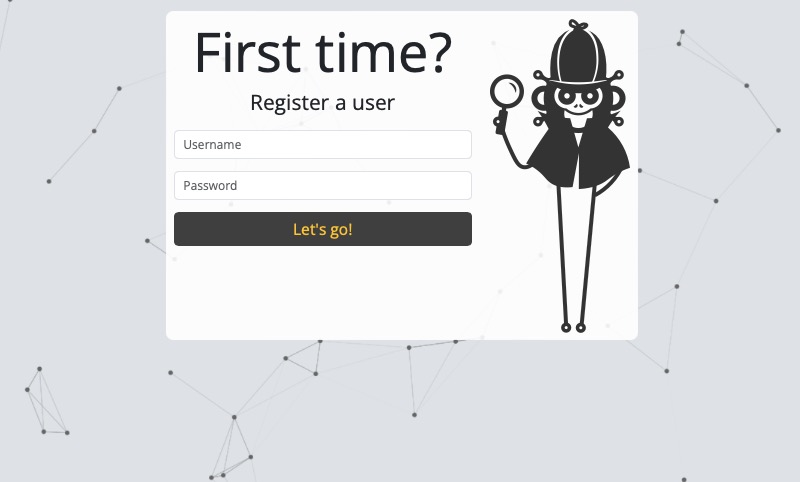
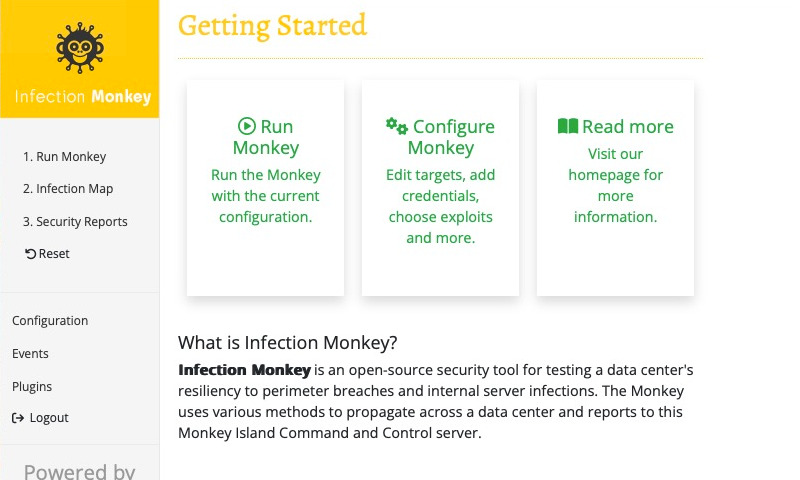
After registering, you'll be automatically logged in. You'll be brought to the welcome screen, which looks like this:
Configure the Monkey
Now we'll need to configure Infection Monkey to exploit the vulnerable container. Select Configure Monkey on the Getting Started page (or select Configuration in the navigation sidebar).
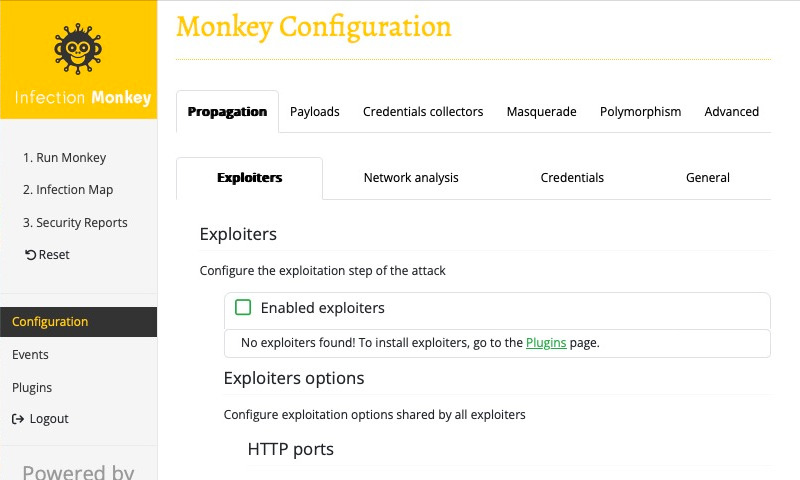
Before the Monkey can do anything useful, you need to configure it. Otherwise, it won't know what exploits to attempt, or what machine(s) to attempt to breach.
Explicitly configure machines
The Infection Monkey will only attempt to breach the machines that you've explicitly configured it to target. This ensures that the Monkey doesn't run amok on your network.
Tell the Monkey which machines to target
In our case, we know that the target machine has the hostname hello. In order to tell the Monkey to target that hostname, starting from the Configuration page, ensure that the Propagation tab is selected, and then select the Network analysis subtab.
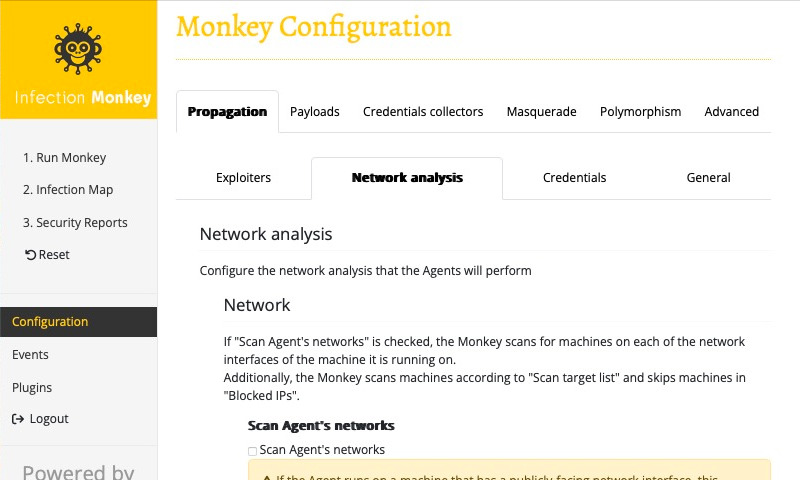
Then, under the Scan target list section, click the "+" button to add a target to scan. Enter our target hostname, hello, into the input field.
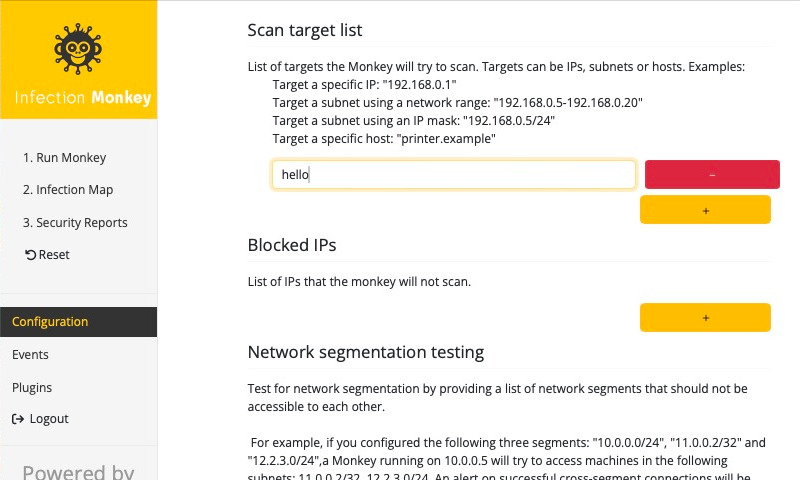
Finally, make sure to scroll to the bottom and click Submit to save the configuration.
You should see a notice indicating that the configuration was submitted successfully.
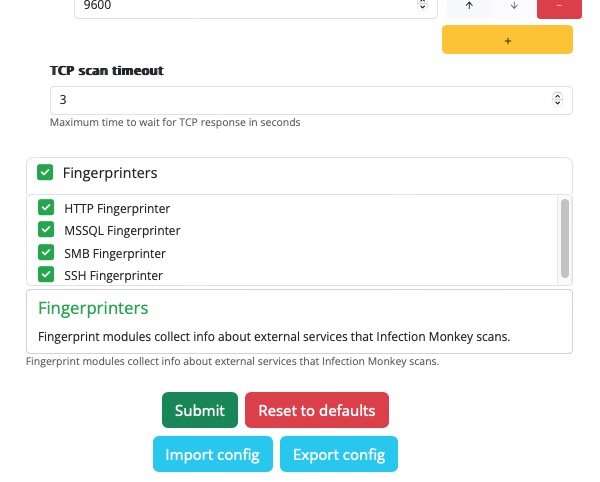
Great, the Monkey now knows which machine to target. What happens if we run it? Select 1. Run Monkey in the navigation sidebar to bring up the Run Monkey page. We'll choose the From Island option, which will start the Monkey from the Island machine. Go ahead and do that now.
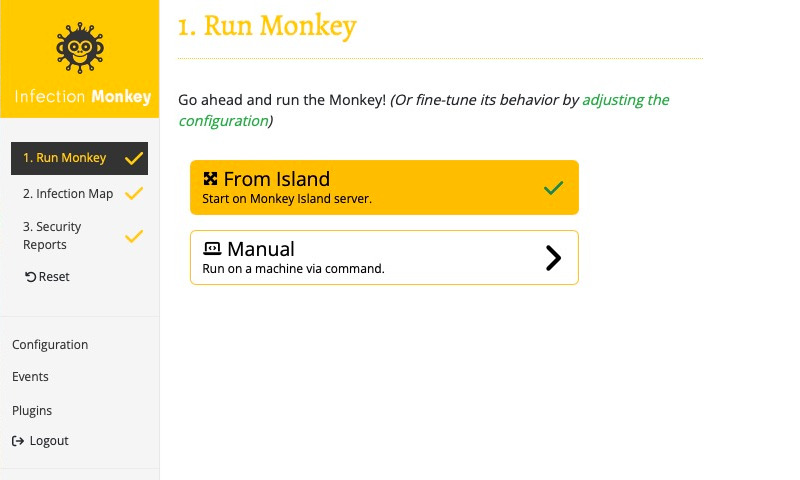
Note that a checkmark appears next to 1. Run Monkey in the navigation sidebar. This indicates that a Monkey Agent has started.
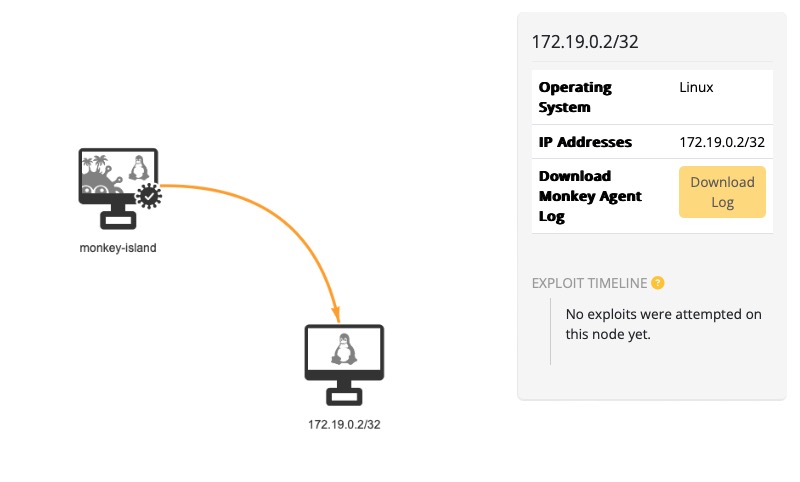
You can see the Monkey's progress by selecting 2. Infection Map in the navigation sidebar. This brings up a network view (from the Monkey's perspective). You should see an arrow appear between the monkey-island machine and the vulnerable container. If you look at the legend, you'll notice that this indicates that the Monkey scanned the container.
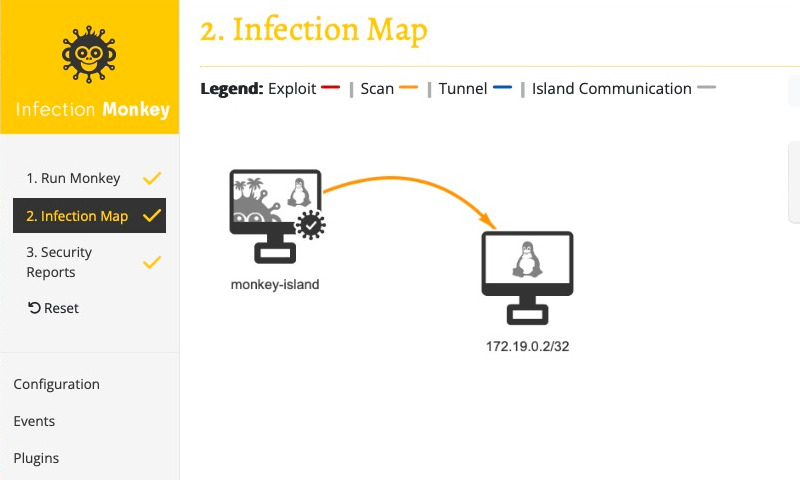
You should also note a checkmark appear next to both 2. Infection Map and 3. Security Reports in the navigation sidebar. This indicates that the assessment has completed. Also note that while the Monkey was able to scan the container, it was not able to exploit it. In fact, if you select the vulnerable container in the Infection Map view or check the Events page, you'll see that it hasn't even attempted to exploit it. This is because we haven't configured the Monkey with any exploiters. We'll do that next.
Tell the Monkey which exploiters to use
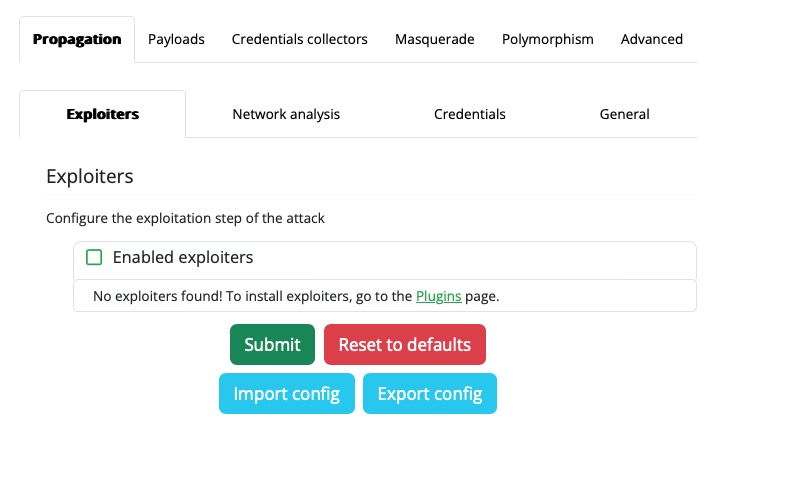
Now we're going to configure the Monkey to use an exploiter. In order to do that, select Configuration in the navigation sidebar. Select the Propagation tab, and the Exploiters subtab. You should see a list of Enabled exploiters, which you'll notice, is empty. This is because we haven't installed any exploiters yet. Thankfully, the Enabled exploiters list provides a link to a page where we can download and install exploiter plugins, so let's follow that link and install an exploiter.
No preinstalled exploiters
Infection Monkey does not come with exploiters pre-installed. However, it provides an easy way to download and install them from within the Island web interface.
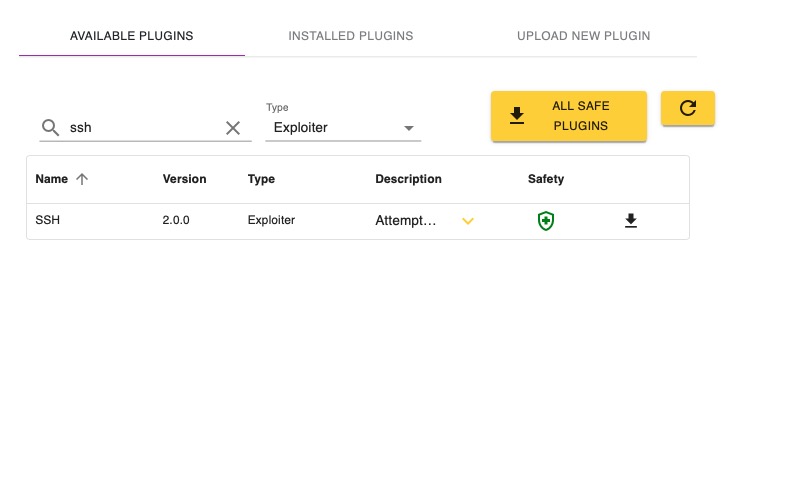
You should now be at the Plugins page. Under the Available Plugins tab you'll see a list of all the plugins that can be installed. Infection Monkey has several types of plugins. Since we're interested in installing an exploiter, let's filter this list to only show us exploiters. Select the Type dropdown, and choose Exploiter. You should now see that the Type column only has Exploiter.
For this tutorial we're going to install the SSH Exploiter. Type ssh into the search field, and you should see an exploiter named SSH. Click the download button to install that exploiter. The button will change into a loading indicator to show that it's installed and then to a checkmark when the plugin is installed. You can go to the Installed Plugins tab and see that a plugin named SSH of type Exploiter is installed.
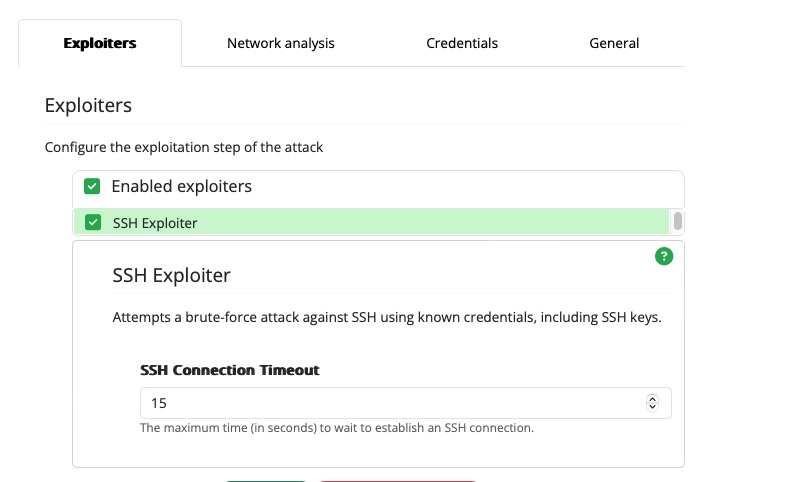
Great! We've installed the SSH Exploiter, but we still need to tell the Monkey to use it. Navigate back to the Configuration page, and notice that the Enabled exploiters list now shows SSH Exploiter as an option. Check the box next to SSH Exploiter, leave the default option values unchanged, and then Submit the configuration.
We've told Infection Monkey which exploiter to use, but we've still got one more step: the SSH Exploiter requires credentials in order to run, and we haven't provided any. Let's do that now.
Credentials needed tpo ruin brute force
Brute force exploiters, such as the SSH Exploiter, require credentials in order to run.
Tell the Monkey which credentials to use
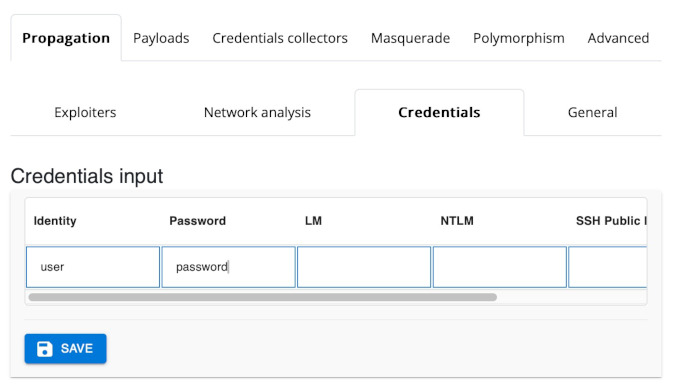
From the Configuration page, select the Propagation tab, then the Credentials subtab.
Enter user into the Identity field, and password in the Password field, and hit the Save button.
You should see a new entry appear in the Saved Credentials list:
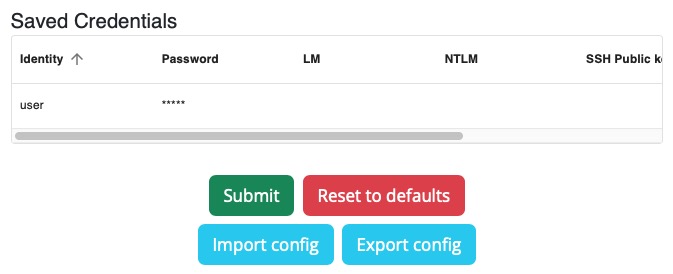
Make sure you Submit the configuration so that the credentials are saved.
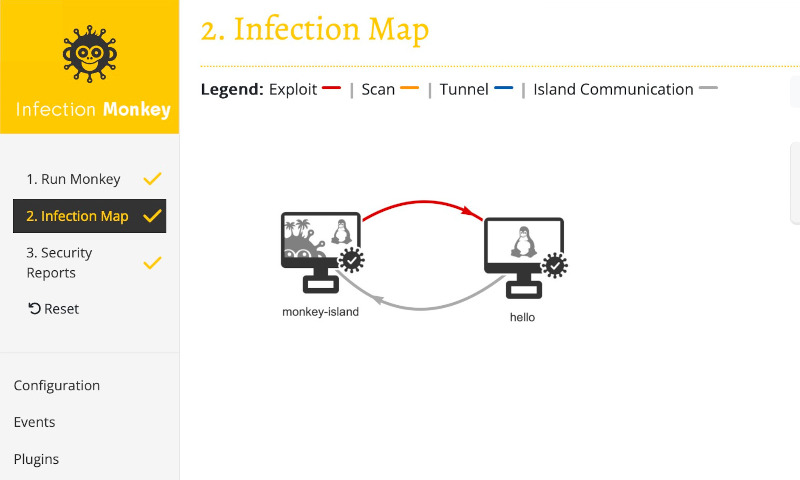
Okay, let's give it one more go. Navigate to the Run Monkey page, and run the Monkey From Island. Then, switch to the Infection Map and observe the Monkey's progress:
Success!
Notice how the arrow from the monkey-island to the vulnerable container changed to red? That indicates that Infection Monkey successfully exploited the container. The checkmark on the container means that the Monkey Agent was executed in the container, and the gray arrow from the container to the Island indicates that the Monkey Agent reported back to the Island.
Review
Let's take a moment to review what you've learned:
- You now know that the Monkey does not come with exploiters out of the box, but they can be installed easily. You also know how to get to the Plugins page and install plugins.
- You've learned how to tell the Monkey which machines to target, which exploiters to use, as well as how to provide credentials to the Monkey.
- You've learned how to run the Monkey and observe its progress.
Next steps
Now that you're more familiar with Infection Monkey, you might try the following:
- Try to secure the vulnerable machine and run the Monkey to verify that your changes work as expected
- Explore some of the other configuration options
- Simulate a network breach on a specific machine by running the Monkey manually
- Explore some of the other Exploiter plugins
- Try using the Monkey to simulate a ransomware attack
Updated about 1 year ago
