Stream logs to Elasticsearch
DataStream 2 supports sending JSON log files to Elasticsearch for improved log analytics. Depending on your choice, DataStream 2 can upload either uncompressed or gzip-compressed log files.
Optionally, you can upload a client certificate to enable mTLS authentication to improve stream security and prevent data delivery failures.
The custom header feature allows you to enter the name and value for the header that you want to use in Elasticsearch for authorization and tagging. See the API conventions in the Elasticsearch documentation for details.
Dynamic index name
When streaming logs to Elasticsearch, you can choose to store them in a cluster with an index name based on the date and time DataStream creates the index and uploads log files.
Using dynamic index names helps you sort log files at your Elasticsearch destination, as it distributes the data across multiple indices, each with a timestamp in the name.
In Index name, provide a name in the <static_name{date_math_expr{date_format|time_zone}}> format, where:
| static_name | is the static component of the name, for example, logs or datastream. |
| date_math_expr | is the math expression that dynamically computes the name, for example, now for the date and time the index was created, or now/M+50M for this date plus 50 months. |
| date_format | is the Java date and time format for the timestamp in the index name, yyyy.MM.dd by default. (Optional) |
| time_zone | is the time zone for the date and time, UTC by default. (Optional) |
Here are some examples of dynamic expressions in index names, and how they resolve in Elasticsearch:
| Expression | Index name |
|---|---|
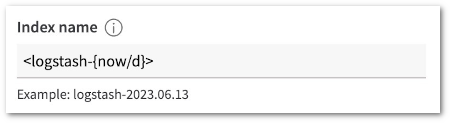
| <logstash-{now/d}> | logstash-2023.06.13 |
| <logstash-{now/M}> | logstash-2023.06.01 |
| <logstash-{now/M{yyyy.MM}}> | logstash-2023.06 |
| <{now/d{yyyy-MM-dd}}> | 2023-06-13 |
| <logs-{now/M+50M{yyyy.MM}}> | logs-2027.08 |
| <akamai_logs-{now/M}> | akamai_logs-2023.06.01 |
If you want to use the name in a request path (for example, when using the DataStream 2 API), you need to URI-encode the special characters:
PUT /<my-index-{now/d}>
PUT /%3Cmy-index-%7Bnow%2Fd%7D%3E
Before you begin
Before configuring your stream to send logs to this destination, make sure you create and configure an Elasticsearch data cluster with at least one index. See Set up Elasticsearch in the Elasticsearch documentation.
How to
-
In Display name, enter a human-readable name description for the destination.
-
In Endpoint, enter an Elasticsearch bulk endpoint URL you want to send your logs to. The endpoint URL should follow the
https://<elastic-cloud.com>/_bulk/format. See Connect to Elasticsearch if you want to retrieve your Elasticsearch endpoint URL. -
In Index name, enter the name of the index inside your Elasticsearch cluster where you want to send logs.
-
In Username, enter your Elasticsearch username you pass in the Authorization header of your requests that grants access to the space protected by basic access authentication.
-
In Password, enter your Elasticsearch password you pass in the Authorization header of your requests that grants access to the space protected by basic access authentication.
-
If you want to send compressed gzip files to Elasticsearch, check the Send compressed data box.
-
Optionally, change the Push frequency to receive bundled logs to your destination every 30, 60 or 90 seconds.
-
Click Validate & Save to validate the connection to the destination and save the details you provided.
Additional options
- Optionally, click Additional options to add mTLS certificates for additional authentication. In Client certificate, enter the:
- TLS hostname matching the Subject Alternative Names (SANs) present in the SSL certificate for the endpoint URL. If not provided, DataStream 2 fetches the hostname from the URL.
- CA certificate that you want to use to verify the origin server's certificate. DataStream requires a CA certificate, if you provide a self-signed certificate or a certificate signed by an unknown authority. Enter the CA certificate in the PEM format for verification.
- Client certificate in the PEM format that you want to use to authenticate requests to your destination. If you want to use mutual authentication, provide both the client certificate and the client key.
- Client key you want to use to authenticate to the backend server in the PEM (non-encrypted PKCS8) format. If you want to use mutual authentication, provide both the client certificate and the client key.
- Optionally, go to Custom header and enter the Custom header name and Custom header value. The custom header name can contain the alphanumeric, dash, and underscore characters.
DataStream 2 does not support custom header user values containing:
- Content-Type
- Encoding
- Authorization
- Host
- Akamai (allowed if using an Akamaized hostname as destination)
- Click Validate & Save to validate the connection to the destination and save the details you provided.
Akamaized hostname as endpoint
This destination supports using Akamaized hostnames as endpoints to send DataStream 2 logs for improved security. When you create a property with an Elasticsearch endpoint URL as hostname, this property acts as a proxy between the destination and DataStream. As a result, you can filter incoming traffic to your destination endpoint by IP addresses using the Origin IP Access List behavior. That means only IP addresses that belong to your Akamaized property hostname can send logs to your custom destination. Using Akamaized hostnames as endpoints also requires enabling the Allow POST behavior in your property.
Once the property hostname works as a destination endpoint, you cannot monitor it as a property in this or another stream. If you already monitor a property in DataStream, you cannot use it as a destination endpoint.
To enable this feature:
-
Go to Property Manager and create a new property. We recommend choosing API Acceleration as the product. See Create a brand new property.
-
Set your Elasticsearch endpoint URL as the property hostname. See Redirect users to edge servers.
-
From the Control Center menu, click Content delivery > CDN > Properties or just enter Properties in the search box.
The Property Groups page opens.
-
Click the Property Name link to go to the property you created.
-
Activate the property on the production network. Only properties active on the production network can serve as DataStream destinations. See Activate property on production.
-
On the Property Details page, click the Version of your configuration that you want to access in Manage Versions and Activations.
The Property Manager Editor appears.
-
In the default rule, click Add Behavior, and select Origin IP Access List. Click Insert Behavior.
The Origin IP Access List behavior appears in the default rule.
-
Set the Enable slider in the Origin IP Access Control List behavior to On. Click Save.
-
Click Add behavior, and select Allow POST.
-
Click Insert Behavior.
The Allow POST behavior appears in the default rule.
-
Set the Behavior option in the Allow POST behavior to Allow.
-
Click Save.
TipYou may need to additionally configure your property to ensure uninterrupted data flow. See Configuration best practices in the Property Manager guide for other behaviors you can configure in your property.
- Configure the firewall settings at your destination endpoint to allow access for IP addresses that belong to CIDR blocks for your Akamaized hostname. See the Origin IP Access List behavior for the list of IP addresses to put on the allow list.
After successfully configuring an Akamaized hostname as the destination endpoint, avoid editing an active property’s setup in Property Manager to ensure uninterrupted data flow. Adding, deleting, and editing hostnames and behaviors may cause unexpected behavior in the DataStream application.
We recommend setting up alerts that send e-mail notifications every time DataStream logs cannot be uploaded to your destination, so you can immediately troubleshoot issues with your property or destination configuration. See Set up alerts.
Updated about 1 month ago