Quick start
You can use this quick start guide to launch DataStream 2 in a couple of steps. If you want to follow the detailed step-by-step procedure, go to Create a stream and follow the instructions there.
To launch your stream, you need to enter basic stream details such as the name and properties you want to monitor, choose the data parameters you want to log, configure the destination to stream log files, and enable the DataStream behavior for your property in Property Manager.
Enter basic details
Log in to the Control Center using credentials with DataStream access. Go to COMMON SERVICES > DataStream, and open the Create stream wizard.
Enter the basic details of your stream, such as a human-readable Name, and select the Akamai contract group.
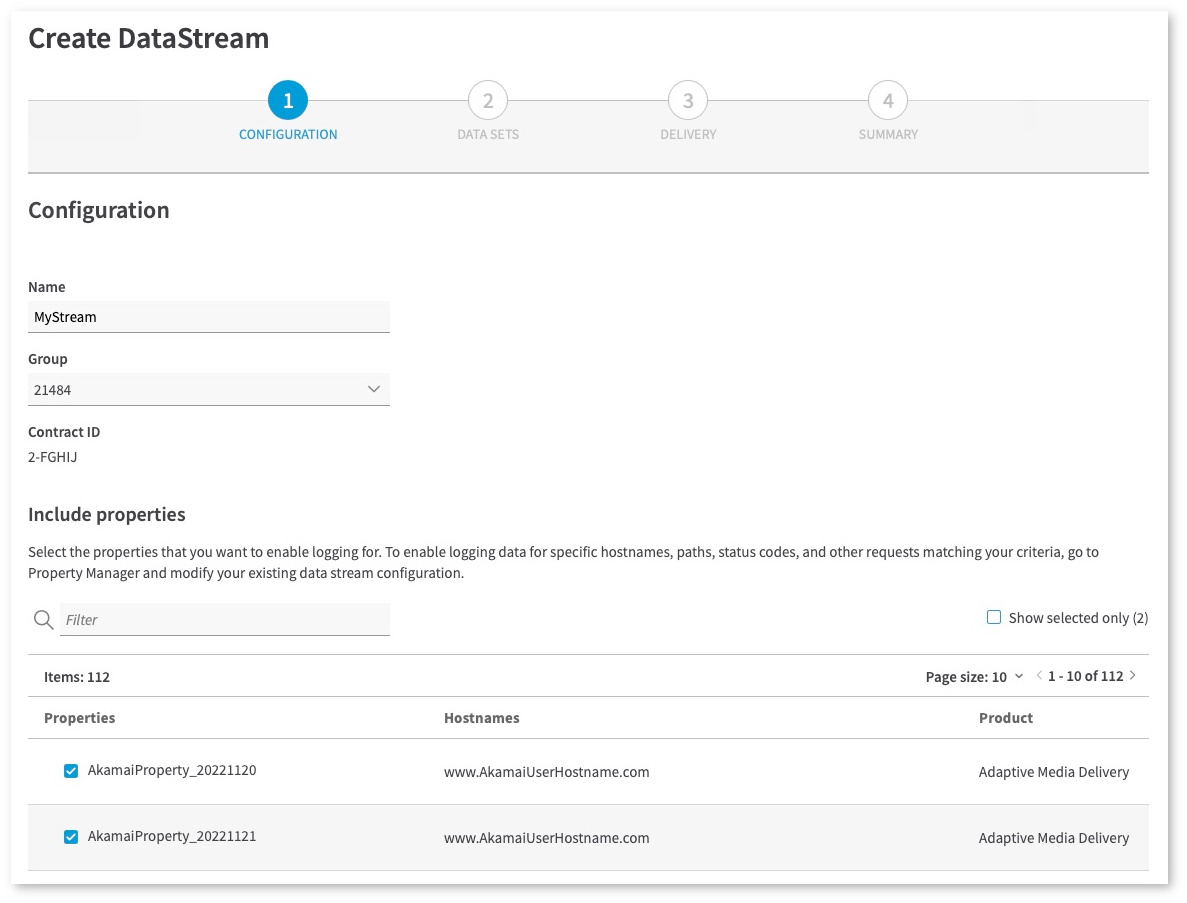
Select the properties
Stay on the Configuration tab to choose up to 1000 properties that you want to monitor. You can choose only active properties from your contract that belong to the same product.
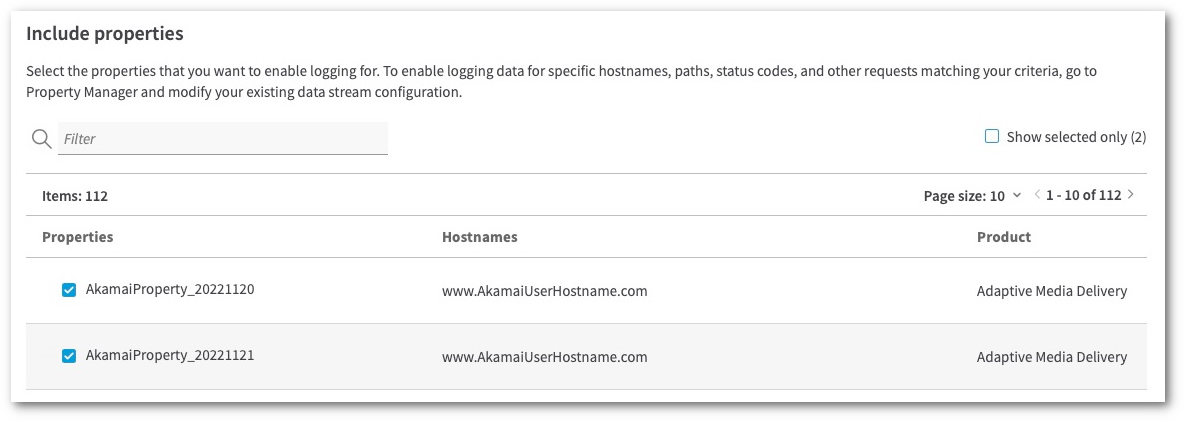
For details on this step, check Create a stream.
Select the data set fields
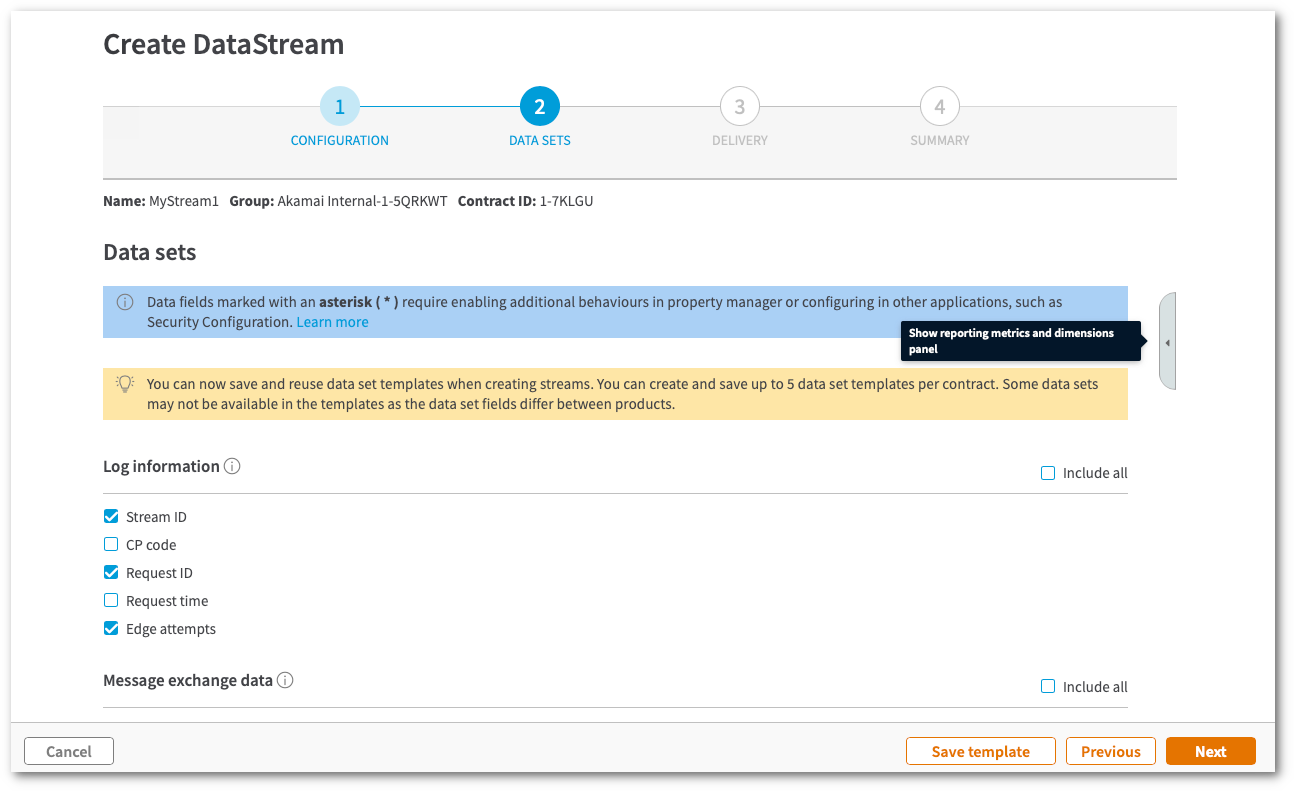
On the Data sets tab, choose the data set parameters you want to monitor in your stream.
Apart from basic supported fields, you can select data sets for midgress traffic within the Akamai platform, custom log fields, and other products, such as EdgeWorkers. This includes Reporting metrics and dimensions you can log and calculate using existing data set fields mapped to these metrics.
There are data set fields that require additional configuration, including adding behaviors in Property Manager. For the complete list of these fields with requirements, see Data set parameters.
Choose the log format
Next, choose the log file format depending on the destination you want to use later to stream your logs. For details on supported formats, see Stream logs to a destination.
You can also view a Sample log line from the target log file for both formats. For Structured logs, move the data set fields to customize their order in the log file:
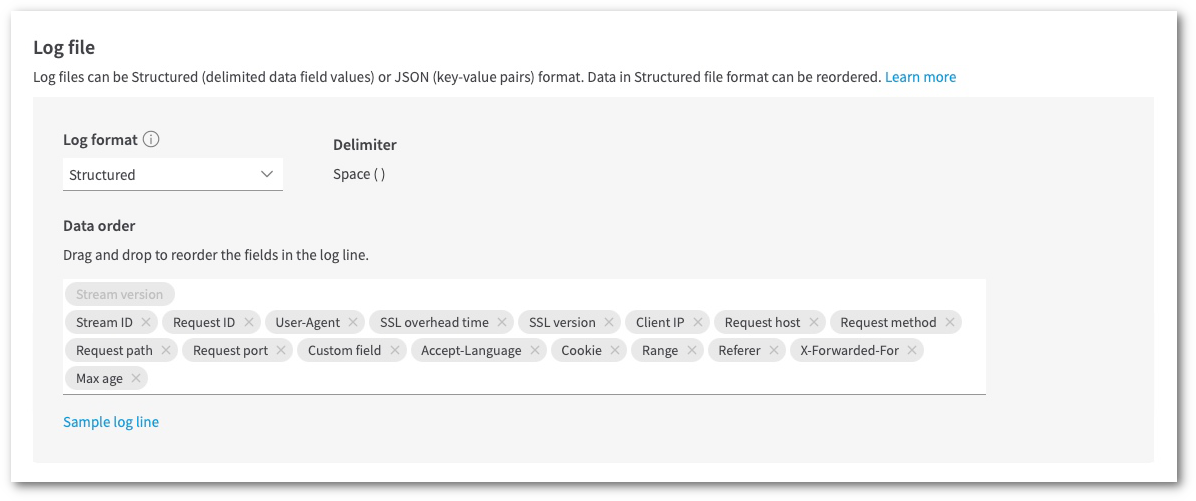 For details on this step, see Choose data parameters.
Configure the destination
DataStream 2 gathers and uploads logs to a third-party destination of your choice, including Amazon S3, Azure Storage, Datadog, Elasticsearch, Google Cloud Storage, Loggly, New Relic, Oracle Cloud, Splunk, Sumo Logic, S3-compatible destinations, and custom HTTPS endpoints, including TrafficPeak integration.
On the Destination tab, enter the details of your chosen destination. For details on each destination, supported features such as Akamaized hostnames support, custom headers and mTLS authentication, and the data you need to enter, see Stream logs to a destination .
DataStream natively supports IP-based access lists (ACLs) that use the same IP addresses as Origin IP ACLs for the Akamai CDN. You can update your DataStream destination's firewall settings to accept these IP addresses.
Several destinations support custom prefixes and suffixes for log filenames, where you can use static and dynamic values. For details, see Dynamic variables.
Next, go to Push frequency to set how often DataStream 2 should bundle logs and upload them to your destination.
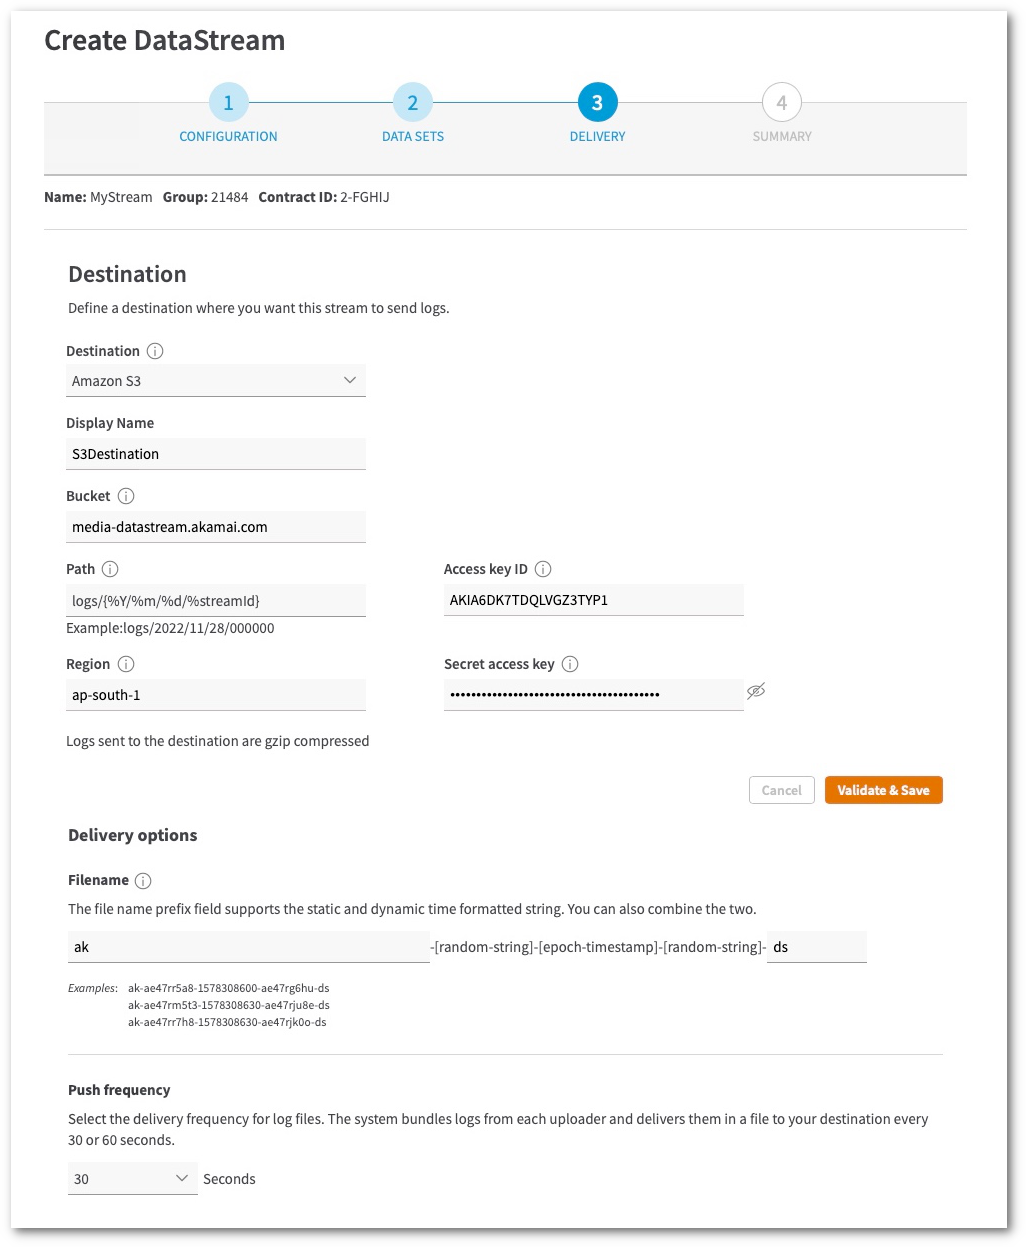
For details on this step, check Stream logs to a destination.
Activate the stream
On the Summary tab, review all the details of the stream you configured in the creation wizard. You can also enter e-mail addresses to get notifications about events involving the stream.
You can Activate stream upon saving or save it as inactive configuration, and deploy it on the production network anytime (see Next steps).

For details on this step, check Stream logs to a destination.
Enable the DataStream behavior
Activating a stream takes up to an hour, but it will start gathering and streaming data only after you add and enable the DataStream behavior to the default rule in your property configuration in Property Manager. You can set the sample percentage of data (0-100) for this property for your streams using this behavior.
Several data set fields, including Custom log fields, require adding and configuring additional behaviors in your property configuration. For the complete list of these fields with requirements, see Data set parameters.

For details on this step, check Enable the DataStream behavior.
Next steps
-
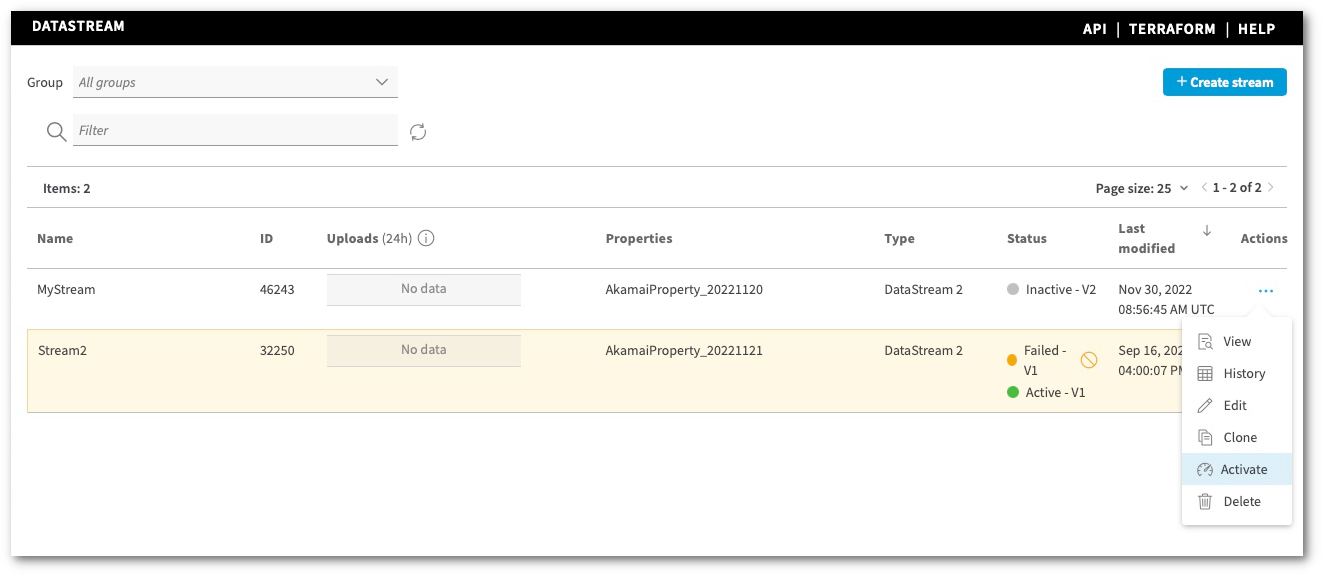
Activate or deactivate a stream. You can activate or deactivate your stream anytime from the DataStream homepage menu. Click · · · from the Action column, and choose Activate or Deactivate from the dropdown list. Activating or deactivating a stream on the production network takes up to an hour.
-
Clone a stream. If you need to conveniently copy an existing stream, for example when creating multiple streams for one or several properties, click · · · from the Action column, and choose Clone. When cloning a stream, you can edit its name, properties, and destination details.
-
Edit a stream. If you need to create a new version of an existing stream, click · · · from the Action column, and choose Edit from the dropdown list. You can edit the properties of a given stream in the editing wizard designed after the creation wizard.
Updated 17 days ago
