
Using custom metrics
For this lab Grafana and Alertmanager need to be enabled for the team.
To be able to collect custom metrics you will first need to configure your app to expose metrics. This is called instrumentation of code and can include annotating the code with metadata, or adding in logic to calculate and expose data.
Instrumenting code means you write code to expose information about the technical, business, and customer context. This information can then be collected and analyzed using Prometheus and Grafana.
In this lab we'll use a container that exposes custom metrics and then show how the metrics can be collected and analyzed.
Create a Workload
-
Go to the Catalog and click on the
k8s-deploymenttemplate. -
Click on the Values tab.
-
Fill in the name
custom-metrics. -
Use the following values:
image: repository: quay.io/rbaumgar/monitor-demo-app-jvm pullPolicy: IfNotPresent tag: latest containerPorts: - name: web containerPort: 8080 protocol: TCP servicePorts: - port: 8080 targetPort: 8080 protocol: TCP name: web replicaCount: 1 serviceMonitor: create: true endpoints: - interval: 30s port: web scheme: http path: /q/metrics -
Click the Submit button.
Our metrics will now be scraped by the Platform Prometheus. Before we continue, let's first generate some load:
-
Expose the
custom-metricsservice (see lab Expose services). -
Run the following command in your terminal:
for i in {1..1000}; do curl https://custom-metrics-labs.<your-domain>/hello; sleep 10; done -
Wait for approximately 10 minutes.
Create a dashboard in Grafana to use the metrics
-
In the left menu, click on Apps and open Grafana.
-
Go to the Grafana dashboard homepage.
-
In the top right, click New and select New Dashboard.
-
Click Add visualization.
-
In the Data source tab, select Prometheus Platform.
-
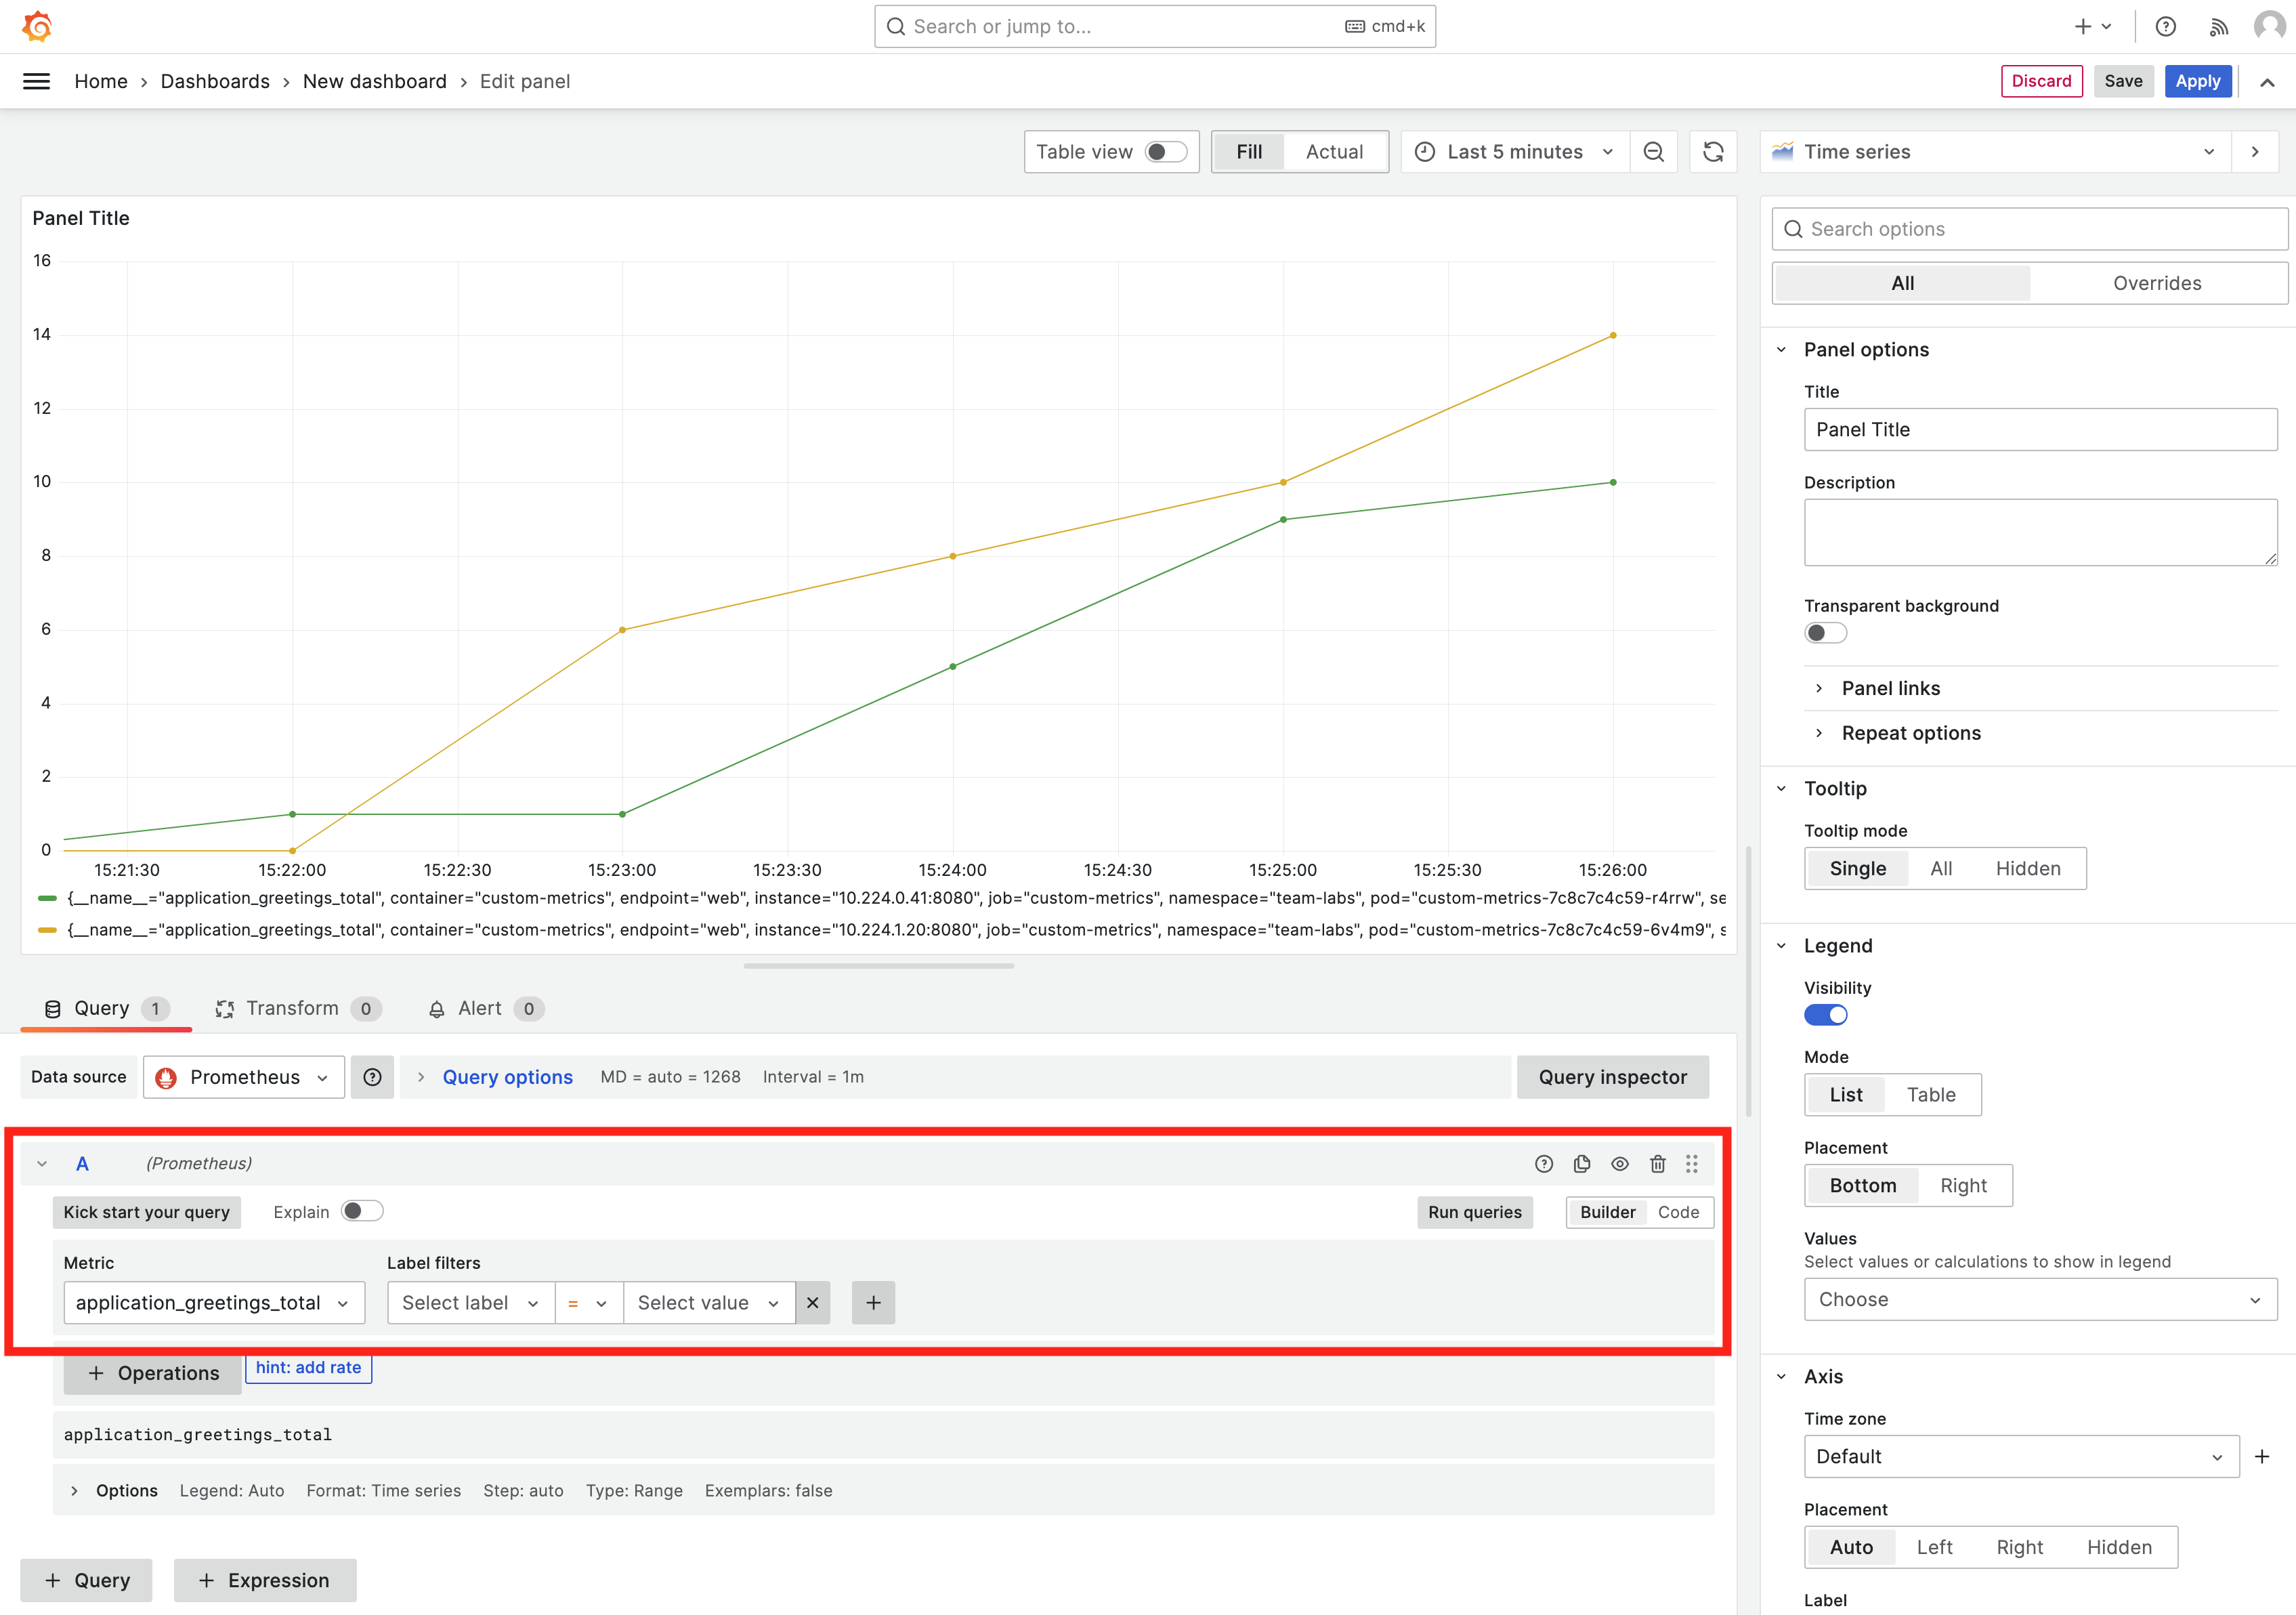
In the A collapsible section, select a metric from the Metric drop-down list. In our example, we use the
application_greetings_totalmetric. -
Click Run queries.
-
You should now see a Time series graph like this:
-
Save the dashboard in Grafana.
Make the dashboard persistent
Now that you've created a dashboard in Grafana, you should also configure it so that persists when the instance is rebooted. To make the dashboard persistent, you can add it to a configmap.
-
Obtain the dashboard settings in JSON format. To do this, go to Dashboard settings (in the top right). Then click on JSON model tab and copy the JSON model.
-
Delete the dashboard that you manually created in Grafana.
-
Next, clone the values git repository and go to that directory.
-
Create the file
env/manifests/namespaces/team-<name>/configmap/my-custom-dashboard.yamlcontaining the following manifest:apiVersion: v1 kind: ConfigMap metadata: name: my-custom-dashboard labels: grafana_dashboard: "1" release: grafana-dashboards-labs # Change labs to the name of your team. data: my-dashboard.json: |- # Paste your dashboard json here. Make sure to indent with 4. -
Commit and push the changes.
The dashboard will now automatically be loaded into the team's Grafana instance.
Create custom rules
Now that we are exporting metrics, these metrics can also be used to generate alerts. To do this, you can create a Prometheus Rule:
-
In the values repository, create the file
env/manifests/namespaces/team-<name>/prometheusrule/my-custom-rules.yamlcontaining the following manifest:apiVersion: monitoring.coreos.com/v1 kind: PrometheusRule metadata: labels: prometheus: system name: labs-custom-rules spec: groups: - name: custom.rules rules: - alert: 50GreetingsReached annotations: description: We reached 50 greetings! summary: The number of greetings has reached more than 50. expr: application_greetings_total > 50 for: 1m labels: severity: warning -
Commit and push your changes.
See alerts based on the rule in Alertmanager
Go to Apps and open Alertmanager. You will see Alertmanager has received the alerts from Prometheus:
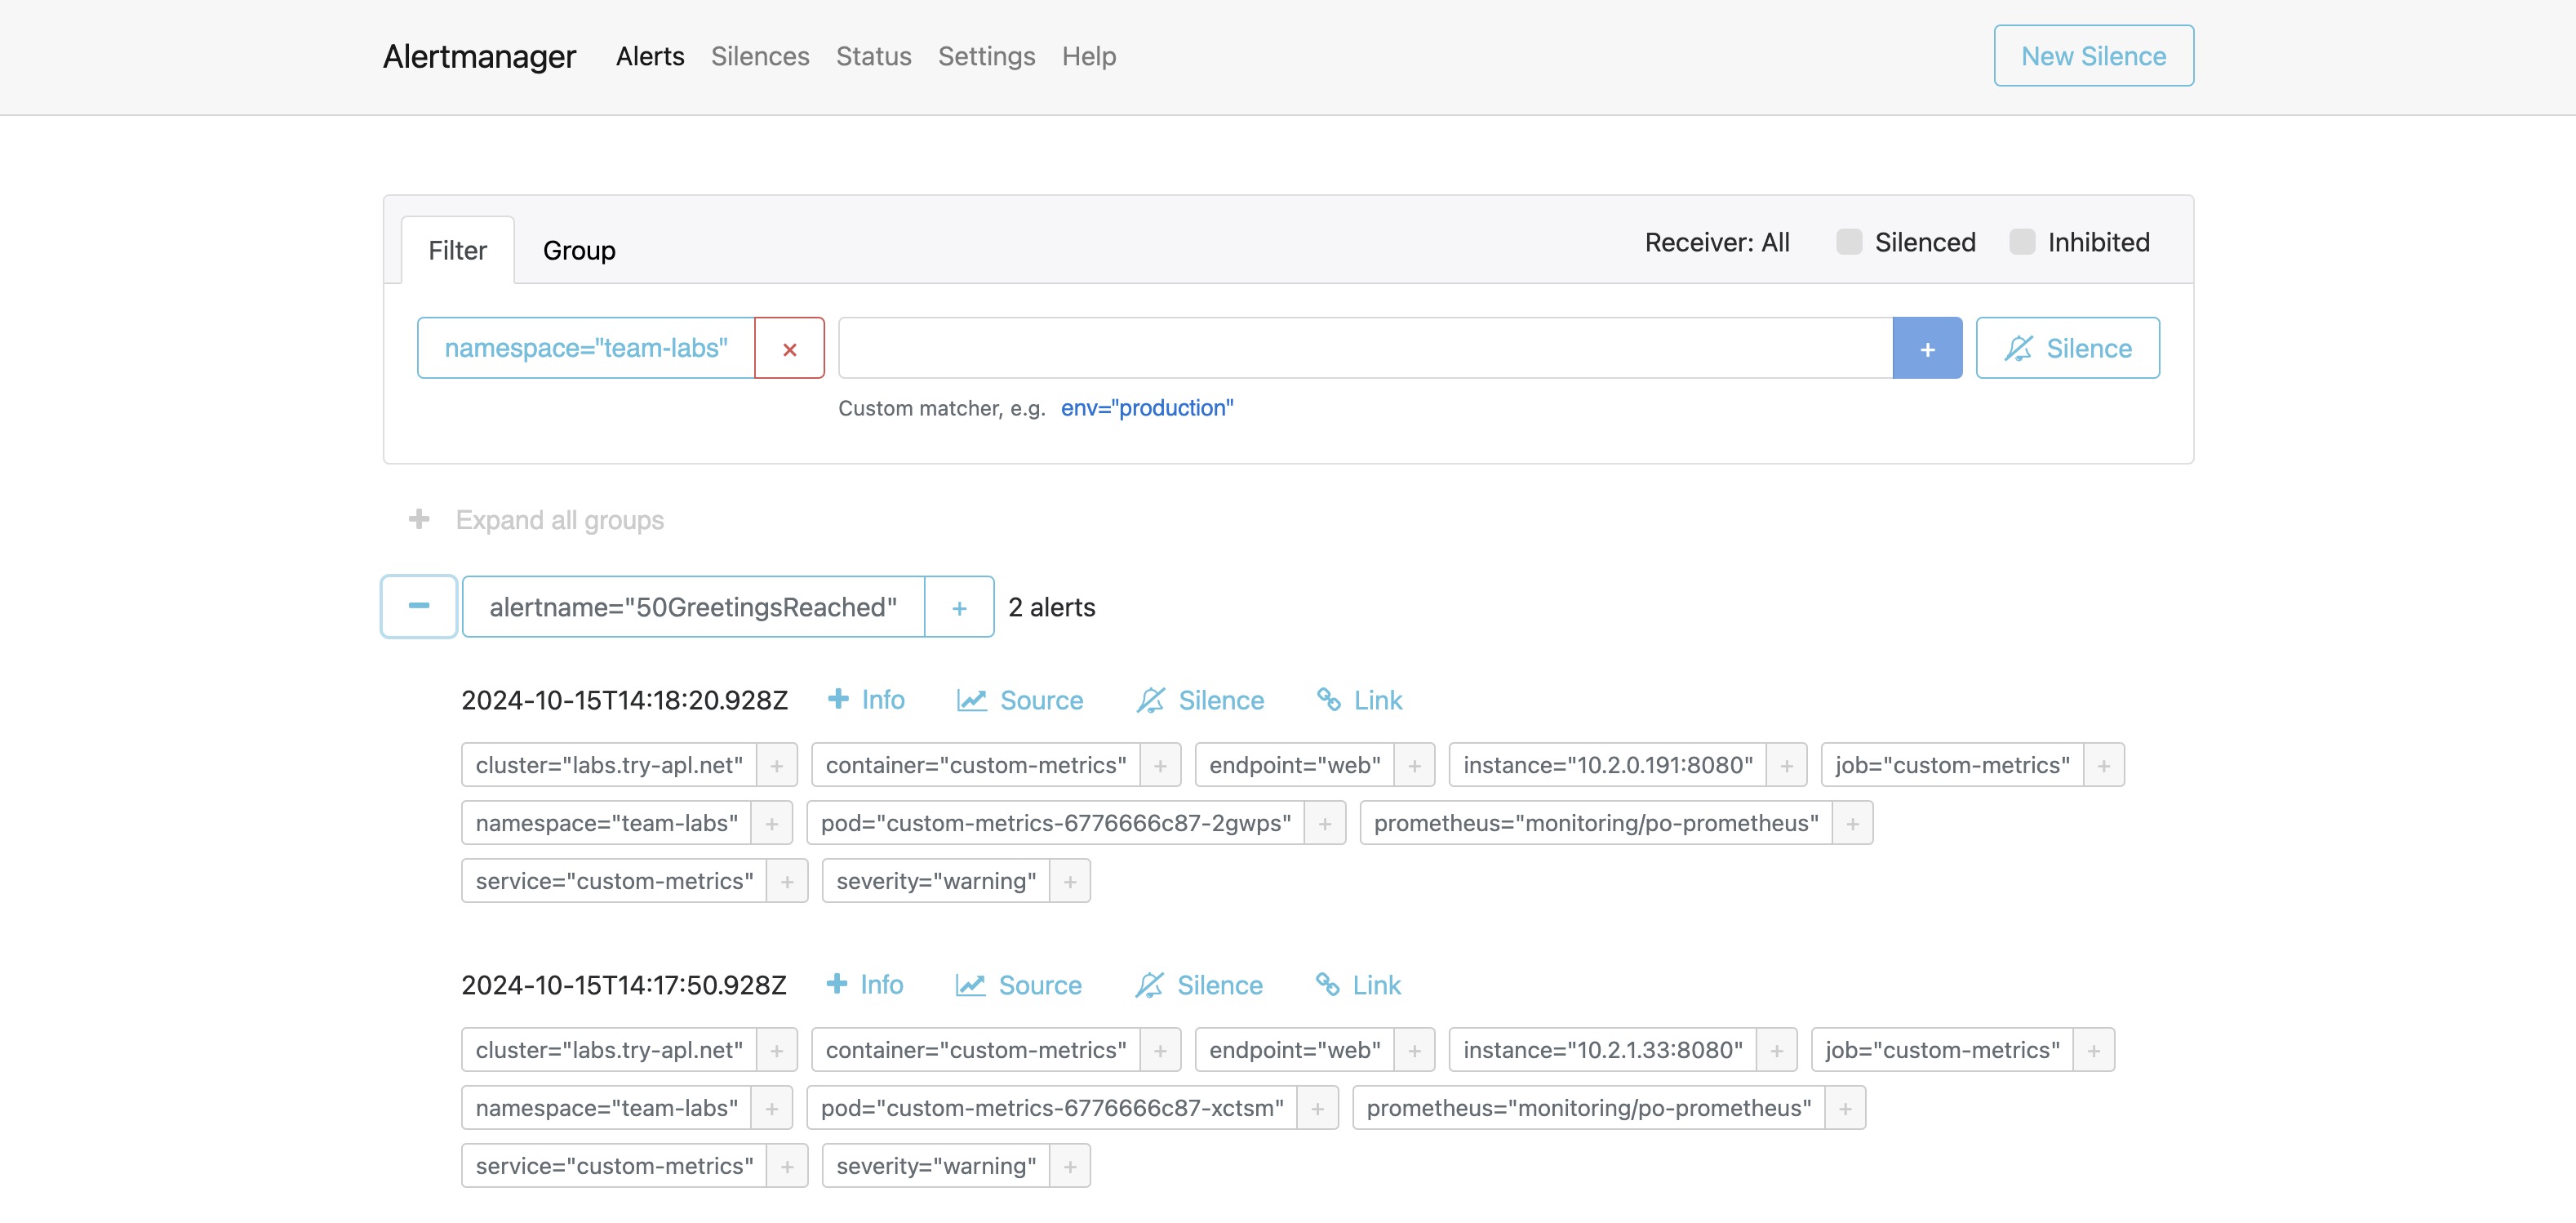
If a receiver has been configured for the team, like Slack, then you would also have received a message with the alert.
Updated 4 months ago