2. Set up Linodes
You need a place to maintain all the content that makes up your website—HTML, javascript, CSS, images, etc. This is what we call an origin server. The Akamai edge network communicates with your origin server during client requests, grabs all of your website content, and holds it in cache for quick access to future requests. Here, you'll create compute instances ("Linodes") to act as virtual origin servers.
| How long will this take? |
Approximately 1 hour
Create three Linodes—a primary and two standby instances—to take advantage of high availability. Perform basic configuration options on your Apache2 web server. |
High availability
If you only need one origin server, why do you need multiple Linodes? This is to eliminate a single point of failure. You want your site available to your clients all the time. By adding multiple Linodes, you add redundancy through what we call High Availability. It combines load balancing and failover to better protect your site against things like hardware problems and network overload.

Linodes also eliminate the overhead that a physical redundant network would create for you. With our cost per usage model, you can scale your site as client-access requests increase. Linodes are easy to create and maintain, so you can quickly add another one to your cloud to expand redundancy.
1. Create the primary
Create a Linode to serve as your primary origin server.
-
Access Cloud Manager and log in using the account you created.
-
Click Create Linode.
-
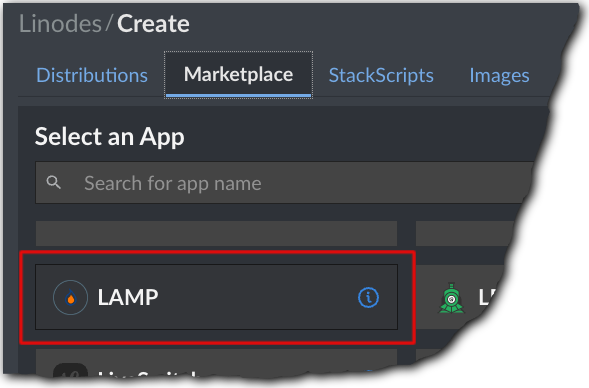
Click the Marketplace tab and select the LAMP application to install the Linux, Apache2, MySQL, PHP (LAMP) stack.
-
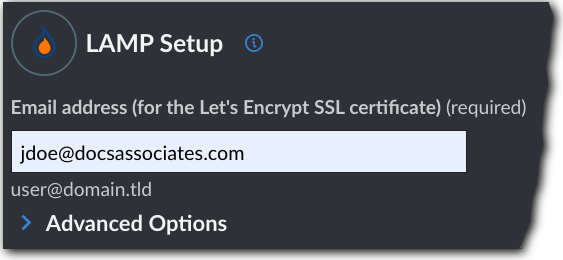
In Lamp Setup, apply these options:
-
Email address (for the Let's Encrypt SSL certificate). Let's Encrypt generates a secure certificate for HTTPS access to the Linode, to resolve requests for your domain to the Akamai edge network. Let's Encrypt needs an email address for confirmation.
-
Advanced Options. For this tutorial, leave all of these options at their default. For information about them, see our Marketplace LAMP Stack guide.
-
-
In the Select an Image options, make sure that the latest version of Ubuntu is selected.
-
Select the desired Region to host your Linode.
-
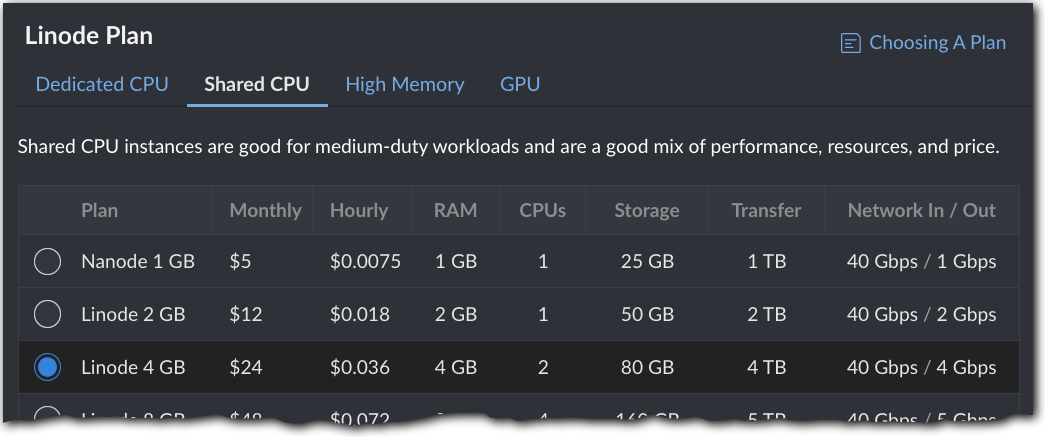
In the Linode Plan options, select the plan that best suits the size requirements for your site. Click Choosing a plan for more details on the available options.
-
Set Linode Label to something to differentiate this one as the primary—for example
lamp-primary-origin. -
Set the Root Password. You'll use it to access the Linode over SSH.
Keep it safe and secure
Keep these points in mind when setting this password:
- Use a strong password. You want to make sure the Linode is secure.
- Consider using an SSH key. For this tutorial, we'll be using the Root Password for ease of use, but an SSH key pair is a more secure way to set up access to your Linode. If you're interested, check out the Manage SSH Keys guide.
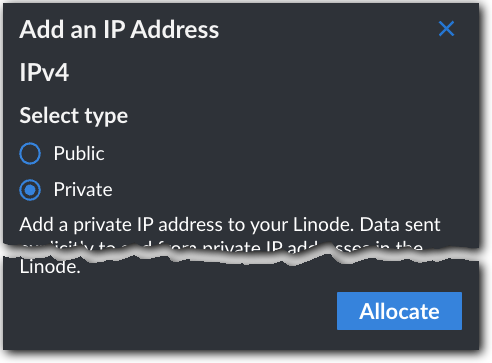
- Finally, under Add-ons, select the Private IP option so it can communicate with the standby Linodes we'll set up later.
- Leave all other options at their default and click Create Linode. Leave Cloud Manager open. You'll be using it more.
Verify and test
It'll take a few minutes for the compute instance to provision and come online. It'll be labeled as RUNNING once it's provisioned, and then it'll automatically start installing the LAMP stack. Here, we'll verify the LAMP installation is complete, and then test it for access.
-
Click Launch LISH Console at the top of this Linode's control page. The console window launches.
-
Follow along with the installation script. Once you see INSTALLATION COMPLETE, it's ready. If you don’t see any installation messages in the console, here are some other ways you can verify installation.
-
Type
exitat the prompt to log out, and then close the window. -
Back in Cloud Manager, look under IP Addresses, mouse-over your Linode's public IP and click
 to copy it.
 -
Open a browser, paste the IP into the address bar, and press Enter.
You should see a page stating “LAMP Stack: Powered by Linode Marketplace” or the index page that Apache2 ships with, which means it can fulfill requests. You're ready to go onto the next phase.

Get your primary hostname
Here, we need to ensure that your primary Linode can communicate with the standby Linodes we'll set up later.
-
From Cloud Manager, select Linodes (
 ) from the left navigation menu and click the Linode you created.
 -
Click the Network tab and check the IP Addresses section to ensure that a private IPv4 address has been provisioned to your Linode. If there isn't one:
- Click Add An IP Address to create one
- Click Reboot at the top of your Linode’s page to update its network settings.
-
Click Launch LISH Console at the top of your Linode’s control page.

-
At the login prompt, enter
rootfor the login and the Root Password you set when creating your primary Linode. -
Once logged in, run the
hostnamecommand to view the current name of your primary:hostname <ip-address>.ip.linodeuser.content.com -
Make note of the returned hostname for reference. You can change this to make it easier to identify later—for example using a value like
primary-origin:hostnamectl set-hostname primary-origin
2. Create standby #1
Create another Linode to serve as your first standby for failover. Follow the same steps you did to create the primary, but set the following:
-
Email address (for Let's Encrypt SSL certificate). Use the same address.
-
Select an Image. Set to the same version you selected for the primary.
-
Region. Set to the same region you set for the primary.
-
Linode Plan. Use the same configuration you did for your primary.
-
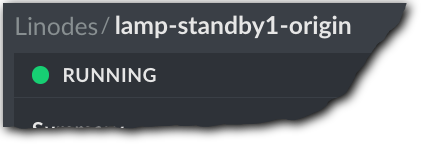
Linode Label. Set it to something to differentiate this one as the first standby—for example
lamp-standby1-origin. -
Root Password. Set a unique password value using the same safe and secure recommendations.
-
Check for the Private IP under Add-ons.
Test standby #1
Once it's labeled as RUNNING, you can test this instance.
Get standby #1's hostname
-
From Cloud Manager, select Linodes (
 ) from the left navigation menu.
 -
In your standby #1 Linode, click Launch LISH Console.

-
At the prompt, enter
rootfor the login and the Root Password you set when creating standby #1. -
Once logged in, run the
hostnamecommand to view the current name of standby #1:hostname <ip-address>.ip.linodeuser.content.com -
Make note of returned hostname for reference. You can change this to make it easier to identify later—for example using a value like
standby1-origin:hostnamectl set-hostname standby1-origin
3. Create standby #2
Having a second standby not only helps with failover, it also helps with site maintenance. More on this later. Follow the same steps you did to create the primary, but set the following:
-
Email address (for Let's Encrypt SSL certificate). Use the same address.
-
Select an Image. Set to the same version you selected for the primary.
-
Region. Set to the same region you set for the primary.
-
Linode Plan. Use the same configuration you did for your primary.
-
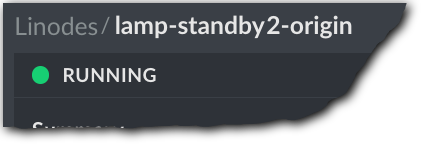
Linode Label. Set it to something to differentiate this one as the second standby—for example
lamp-standby2-origin. -
Root Password. Set a unique password value using the same safe and secure recommendations.
-
Check for the Private IP under Add-ons.
Test standby #2
Once it's labeled as RUNNING, you can optionally test this instance.
Get standby #2's hostname
-
From Cloud Manager, select Linodes (
 ) from the left navigation menu.
 -
Click the standby #2 Linode to open it.
-
In your standby #2 Linode, click Launch LISH Console.

-
At the prompt, enter
rootfor the login and the Root Password you set when creating standby #2. -
Once logged in, run the
hostnamecommand to view the current name of standby #2:hostname <ip-address>.ip.linodeuser.content.com -
Make note of the hostname for reference. You can change this to make it easier to identify later—for example using a value like
standby2-origin:hostnamectl set-hostname standby2-origin
4. Set up HTTPS on the primary
To set up high availability, one of your Linodes will serve as a secure point of entry, using HTTPS through a secure certificate. A LAMP stack set up on a Linode already includes this certificate, but you'll need to manually renew it once it expires. Here, we'll set up Certbot on your primary to create the applicable certificate and enable automatic renewal.
Before you begin
You need your Apache2 web server configured with your registered domain name. You also need to have an "A" record set in your DNS using this domain and the public IP address for your primary Linode.
Follow the Apache2 quick config to get set up.
Set up HTTPS
-
From Cloud Manager, select Linodes (
 ) from the left navigation menu.
 -
Click Launch LISH console for your primary Linode.
-
At the prompt, enter
rootfor the login and the Root Password you set when creating the primary. -
Run the
ufw statuscommand to verify firewall settings. A LAMP stack should automatically enable firewall settings and you should see the follow response:Status: active To Action From -- ------ ---- 80/tcp ALLOW Anywhere 443/tcp ALLOW Anywhere 22/tcp ALLOW Anywhere 80/tcp (v6) ALLOW Anywhere (v6) 443/tcp (v6) ALLOW Anywhere (v6) 22/tcp (v6) ALLOW Anywhere (v6) -
To ensure you've got the proper version of Certbot, remove any previously installed versions:
apt remove certbot -
Use Snap to install the current version of Certbot:
snap install --classic certbot -
Configure a symbolic link to the Certbot directory using the
lncommand:ln -s /snap/bin/certbot /usr/bin/certbot -
Request a certificate using Certbot:
certbot --apache -
When prompted, enter the domain name you want protected. We're using our example domain,
docassociates.comagain. If you have more than one, separate each with a whitespace:Please enter the domain name(s) you would like on your certificate (comma and/or space separated) (Enter 'c' to cancel): docsassociates.com
The domains you enter need to:
- Be registered with an accredited registrar
- Already exist on your Apache2 web server. See Apache2 quick config for details on adding your domains.
The request is sent to Let's Encrypt to verify your domain and register the certificate. A successful completion message looks like this:
Successfully received certificate.
Certificate is saved at: /etc/letsencrypt/live/docsassociates.com/fullchain.pem
Key is saved at:         /etc/letsencrypt/live/docsassociates.com/privkey.pem
This certificate expires on 2023-09-06.
These files will be updated when the certificate renews.
Certbot has set up a scheduled task to automatically renew this certificate in the background.

Deploying certificate
Successfully deployed certificate for docsassociates.com to /etc/apache2/sites-available/docsassociates.com-le-ssl.conf
Congratulations! You have successfully enabled HTTPS on https://docsassociates.com

- - - - - - - - - - - - - - - - - - - - - - - - - - - - - - - - - - - - - - - -
If you like Certbot, please consider supporting our work by:
 * Donating to ISRG / Let's Encrypt:   https://letsencrypt.org/donate
 * Donating to EFF:                    https://eff.org/donate-le
- - - - - - - - - - - - - - - - - - - - - - - - - - - - - - - - - - - - - - - -
Test your domain
Open a browser and type in your domain. Your site should now be secure. For example, if you were using Chrome, the "Not secure" label next to your domain should be replaced by a lock icon.

Renew the certificate
A domain-validated certificate has a lifecycle of 90 days. Certbot will automatically renew your certificate before its expiration date. The only time you'll need to manually request an updated certificate is if your site's configuration file on the Apache2 server changes. In this case, you could just rerun this Certbot procedure.
If you want, you can test the automated renewal process, without affecting your current certificate.
5. Add network load balancing
A NodeBalancer distributes client requests between Linodes to improve capacity, performance, and availability. Here, we'll set one up to distribute requests between the Linodes acting as your origin servers.
Before you begin
When you Set up HTTPS on the primary, a certificate and its private key were generated for the certificate. You need the contents of these files for this process.
-
From Cloud Manager, select Linodes (
 ) from the left navigation menu.
 -
Click Launch LISH console for your primary Linode.
-
At the login prompt, enter
rootfor the login and the Root Password you set when creating the primary. -
Navigate to the Apache2 directory that holds the certificate, replacing
docassociates.comwith your domain.cd /etc/letsencrypt/live/docsassociates.com/ -
Open the
fullchain.pemfile to view its contents. This is the SSL certificate.nano fullchain.pem -
Highlight and copy the entire contents of the file.
-----BEGIN CERTIFICATE----- AHDH47FDJNGTJGJ347DFMNHLOJODHS623960i8JNMSJFJDFJGJK38FJKM eiosmnc7dlhikswbd4wj405ohmdgqfrsdkmc6skvjnrdhdy67cxmfgkjr AHDH47FDJNGTJGJ347DFMNHLOJODHS623960i8JNMSJFJDFJGJK38FJKM eiosmnc7dlhikswbd4wj405ohmdgqfrsdkmc6skvjnrdhdy67cxmfgkjr AHDH47FDJNGTJGJ347DFMNHLOJODHS623960i8JNMSJFJDFJGJK38FJKM eiosmnc7dlhikswbd4wj405ohmdgqfrsdkmc6skvjnrdhdy67cxmfgkjr AHDH47FDJNGTJGJ347DFMNHLOJODHS623960i8JNMSJFJDFJGJK38FJKM eiosmnc7dlhikswbd4wj405ohmdgqfrsdkmc6skvjnrdhdy67cxmfgkjr AHDH47FDJNGTJGJ347DFMNHLOJODHS623960i8JNMSJFJDFJGJK38FJKM eiosmnc7dlhikswbd4wj405ohmdgqfrsdkmc6skvjnrdhdy67cxmfgkjr AHDH47FDJNGTJGJ347DFMNHLOJODHS623960i8JNMSJFJDFJGJK38FJKM eiosmnc7dlhikswbd4wj405ohmdgqfrsdkmc6skvjnrdhdy67cxmfgkjr AHDH47FDJNGTJGJ347DFMNHLOJODHS623960i8JNMSJFJDFJGJK38FJKM eiosmnc7dlhikswbd4wj405ohmdgqfrsdkmc6skvjnrdhdy67cxmfgkjr AHDH47FDJNGTJGJ347DFMNHLOJODHS623960i8JNMSJFJDFJGJK38FJKM eiosmnc7dlhikswbd4wj405ohmdgqfrsdkmc6skvjnrdhdy67cxmfgkjr AHDH47FDJNGTJGJ347DFMNHLOJODHS623960i8JNMSJFJDFJGJK38FJKM eiosmnc7dlhikswbd4wj405ohmdgqfrsdkmc6skvjnrdhdy67cxmfgkjr AHDH47FDJNGTJGJ347DFMNHLOJODHS623960i8JNMSJFJDFJGJK38FJKM eiosmnc7dlhikswbd4wj405ohmdgqfrsdkmc6skvjnrdhdy67cxmfgkjr AHDH47FDJNGTJGJ347DFMNHLOJODHS623960i8JNMSJFJDFJGJK38FJKM eiosmnc7dlhikswbd4wj405ohmdgqfrsdkmc6skvjnrdhdy67cxmfgkjr AHDH47FDJNGTJGJ347DFMNHLOJODHS623960i8JNMSJFJDFJGJK38FJKM eiosmnc7dlhikswbd4wj405ohmdgqfrsdkmc6skvjnrdhdy67cxmfgkjr -----END CERTIFICATE-----This is just an example of what the content of this file might look like. Don’t use it.
-
Open a text editor and paste the content of the file. Save it as
certificate.txt. -
Back in the LISH console, press Ctrl + X, then Y and Enter to close the
.pemfile. -
Open the
privkey.pemfile. This is the private key.nano privkey.pem -
Highlight and copy the entire contents of the file.
-----BEGIN PRIVATE KEY----- AHDH47FDJNGTJGJ347DFMNHLOJODHS623960i8JNMSJFJDFJGJK38FJKM eiosmnc7dlhikswbd4wj405ohmdgqfrsdkmc6skvjnrdhdy67cxmfgkjr AHDH47FDJNGTJGJ347DFMNHLOJODHS623960i8JNMSJFJDF -----END PRIVATE KEY-----This is also just an example of what this file might look like. Don’t use this content.
-
Open a text editor and paste the content of the file. Save it as
private.txt. -
Back in the LISH console, press Ctrl + X, then Y and Enter to close the
.pemfile.
Set up load balancing
Follow these steps to get it set up.
-
From Cloud Manager, select NodeBalancers (
 ) from the left navigation menu.
 -
Click Create NodeBalancer.
-
Set a NodeBalancer Label. Enter a name to make it recognizable. This will be helpful if you decide to add more NodeBalancers in the future.
-
Set Region to the same region you used for your three Linodes.
-
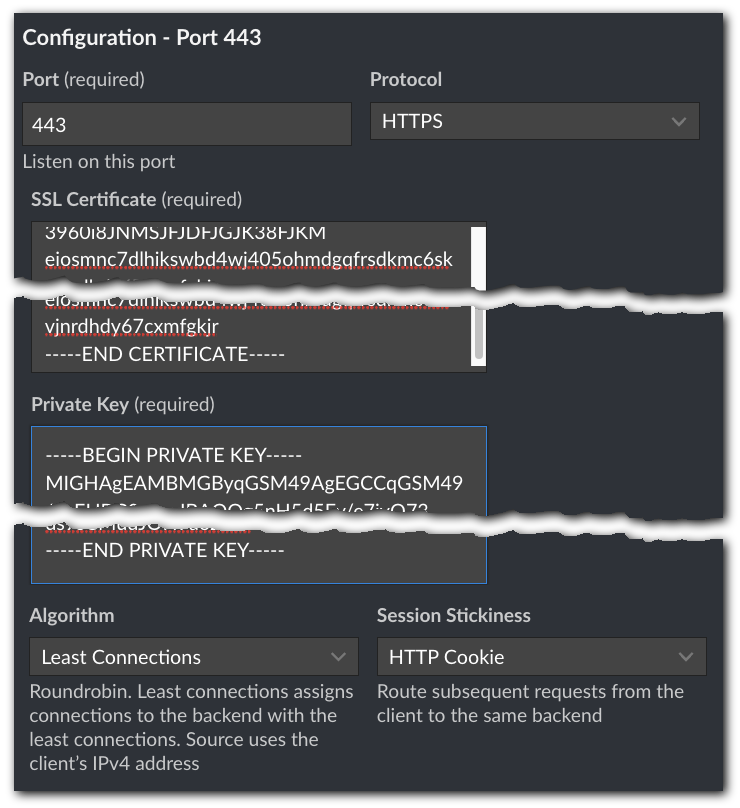
Set the Configuration options:
-
Port. Set this to 443. This is the default port used for secure HTTPS connections.
-
Protocol. Select HTTPS to limit connections to clients using HTTPS. This adds security to the connection between the Akamai edge servers and your Linodes.
-
SSL Certificate (required). Copy the content from the
certificate.txtfile you created and paste it here. -
Private Key (required). Copy the content from the
private.txtfile you created and paste it here. -
Algorithm. Select Least Connections. This helps evenly distribute the client request load for your site, between your three Linodes.
-
Session Stickiness. Select HTTP Cookie. Subsequent requests from the same client will review an HTTP cookie on that client to determine which Linode to use.
-
-
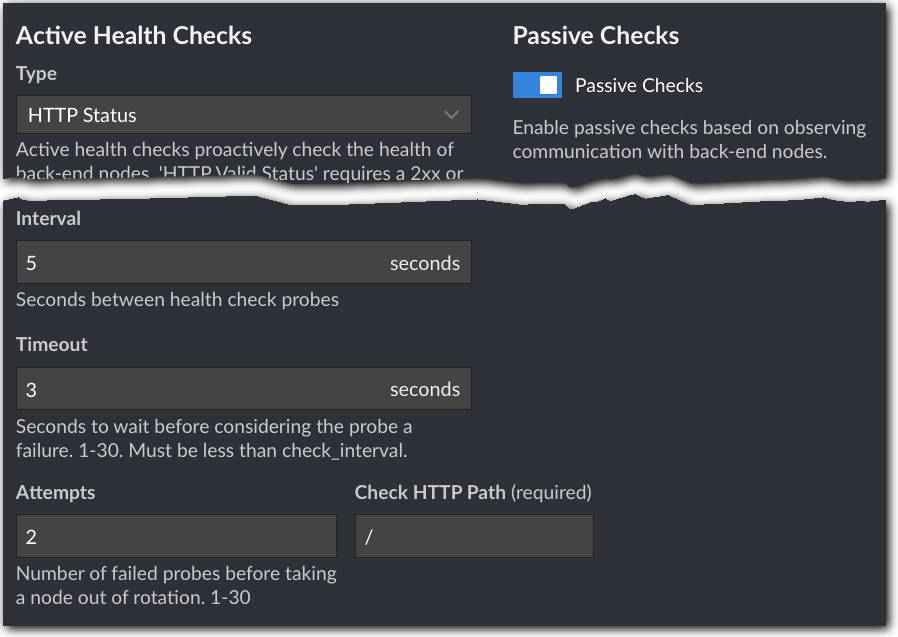
Health Checks help take problematic Linodes out of the rotation so edge servers won't try to connect to them. Set these options to enable them:
-
Active Health Checks. Set Type to HTTP Status and set Check HTTP Path to
/. Leave all other options at their default. If a request to any path (/) on one of your Linodes fails these timeout parameters, the request will be rerouted to one of your other Linodes. -
Passive Checks. Make sure this is enabled.
-
-
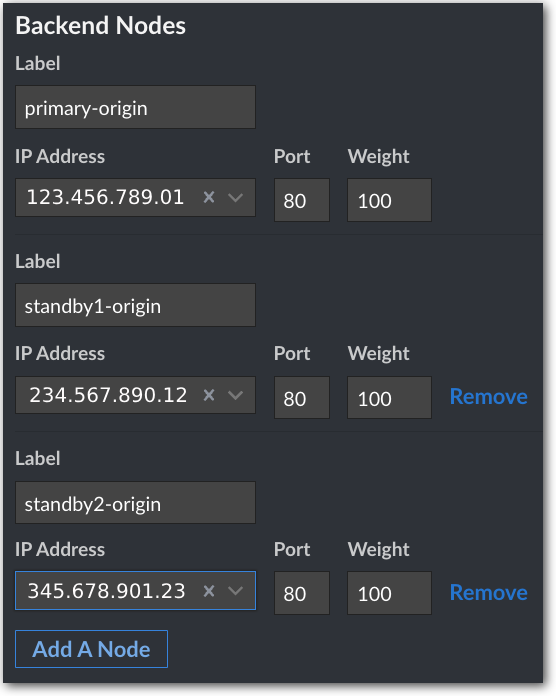
In the Backend Nodes options, click the Label field and enter a name for your primary—for example,
primary-origin. -
Select your primary Linode from the IP Address menu. Leave the other options at their default.
-
Click Add A Node.
-
Repeat steps 7-8 for Standby #1, giving it a Label of something like
standby1-origin. -
Click Add A Node.
-
Repeat steps 7-8 for Standby #2, giving it a Label of something like
standby2-origin.
-
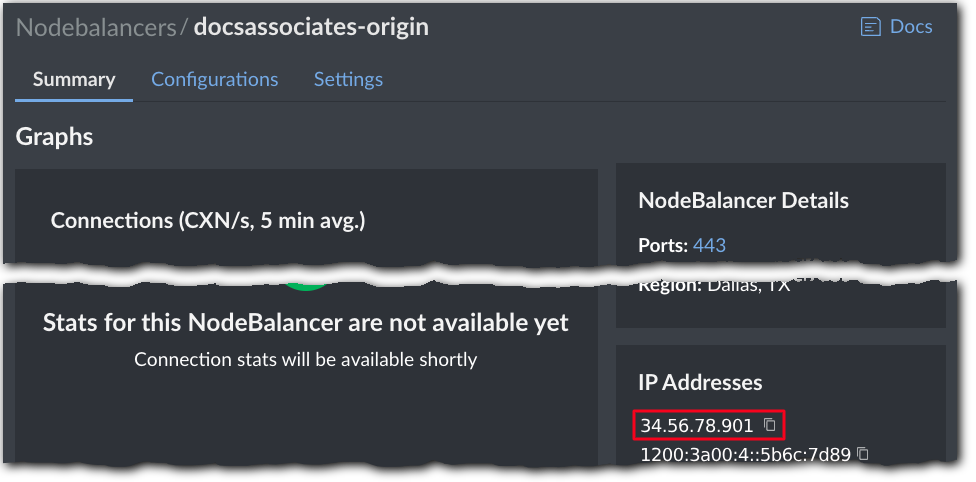
Click Create NodeBalancer. Your new NodeBalancer is displayed.
-
With the Summary tab selected, make note of the IPv4 address under IP Addresses. You'll need this later when setting up your Ion property.
To ensure security of your origin cert, delete the
certificate.txtandprivate.txtfiles from your local system.
6. Duplicate your Apache2 configuration
High availability switches between your Linodes, to handle traffic and support failover. So, your Standby #1 and Standby #2 Linodes need to be configured the same as your Primary.
Follow the steps in Update Apache2 to duplicate your configuration on Standby #1 and #2.
7. Get your site on your Linodes
This tutorial isn't intended for complex sites that integrate detailed databases or file systems. It offers an example of a basic Akamai cloud computing environment using Linodes to store a simple, secure site for delivery through the Akamai CDN.
With a LAMP stack set up on your Linodes, you essentially have a "blank canvas" you can use to house your website.
Create a new basic site
You could develop your site, directly on your primary Linode using PHP, MySQL as your database, and Apache2 as your web server. See the relevant product's documentation for details on their use.
Move your existing basic site
If you already have a simple site, you could migrate it to your primary Linode. With your Linodes deployed and LAMP installed, you'd need to:
-
Test your new environment. (This isn't for actual delivery, this is just to test that your site is on the Linode.)
Duplicate your site on the standbys
Once you've created a new site or migrated an existing one to your primary, you need to get it on standby #1 and standby #2. You could use rsync to copy all relevant files.
What about maintenance?
What if you need to make changes to your site? There are several ways you can set up maintenance, including detailed replication scenarios that would reflect changes from your primary directly out to your standbys. These can be pretty detailed, so they're a bit outside the scope of this document. But, the "primary + standby #1 + standby #2" model you've set up here, allows for a manual method for maintenance.
Here's a rough outline of a process you could follow:
-
Log in to your primary.
-
Stop Apache2 services by running this command:
systemctl stop apache2The service stops on your primary. Standby #1 and standby #2 are still available to the NodeBalancer.
-
Make the necessary updates to your website on the primary.
-
Login to standby #1.
-
Stop Apache2 services. The service stops on standby #1. Standby #2 is still available to the NodeBalancer.
-
Copy the changed files from the primary to standby #1, for example using rsync.
-
Start Apache2 services again on standby #1, by running this command:
systemctl start apache2 -
Login to standby #2.
-
Stop Apache2 services. Standby #1 is available to the NodeBalancer and all of your updates go live.
-
Copy the changed files from the primary to standby #2, for example using rsync.
-
Restart services on standby #2. It's now available to the NodeBlancer, with your updated site.
-
Login to your primary and restart Apache2 services. All three of your Linodes are now available to the NodeBalancer, with your updated site.
Additional resources
Secure your Linodes
Have a look at Setting Up and Securing a Compute Instance. It contains several recommendations and tips on how to properly secure your Linodes, over and above what we cover here.
Third-party resources
Here are some additional non-Akamai resources you might want to check out:
Since these are third-party resources, we can't vouch for their accuracy or timeliness.
Updated 3 months ago
