Group
MSL5 uses Role-Based Access Control (RBAC) managed through the Akamai Control Center (ACC).
The key points include:
- User Access Management: Users are granted group access through specific roles. The group controls user access and visibility to streams, including read/write permissions.
- Group Display: The Group drop-down menu shows Group IDs imported from Akamai via SAML.
The next release will include an option to enable auto-sync for “Group Name” and “Group ID,” allowing the group options to be displayed as “Group Name.”
There are two methods to update the Group Name associated with a Group ID:
- Manual Entry: The Group Name can be entered manually.
- API Sync: The Group Name can be fetched and synchronized using an API token option.
Fetch Group Names
The Contract and Group ID are made available to MSL5 based on the userʼs login, but the Group Name is not included.
To fetch the Group Names to MSL5, you need to retrieve the EdgeGrid credentials from the Access Control Center (ACC) and provide the associated credentials via Asset Management.
-
Navigate to Access Management > Group.
-
Click on the Fetch Group Name button in the top right corner of the screen.
-
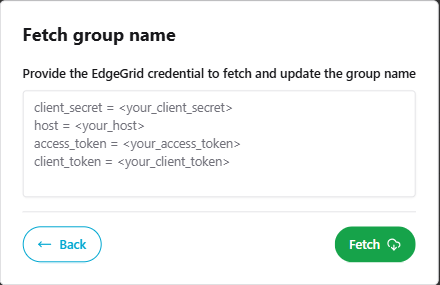
From the Fetch Group Name pop-up window, fill in the EdgeGrid credentials retrieved from Akamai Control Center.

Make sure you have to use the correct format and order of EdgeGrid credentials.
- Click the Fetch button to proceed.
Result: Once the groups are successfully fetched, the Group IDs, Group Names, and assigned group permissions will be displayed.
In addition, the Group IDs and Group Names will be available for selection when creating your MSL5 streams. (Refer to Create an MSL5 stream for details.)
Edit a Group
After fetching the group names from the Akamai Control Center, you can update the Group Name as desired.
- Navigate to the Action column and select … > Edit Group.
- Specify the new Group Name that you want to map to the specific Group ID.
- Click the Save button.
Updated 5 months ago
