Add a filter
You have various filtering options that allow you to narrow your search and precisely target the cases you want to analyze. Before we dive into details, here are a few handy tips to keep in mind when building your filter:
- By default, Akamai filters data by requests. Learn more on filtering methods and how to change the default setting.
- After you set your filtering method, add filter conditions to narrow down your search. There is an AND operator between each filter condition you define.
- Click the Lock icon
 to keep the filter visible, even when switching between views.
To apply filters, go to the top right of the screen and click the Filters icon  .
.
The gray filter box opens. While you work you can collapse and open this box by clicking it.
View results by request or rule
On the upper right of the filter box, a toggle switch lets you choose the filtering method. You can leave the default setting that applies your filter by requests or, in special cases, click the toggle to apply your filter by rules.
Apply filter by request
Web Security Analytics shows only those requests that triggered your security configuration rules. Such requests have multiple attributes, such as rule ID, selector, rule name, connecting ID, hostname, request ID, and so on. By default, Web Security Analytics filters your attack traffic by requests. When you decide to leave the default filtering method as is, all requests’ attributes will be taken into account (both rule- and request-related ones) in your search after you define your filter conditions.
Apply filter by rule
If you decide to change the default filtering method and choose to apply your filter by rule, the criteria from your filter will be applied to rules instead of requests. Then only those requests will be displayed that meet the rule-related conditions.
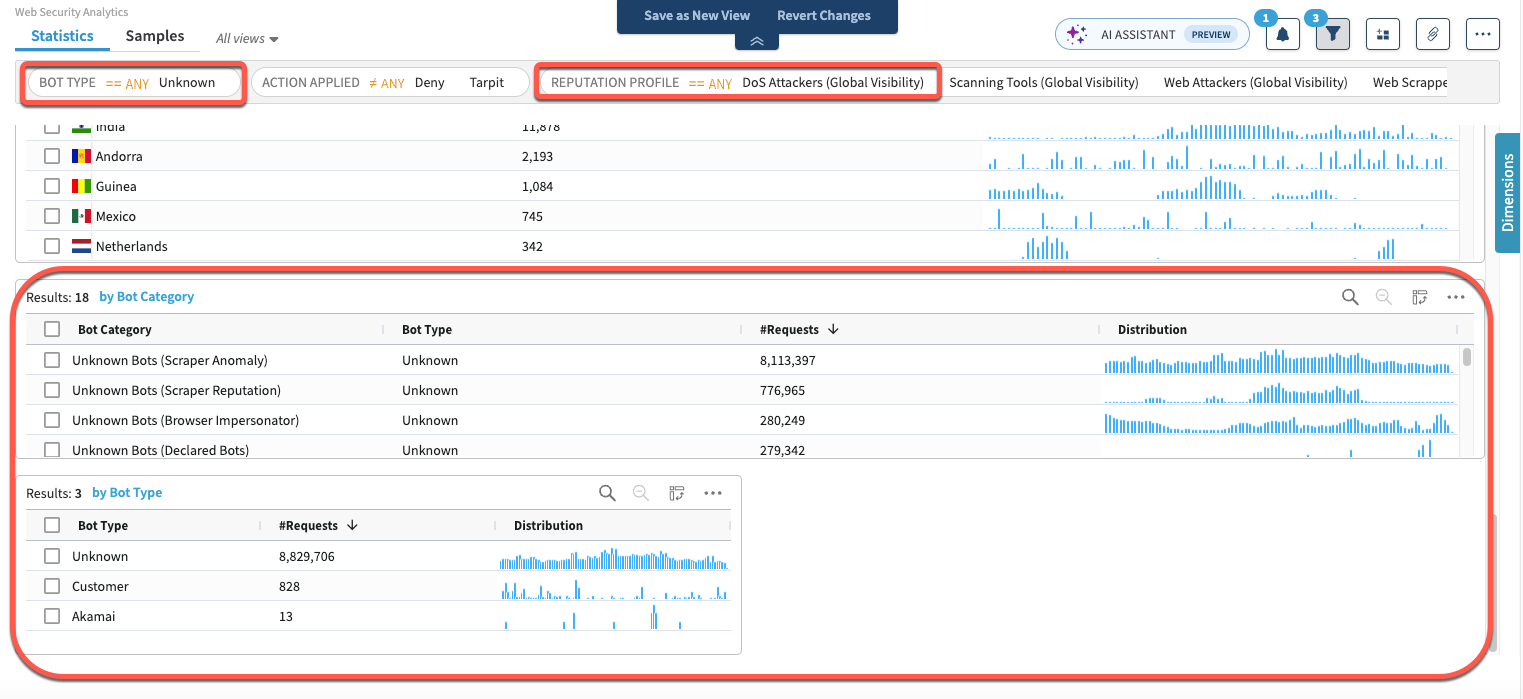
For example, if you filter by requests and build your query with conditions where the rule type is equal to both Bot Type and Reputation Profile, you will see requests that were triggered by both rule types in Bot Type and Attack Type widgets:

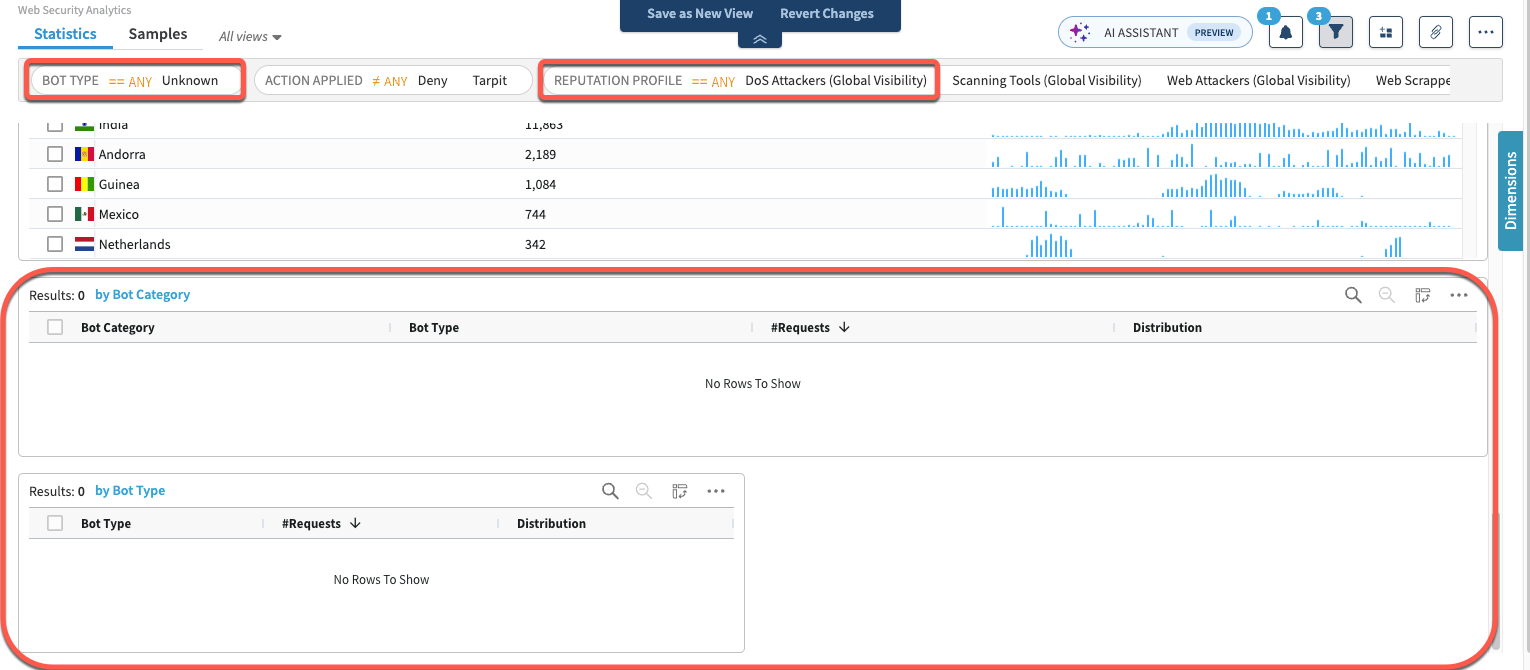
But, when the same filter conditions are used in the filter by rule mode, you will see no results in rule-related widgets (such as the Bot Type widget), because there are no rules with both dimension types: Bot Type and Reputation Profile. In that case, Web Security Analytics will display no results in rule-related widgets, but may show requests in request-related ones.

Let’s analyze the above example in context to illustrate the difference between the two filtering methods. Say you want to review traffic matching the Client Reputation filter condition, but you don’t want to match on Bot triggers that are related to Akamai or Customer bots. You only want to review triggers from Unknown bots that have Client Reputation scores on them. If you apply your filter by rule, like in the screenshot below, the search will produce no results in rule-related widgets. In this case, Web Security Analytics is requested to find rule-related attributes that match both Reputation Profile and Bot Type filter conditions in your requests. Your search will show no results then as it cannot be relevant for multiple rule filters. Here’s the query with filters applied by rule:
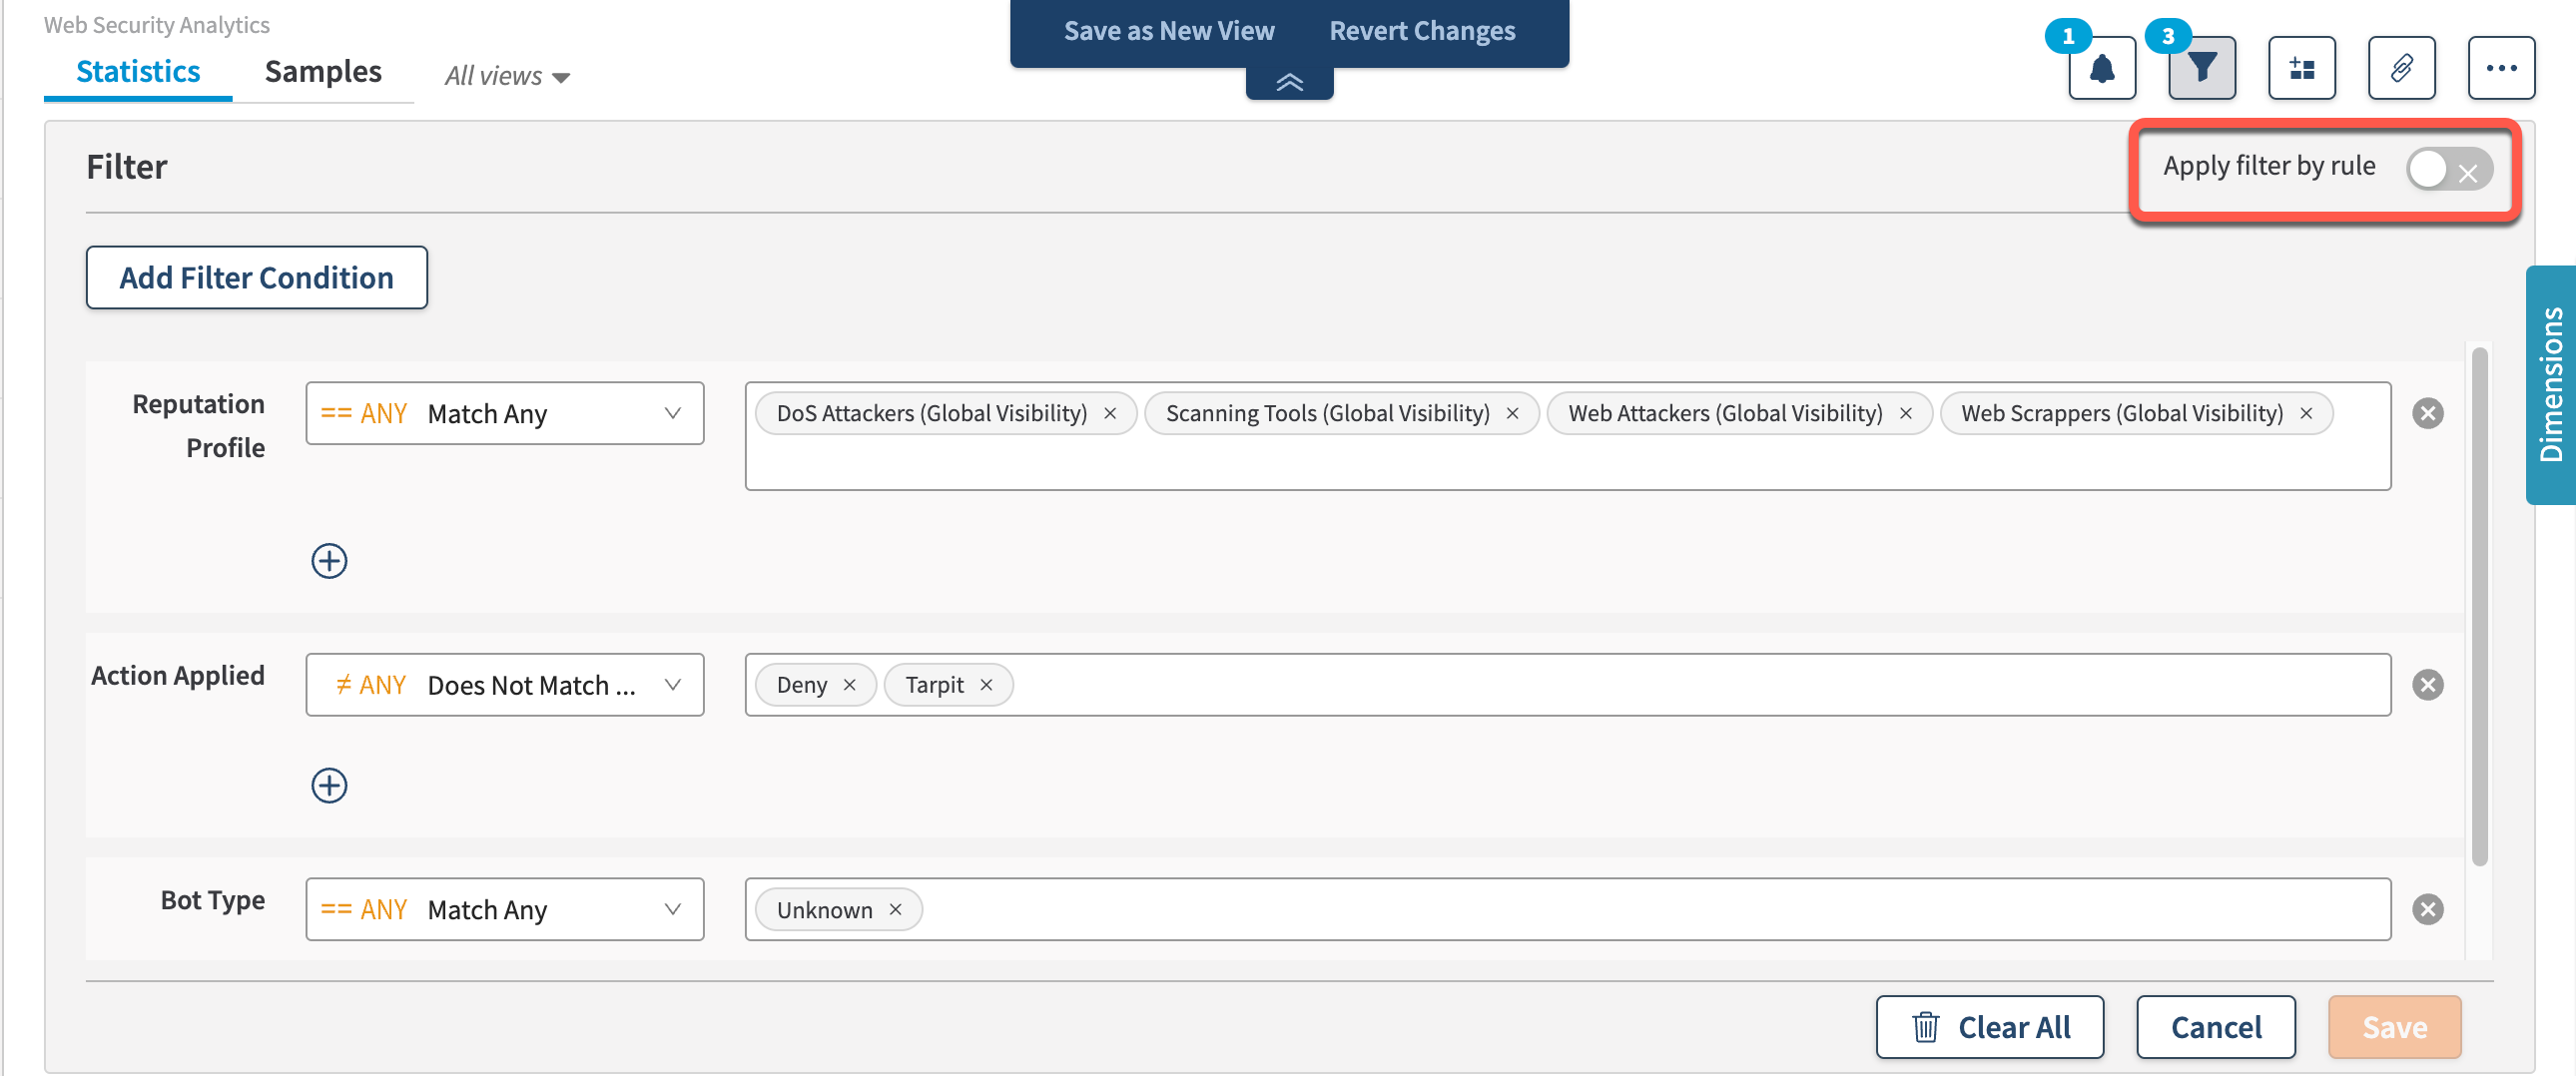
See that the rule-related widgets display no results as your query includes two rule-type conditions:
If you switch the toggle to Apply filter by request, your search may produce results for analysis in all widgets added to your dashboard. Web Security Analytics will then display data according to requests that have triggered both rules that match the Reputation Profile filter condition, and rules that match the Bot Type filter conditions:
DDoS Rate Evaluation, Rate Evaluation Version, and Rate Group Evaluation dimensions don't work when you're viewing results by request. To see details on rate limits evaluation, view by rule.
Step-by-step example
To showcase the difference between the two filtering methods, let’s create a filter together:
- Go to ☰ > WEB & DATA CENTER SECURITY > Security Center > Web Security Analytics. If you're already in Security Center, in the left menu, click Analysis > Web Security Analytics. Initial view shows all security triggers from the selected time period.
- Add a widget showing Bot Management > Rule > Table.
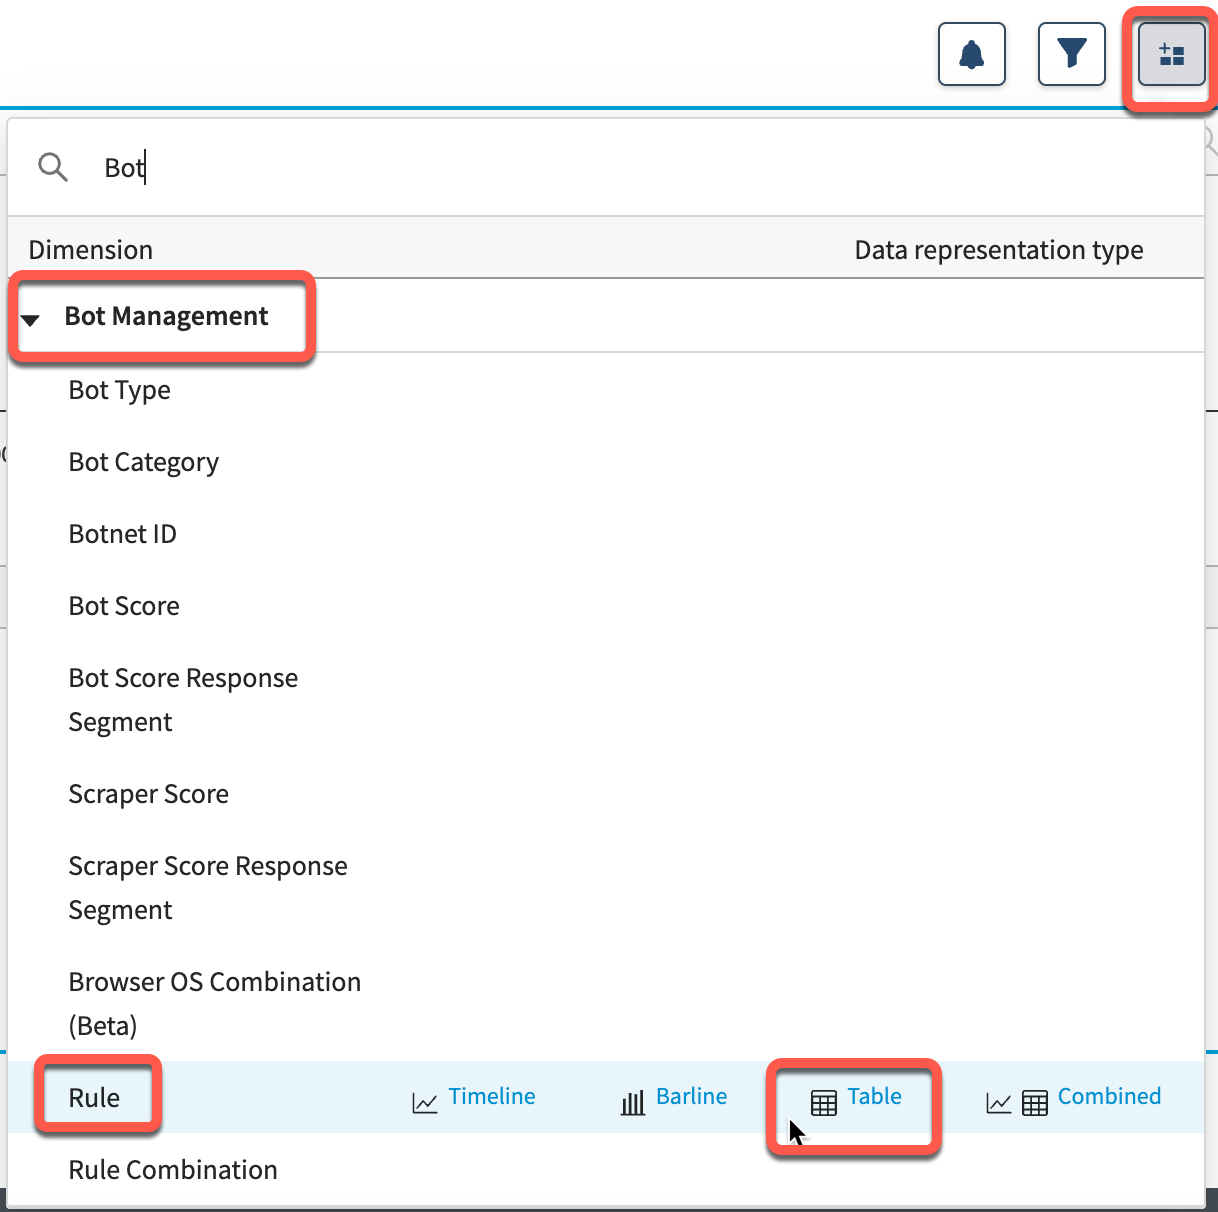
- Add a widget showing Bot Management > Rule > Combined.
- Add a widget showing Bot Management > Botnet ID > Table.
- Add a widget showing Common > Rule Action > Table.
- See results displayed in the panes (Bot – Rule ID, Rule Action, and Botnet ID). Each is likely to show multiple values.
- Left-click a Rule ID that appears in multiple combinations; select Match Any.
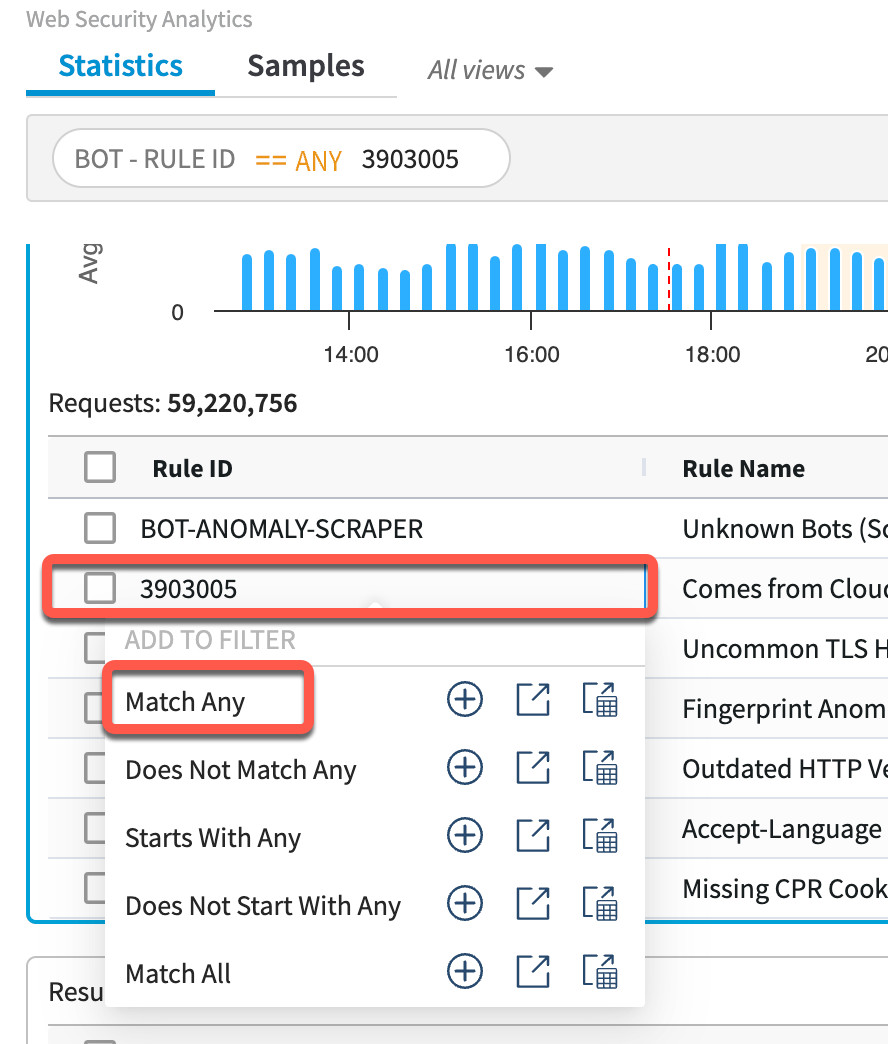
Note that many other rules remain listed in the Bot – Rule ID, Rule Action, and Botnet ID widgets. The filter is applied on each request, but data is pulled from all triggers within each request, hence multiple values.
- Click the filter icon and click the toggle to Apply filter by rule.
- Click Save.
Notice that the non-selected rules are now removed from the Bot – Rule ID pane; the filter is applied on each rule that was triggered within each request.
The other panes showing Rule Action and Botnet ID should have changed as well, since the data for them is now being pulled only from triggers on the specific rule selected.
Set conditions
You can select multiple dimensions and set specific conditions for each.
-
Click the Add filter condition button.
-
From the list that appears, choose a dimension by which to filter.
-
From the menu, select how you would like your box values to be treated by the filter (The selections available here will depend on which dimension you chose):
-
Match Any. The filter matches any of the values you specify. It’s equivalent to an OR statement.
Example: If for the IP address you choose Match Any and specify1.1.1.1,2.2.2.2,3.3.3.3, the query returns the requests that originate from any of the IP addresses. -
Match All. The filter matches all of the values you specify. It’s equivalent to an AND statement.
Example: If for the Attack Type dimension you choose Match All and specifyBot,WAF,Custom, the query returns the requests that had all three attack types triggered on them. -
Does Not Match Any. The filter excludes all of the values you specify. It’s equivalent to an not(OR) statement.
Example: If for the Connecting AS Number dimension you choose Does Not Match Any and specify100,200,300, the query returns the requests that didn’t originate from these three AS Numbers. -
Starts With Any. Filters on multiple starts with conditions to show any content that begins with the characters you specify.
Example: If for the Hostname dimension you choose Starts With Any and specifye,www,qa, the query returns requests or triggered rules where the hostnames start with those strings, likeexample.comorqa-example.com. -
Does Not Start With Any. Filters on multiple does not start with conditions to exclude content that begins with the characters you specify.
Example: If for the Hostname dimension you choose Does Not Start With Any and specifym,www,qa, the query excludes requests or triggered rules where the hostnames start with those strings, likeexample.comorqa-example.com. -
Ends With Any. Filters on multiple “ends with” conditions to show content that ends with the characters you specify.
Example: If for the Hostname dimension you choose Ends With Any and specifycom,security,io, the query returns requests or triggered rules where the hostnames end with those strings, likeexample.comorexample.io -
Does Not End With Any. Filters on multiple “does not end with” conditions to exclude content that ends with the characters you specify.
Example: If for the Hostname dimension you choose Does Not End With Any and specifycom,security,io, the query excludes requests or triggered rules where the hostnames end with those strings, likeexample.comorqa-example.com. -
ContainsAny. The filter matches content that contains any of the match conditions.
Example: If for the Path dimension you choose Contains Any and specifypen,book,tablet, the query returns requests or triggered rules for paths where the specified values occur. -
Does Not Contain Any. The filter matches content that doesn’t contain any of the match conditions.
Example: If for the Path dimension you choose Does Not Contain Any and specifypen,book,tablet, the query returns requests or triggered rules where the path those specified values do not exist. -
Greater Than. If you are creating a filter with the reputation score dimension, this selection lets you match scores that are greater than the values you enter.
-
Greater Than or Equal To. If you are creating a filter with the Bot Score or the User Risk Score dimensions, this selection lets you match scores that are greater or equal to the values you enter.
-
Less Than. If you are creating a filter with the reputation score dimension, this selection lets you match scores that are less than the values you enter.
-
Less Than or Equal To. If you are creating a filter with the Bot Score or the User Risk Score dimensions, this selection lets you match scores that are less or equal to the values you enter.
-
Exists. If you’re creating a filter for the following dimensions: Referer, API ID, API Resource Purpose Name, SDK Version, Native Mobile App Version, Bot Type, Bot Category, Bot Score Response Segment, Bot - Rule Combination, and you want to narrow down requests to search for certain types of anomalous requests.
Example: If you search for requests that had an API Resource Purpose defined, but that Bot Manager Premier did not protect, you don’t necessarily care which API Resource Purpose it was, but you need to filter for traffic that had one. Then you would create the following condition: API Resource Purpose exists. -
Does not exist. If you’re creating a filter for the following dimensions: Referer, API ID, API Resource Purpose Name, SDK Version, Native Mobile App Version, Bot Type, Bot Category, Bot Score Response Segment, Bot - Rule Combination, and you want to narrow down requests that don’t include those dimensions.
-
Tips
- If you use the Contains Any or Ends With Any operators, limit the time range to 24 hours at maximum.
- If the selected dimension is either Path or Query, click
, to specify the case-sensitivity of the match condition.
- If you select Case-Insensitive from the menu, limit the time range to 24 hours at maximum.
- Enter criteria.
Options for entering specific criteria for each filter differ depending on the dimension you chose. For some, click to see a menu and make a selection. For others, enter a value. You can copy and paste comma- or tab-delimited values in this box.
To remove an item click its x.
To delete an entire dimension line, click the x to its right. - Click Save to apply conditions you set.
The filter appears in the filter area, and the display refreshes to present the filtered data.
As you view results, the filter box automatically collapses to grant valuable screen space to your data. If you want to return to the filter box and tweak settings, click anywhere in its gray box to expand it.
Updated 7 months ago
