Get an administrative access token
Webhooks v3 uses token-based authentication. That means that, in order to call a webhooks endpoint, you need to:
-
Use a configuration client to connect to the token exchange endpoint and obtain an access token. You need to present the client ID and client secret of the configuration client in order to get a token.
-
Use Bearer Token authentication and the value returned from the token exchange endpoint to make a webhooks API call. For example, in Postman your authentication will look similar to this:
Before we go any further, we should explain what a configuration client is. In the OAuth world, a client works on your behalf in order to obtain authorization of some sort. In the case of webhooks, the client works on your behalf to obtain a bearer token. The Identity Cloud’s version of OAuth supports three types of clients:
- Confidential clients, which can be entrusted with a client secret.
- Public clients, which can’t be trusted with a client secret.
- Configuration clients, which enable you to obtain access tokens that authorize you to use protected resources such as Identity Cloud APIs.
The PRODUCT_NAME token endpoint can only be access by using a configuration client.
Although it’s easy to do, don’t confuse OAuth configuration clients with API clients. Configuration clients are only used for obtaining tokens. In fact, if you look at the Manage Properties page in Console, you won’t see any configuration clients listed there. That’s because the Manage Properties page is for managing API clients, not configuration clients.
When you subscribe to Webhooks v3, your Akamai representative sets up a configuration client for you and provides you with the client ID and client secret. In addition, you’ll be given a token policy. Token policies serve two purposes. First, they specify how long tokens remain valid. By default, access tokens remain valid for 60 minutes (3600 seconds) and refresh tokens remain valid for 90 days (7776000 seconds).
Token policies also specify the scopes that the configuration client associated with the policy has access to (something we’ll discuss in a moment). Your initial token policy, also provided by your PRODUCT_NAME representative, will look similar to this:
{
   "id": "2dcae965-0d56-4961-a98e-f98583e30bb9",
   "accessTokenLifetime": 3600,
   "allowedScopes": [*:webhooks/],
   "refreshTokenLifetime": 7776000,
   "title": "Webhooks Token Policy",
   "_links": {
       "self": {
           "href": "/config/01000000-0000-3000-9000-000000000000/tokenPolicies/2dcae965-0d56-4961-a98e-f98583e30bb9"
       }
   }
}
After you’ve been given a configuration client and a token policy you can use the client ID and client secret in order to obtain a webhooks access token. Note that the configuration client provided to you can only be used to obtain a webhooks access token; the scope claim called out in the token policy provides full access to the /webhooks API endpoints and nothing else:
"scope": "*:webhooks/**"
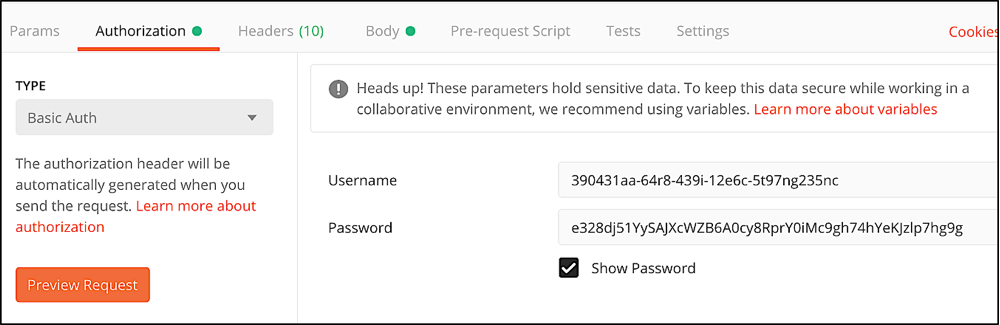
So how do you actually get an access token? To do that you need to call the /{customer_id}/login/token operation. Prior to making that call, you need to configure basic authentication, using the client ID as the username and the client secret as the password. For example, in Postman your authorization should look similar to this:
If you’re using Curl, your authorization header will look like this:
-H 'Authorization: Basic c2dueXZ1czZwYzRqbTdraHIybmVxNWdzODlnYnIyZXE6d3Q0YzN1bjl3a2tjZnZ5a25xeDQ0eW5jNDc2YWZzNjg='You'll also need to configure the request’s grant_type** and scopemembers, which must be configured asx-www-url-encoded` parameters. For example:
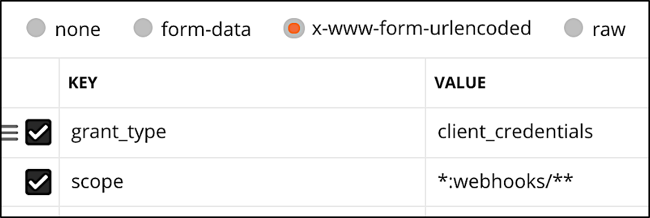
The grant_type must be set to client_credentials; this tells the token endpoint that you're using the client credentials grant to request an access token. The client credentials grant is employed when requesting access to system resources such as API operations. This grant type also tells the token endpoint that you're using the credentials of a configuration client to request the token, and aren't exchanging an authorization code or a refresh token for an access token.
Meanwhile, the scope member must be set to the same scope specified in your token policy. In this example, that means that the scope is set to **:webhooks/**.
A complete Curl command for requesting an access token will look similar to this:
curl -X POST \
  https://v1.api.us.janrain.com/01000000-0000-3000-9000-000000000000/login/token \
  -H 'Authorization: Basic c2dueXZ1czZwYzRqbTdraHIybmVxNWdzODlnYnIyZXE6d3Q0YzN1bjl3a2tjZnZ5a25xeDQ0eW5jNDc2YWZzNjg=' \
  -F grant_type=client_credentials \
  -F 'scope=*:webhooks/**'
At that point you can call the operation. Assuming you supplied the correct information, you should get back a response that includes an access token:
{
   "access_token": "Xk7EzdpGq5GPQcsxCWM2SxdlwU\_iTsA4i2Px4TEzBrfLIvddjnDVBJxjPDuCARHH",
   "expires_in": 3600,
   "token_type": "Bearer",
   "scope": "*:webhooks/**"
}
The access token value -- Xk7EzdpGq5GPQcsxCWM2SxdlwU\_iTsA4i2Px4TEzBrfLIvddjnDVBJxjPDuCARHH – is the value you’ll use when making your webhooks API call.
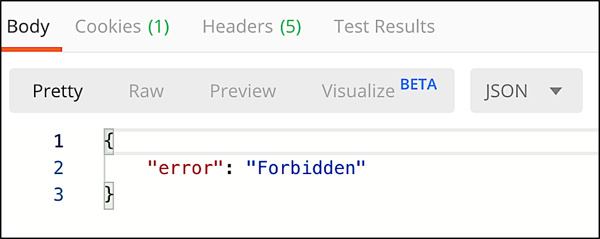
Two quick notes about the access token you get back. First, the access token can be used for one hour (3600 seconds); after that the token expires and any subsequent API calls that use the expired token will fail. If you see an error like this, that typically means that your token has expired:
But that’s fine: all you have to do is get a new token and you can resume making API calls until that token expires.
Second, you might have noticed that no refresh token is returned along with the access token. That’s by design: refresh tokens typically aren’t returned with a client_credentials grant. Because these tokens are used for administrative purposes, it’s a good practice to keep token lifetimes relatively short, and to forego the use of refresh tokens. Should one of these tokens somehow fall into the wrong hands, there would only be a limited amount of time (60 minutes at most) during which that token could be misused.
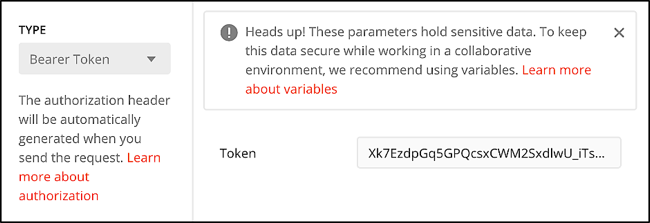
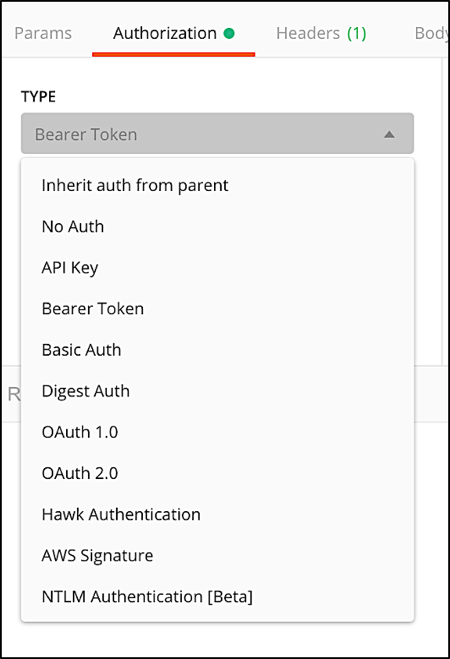
After you have an access token the rest is easy. If you’re using Postman, click Authorization, click Type, and then click Bearer Token:
After that, set the value of the Token field to the value of your token, and you’re ready to begin making API calls:

If you’re using Curl, your authorization header will look like this:
-H 'Authorization: Bearer Xk7EzdpGq5GPQcsxCWM2SxdlwU\_iTsA4i2Px4TEzBrfLIvddjnDVBJxjPDuCARHH'That’s all you have to do.