---
updatedAt: 2026-04-20T20:08:21.000Z
---
# Sina Weibo social login guide

[Sina Weibo](http://www.sina.com/) is a Chinese microblogging site (“weibo” is Chinese for “microblogging”) which has approximately 220 million subscribers and 100 million daily users.
# Before you begin
To use Sina Weibo for social login you must:
1. Obtain a Sina Weibo developer’s account from .
2. Do one of the following:
* Open a previously-created Sina Weibo app, and copy the app key and app secret.
* Create a new app and copy the app key and app secret.
3. Use the Social Login Dashboard to configure Sian Weibo as a social login provider.
[block:callout]
{
"type": "info",
"title": "",
"body": "Web pages on the Sina Weibo Developers site are written in Chinese. If you do not speak Chinese, you might want to use a web browser than can translate the Sina Weibo web pages. For this configuration guide, we used Google Chrome and its **Translate to English** option."
}
[/block]
# Create a Sina Weibo application
This section walks you through the process of creating a Sina Weibo application for social login. If you already have an application, see the Using an Existing Sina Weibo Application for Social Login section of this documentation.
To configure a Sina Weibo application, complete the following procedure:
1. Log on to the Sina Weibo Developers site ().
2. From the Developers site home page, click **Web**:

3. From the **Website access** page, click **Immediate access**:
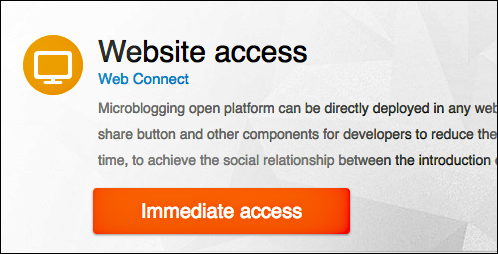
4. On the **Create a new application** page, enter a name for your application in the **Application Name** field. Note that your application name cannot include blank spaces:
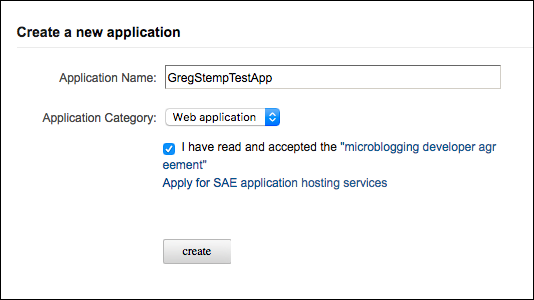
5. Click **Application Category** and then click **Web application**.
6. Select **I have read and accepted the “microblogging developer agreement”** and then click **Create**.
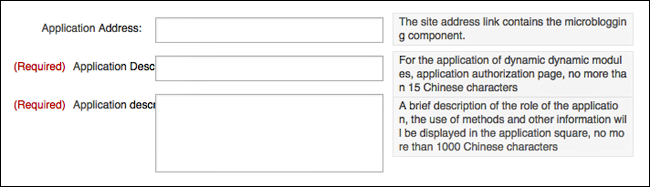
7. On the **Application status** page, enter:
* Your website URL in the **Application Address** field.
* A brief description of your application in the first **Application Description** field.
* A longer description of your application in the second **Application Description** field.
8. Scroll down the page and locate the three green buttons used for uploading icons for your application:
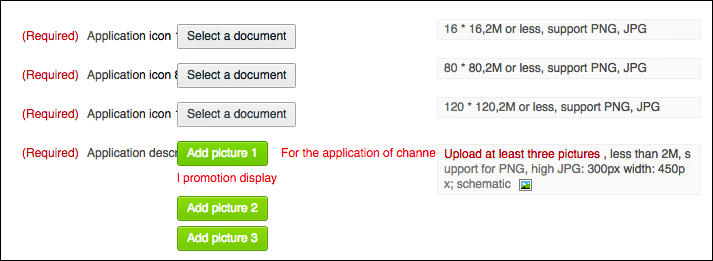
9. Click the first button (**Add picture 1**) and then use your operating system’s **File Open** dialog box to select a 16 pixel by 16 pixel icon (saved either as a .PNG or a .JPG file).
10. Repeat the process with the **Add picture 2** button to add an 80 pixel by 80 pixel icon, then click the **Add picture 3** button to add a 120 pixel by 120 pixel icon.
11. Click **Save the above information to**:

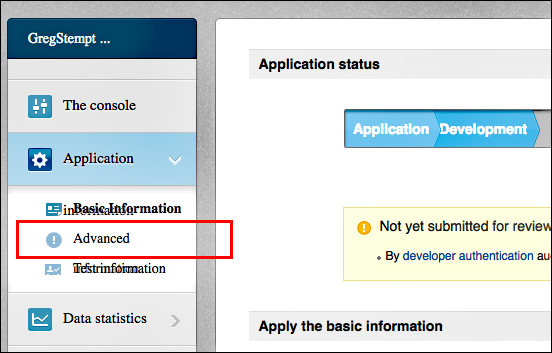
12. Scroll back to the top of the page and, in the left navigation bar, click **Advanced**:
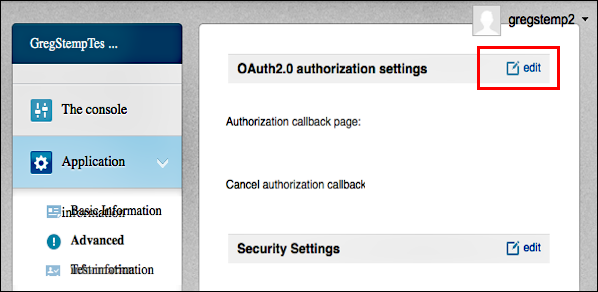
13. On the **Advanced Settings** page, click **Edit** next to the label **OAuth2.0 authorization settings**:
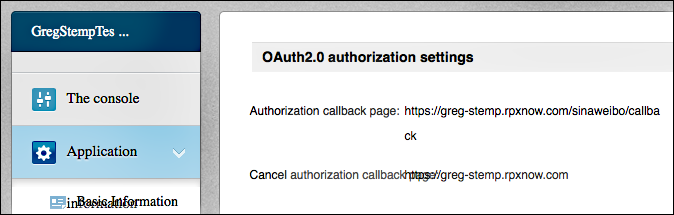
14. Enter your redirect URL in the **Authorization callback page** field. If you are using a standard Identity Cloud domain, your redirect URL will look similar to this: *https\://greg-stemp.rpxnow\.com/sinaweibo/callback*.
15. Enter your authorization cancellation page in the **Cancel authorization callback** field. This can simply be your website URL:
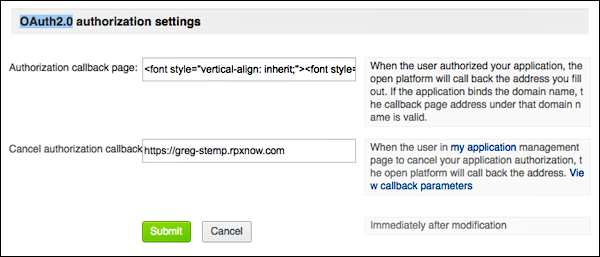
16. Click **Submit**:
17. On the **Application Status** page, copy and save the **App Key** and the **App Secret**. You can copy this information to a text editor, then close the text editor after you have configured social login:

18. Log off from the Sina Weibo Developers site.
# Use an existing Sina Weibo application for social login
If you already have a Sina Weibo application that can be used for social login, complete the following steps to retrieve the application’s app key and app secret:
1. Log on to the Sina Weibo Developers site ().
2. From the Sina Weibo Developers home page, click **My Applications**:

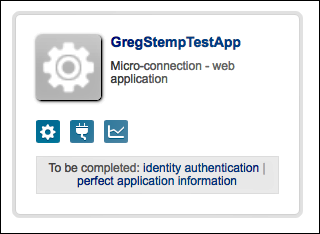
3. From the home page for your applications, click the **Settings** icon for the application you want to use for social login:
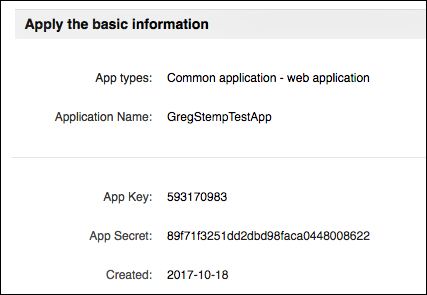
4. On the **Application Status** page, copy and save the **App Key** and the **App Secret**. You can copy this information to a text editor, then close the text editor after you have configured social login:
5. Log off from the Sina Weibo Developers site.
# Configure Sina Weibo as a social login provider
To configure Sina Weibo as a social login provider, make sure you have your Sina Weibo app key and app secret, and then complete the following procedure:
1. Log on to your Social Login Dashboard ([https://dashboard.janrain.com](https://dashboard.janrain.com/)).
2. From the Dashboard home page, click the **Manage Engage Dashboard** icon.
3. From the Engage Dashboard home page, in the **Widgets and SDKs** section, click **Sign-Ins**.
4. From the **Sign-in** page, verify that **Widget** is selected and then expand **Providers**.
5. From the list of **Providers**, click **Sina Weibo**.
6. In the **Sina Weibo** dialog box, click **Next** until you reach the screen requesting the app key and app secret:

7. Paste your Sina Weibo app key in the **App Key** field, paste your Sina Weibo app secret in the **App Secret** field, and then click **Save**. Sina Weibo appears in your social login widget.
8. When you are finished, select **Save and Publish** and then click **Publish**. It might take as long as one hour before Sina Weibo appears as a social login option on your web site.
# Test Sina Weibo social login
To test Sina Weibo social login, complete the following procedure:
1. Do one of the following:
* If you have just published your widget settings, click the **Test your widget** link that appears after the widget has been saved.
* If you previously published your widget settings then, from the Engage Dashboard **Sign-in** page, click **Launch a test widget**.
2. From the **Test** page, click the **Sina Weibo** icon:
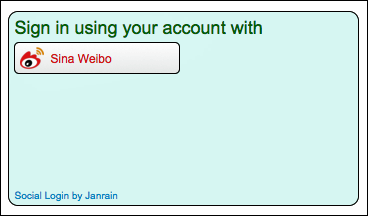
3. In the **Application authorization** window, click the red Allow button and then logon using a valid Sina Weibo account:

4. If login succeeds, information returned from the Sina Weibo profile is displayed in the **API response preview** field:

The returned profile information will vary depending on the Sina Weibo account used in the test, You can verify Sina Weibo profile fields by completing the following procedure:
1. From the Engage Dashboard home page, click the **Manage Providers** icon:
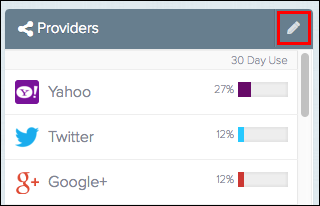
2. From the **Configure Providers** page, click **Sina Weibo**.
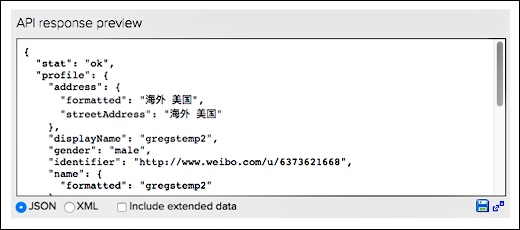
3. Profile information returned from Sina Weibo is displayed onscreen. For example:
# Assign a different Sina Weibo app for social login
If you want to use a different Sina Weibo app or if you need to change your existing app, you must update the Sina Weibo provider configuration settings. To do that, complete the following procedure:
1. From the Engage Dashboard home page, click the **Manage Providers** icon:
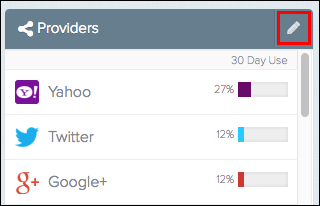
2. From the **Configure Providers** page, click **Sina Weibo**.
3. Click the green **Configured** button to display the **Sina Weibo is currently enabled** dialog box:
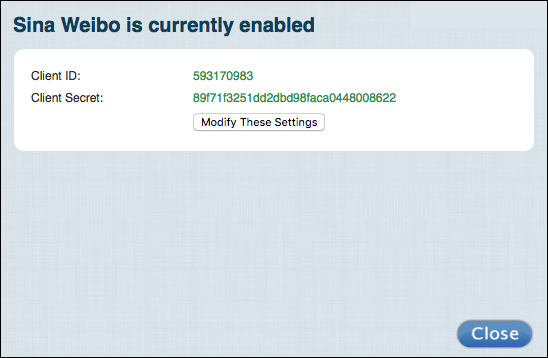
4. To change the Sina Weibo configuration, click **Modify these settings**.
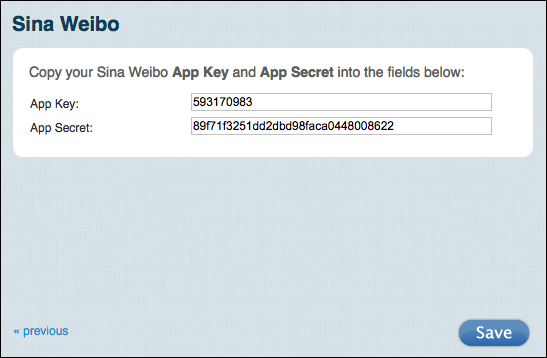
5. In the **Sina Weibo** dialog box, change the **App Key** and/or **App Secret** as needed, and then click **Save**:
Although you can modify your Sina Weibo settings, you cannot delete those settings. If you delete the settings and then save your changes, you’ll see the error message **Please enter your Consumer Key and Secret exactly as Sina Weibo shows them.**
This means that you cannot “unconfigure” the provider: once configured, the Sina Weibo icon will always be shown as green (i.e., configured) in the Social Login Dashboard.
# Remove Sina Weibo as a social login provider
You can remove Sina Weibo as a social login provider by completing the following procedure:
1. Log on to your Social Login Dashboard ([https://dashboard.janrain.com](https://dashboard.janrain.com/)).
2. From the Dashboard home page, click the **Manage Engage Dashboard** icon.
3. From the Engage Dashboard home page, in the **Widgets and SDKs** section, click **Sign-Ins**.
4. From the **Sign-in** page, verify that **Widget** is selected and then expand **Providers**.
5. In the widget, click the **X** in the upper right corner of the **Sina Weibo** icon.
6. Scroll to the bottom of the page, select **Save and Publish**, and then click **Publish**. Sina Weibo no longer appears in the sign-on widget.
[block:callout]
{
"type": "info",
"body": "You must always have at least one social login provider in the widget. If you delete all the providers and then click **Publish**, you’ll see the error message **Couldn’t save configuration: No providers**.",
"title": ""
}
[/block]
# Sibling pages
* [Amazon social login guide](https://techdocs.akamai.com/identity-cloud/docs/the-amazon-social-login-configuration-guide.md)
* [Sign-in with Apple social login guide](https://techdocs.akamai.com/identity-cloud/docs/the-sign-in-with-apple-social-login-configuration-guide.md)
* [DocCheck social login guide](https://techdocs.akamai.com/identity-cloud/docs/the-doccheck-social-login-configuration-guide.md)
* [Doximity social login guide](https://techdocs.akamai.com/identity-cloud/docs/the-doximity-social-login-configuration-guide.md)
* [Facebook social login guide](https://techdocs.akamai.com/identity-cloud/docs/the-facebook-social-login-configuration-guide.md)
* [Flickr social login guide](https://techdocs.akamai.com/identity-cloud/docs/the-flickr-social-login-configuration-guide.md)
* [Google social login guide](https://techdocs.akamai.com/identity-cloud/docs/the-google-social-login-configuration-guide.md)
* [Instagram social login guide](https://techdocs.akamai.com/identity-cloud/docs/the-instagram-social-login-configuration-guide.md)
* [LINE social login guide](https://techdocs.akamai.com/identity-cloud/docs/the-line-social-login-configuration-guide.md)
* [Retrieve user information with LINE Profile+](https://techdocs.akamai.com/identity-cloud/docs/retrieve-user-information-with-line-profile.md)
* [LinkedIn OAuth 2.0 social login guide](https://techdocs.akamai.com/identity-cloud/docs/the-linkedin-oauth-20-social-login-configuration-guide.md)
* [LiveJournal social login guide](https://techdocs.akamai.com/identity-cloud/docs/the-livejournal-social-login-configuration-guide.md)
* [MediKey social login guide](https://techdocs.akamai.com/identity-cloud/docs/the-medikey-social-login-configuration-guide.md)
* [Microsoft Online social login guide](https://techdocs.akamai.com/identity-cloud/docs/the-microsoft-online-social-configuration-guide.md)
* [Microsoft Active Director Federation Services social login guide](https://techdocs.akamai.com/identity-cloud/docs/the-microsoft-active-director-federation-services-social-login-configuration-guide.md)
* [Okta social login guide](https://techdocs.akamai.com/identity-cloud/docs/the-okta-social-login-configuration-guide.md)
* [PayPal social login guide](https://techdocs.akamai.com/identity-cloud/docs/the-paypal-social-login-configuration-guide.md)
* [Ping social login guide](https://techdocs.akamai.com/identity-cloud/docs/the-ping-social-login-configuration-guide.md)
* [QQ social login guide](https://techdocs.akamai.com/identity-cloud/docs/the-qq-social-login-configuration-guide.md)
* [Renren social login guide](https://techdocs.akamai.com/identity-cloud/docs/the-renren-social-login-configuration-guide.md)
* [Snapchat social login guide](https://techdocs.akamai.com/identity-cloud/docs/the-snapchat-social-login-configuration-guide.md)
* [swiss-rx social login guide](https://techdocs.akamai.com/identity-cloud/docs/the-swiss-rx-social-login-configuration-guide.md)
* [Twitter social login guide](https://techdocs.akamai.com/identity-cloud/docs/the-twitter-social-login-configuration-guide.md)
* [VMware Identity Manager social login guide](https://techdocs.akamai.com/identity-cloud/docs/the-vmware-identity-manager-social-login-configuration-guide.md)
* [WeChat social login guide](https://techdocs.akamai.com/identity-cloud/docs/the-wechat-social-login-configuration-guide.md)
* [Yahoo! Japan social login guide](https://techdocs.akamai.com/identity-cloud/docs/the-yahoo-japan-social-login-configuration-guide.md)
* [Yahoo! OAuth 2.0 social login guide](https://techdocs.akamai.com/identity-cloud/docs/the-yahoo-oauth-20-social-login-configuration-guide.md)
* [Yahoo! social login guide](https://techdocs.akamai.com/identity-cloud/docs/the-yahoo-social-login-configuration-guide.md)